Showing posts with label halloween. Show all posts

Saturday, October 31, 2015

HTTC - Costumed Canines, Bride of Frankenstein


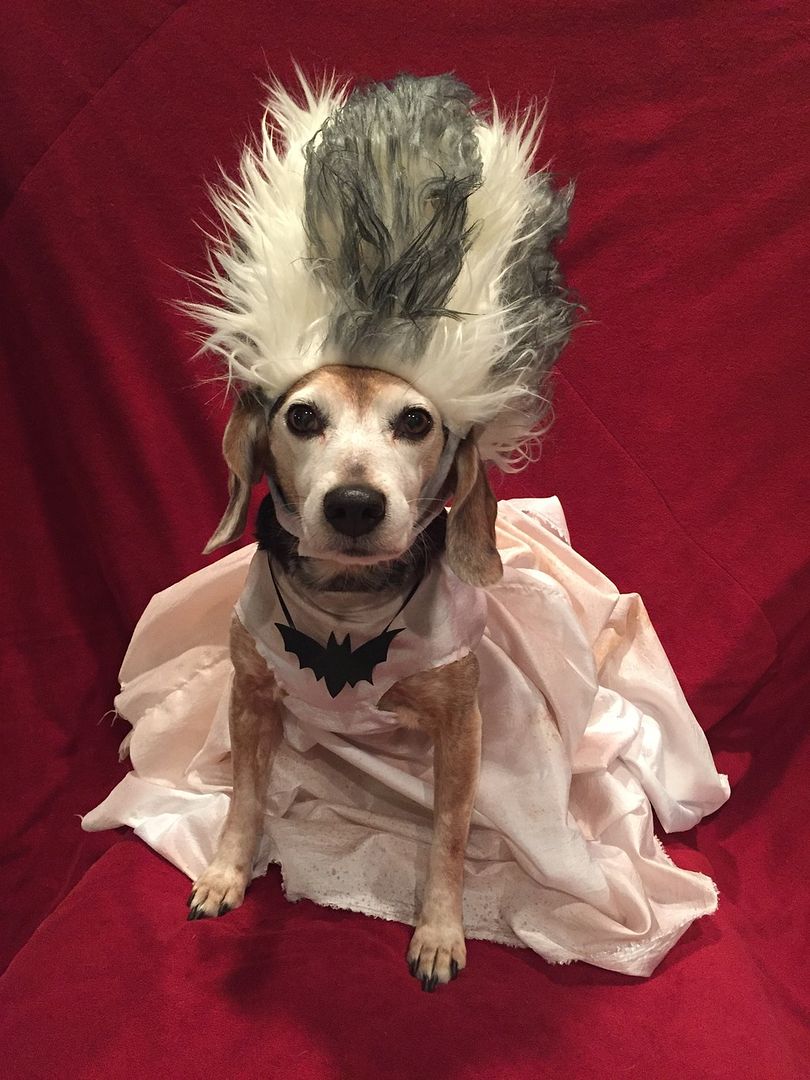
Gidget is starring as the bride of Frankenstein this year.  She said she'd never really marry Mr. Biscuit but the costume is acceptable.  Happy Howl-oween!

Tuesday, October 27, 2015

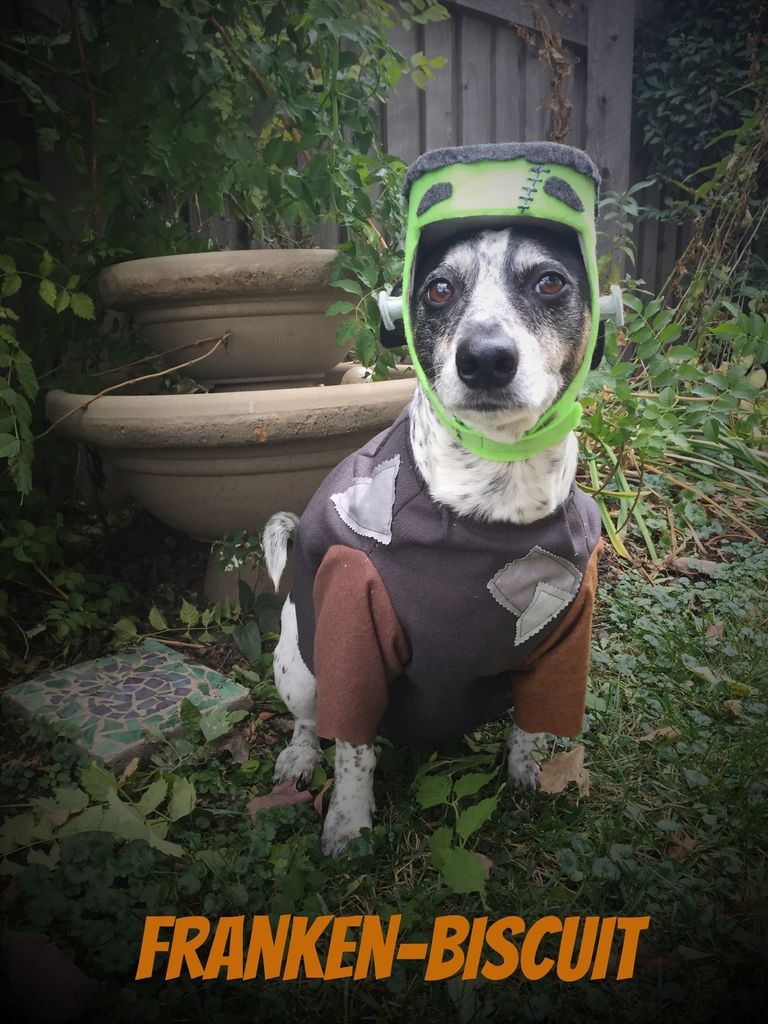
HTTC - Costumed Canines, Franken-biscuit


Have you ever wondered what it looked like to spend way too much time on a dog costume but every second was actually worth it in the end?  Well here you go.  This is the first creation from Dr. S. Frankenstein.   She pieced together all the adorable puppy parts we had laying around and zapped it with some attitude.  HE'S ALIVE!

Wednesday, October 21, 2015

HTTC - Crocheted Spooky Kitchen Towels

This all started last year at a thrift store. My father was looking for some pictures to hang up in his home and is "thrifty" to say it nicely.  We found a very large Faith sponsored Thrift Store, and I mean huge, it took up most of the strip mall it was located in and then still had another separate store for furniture! I found a some cute decorations I used for work...and then there was this hand towel.

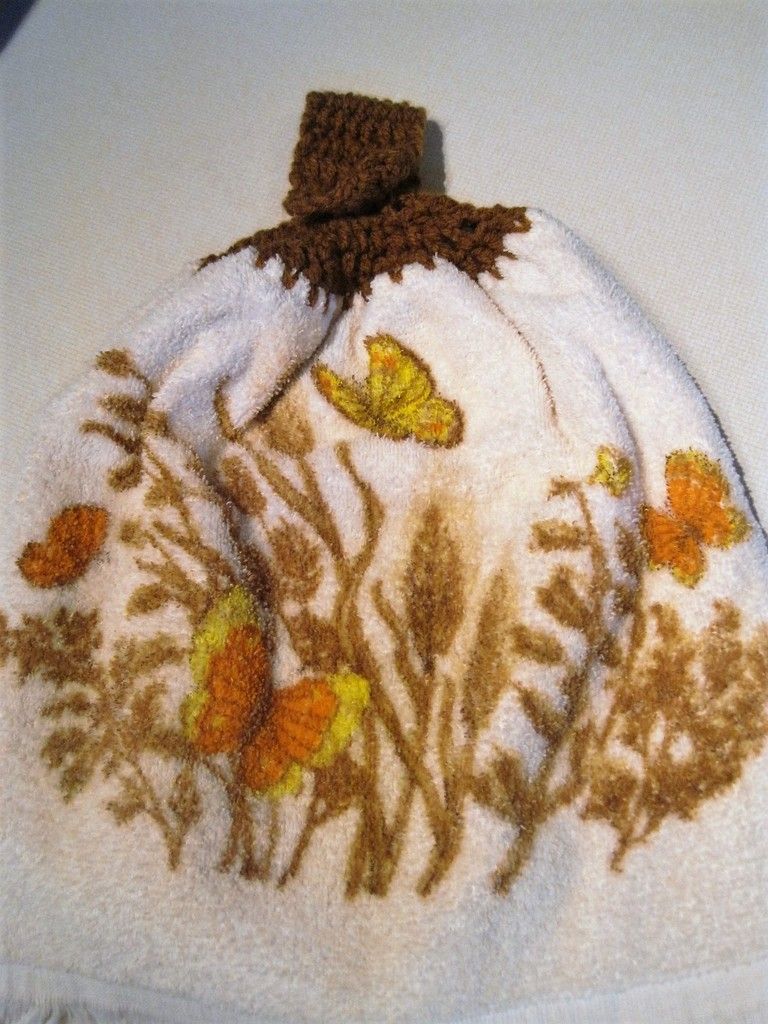
This hand towel was amazing, like when you see a piece or a bit or a bob of a craft that you have no idea how to do but it speaks to you so much, like calls out to your crafter soul, that you must purchase it.  Martha Stewart once said that if that happens you MUST get the item, you may not know what to do with it at that exact moment but one day you will and you will be all that much happier that you bought it!  This towel was all of that in one inexpensive package.  For $2 I got the hand towel and a matching washcloth.  These two were pristine, never been used, not even by a little old lady who drove it to church on Sundays.  The towel was plush and soft, it even had that fine thread fringe on the bottom, perfect for luxurious hand drying moments.  But what put the whole thing over the top was the immaculate brown and tan leaves and flowers with a delicate orange and yellow butterfly delicately alighting on one of the flowers. The Seventies decorating glory in one beautiful towel. 

I bought it post haste with the goal of learning how to crochet a hanger on top of it so I could display it in all its epicness in my kitchen.  Fast forward six months: I find the towel in my To-Do box and think now is the time to try this.  I wandered on over to the Pinterest and started hunting for a pattern to try out on my towel.  I found a classic looking hanging towel look and a pattern I felt I could do and set to work.  By far the punching the holes in the towel is the hardest part, and as my husband told me "it can't be that bad, old ladies make those", I admit it is not really that difficult.  I used a funky gold brown to match the color scheme of the towel and in less than two hours I had a new hanging kitchen hand towel!

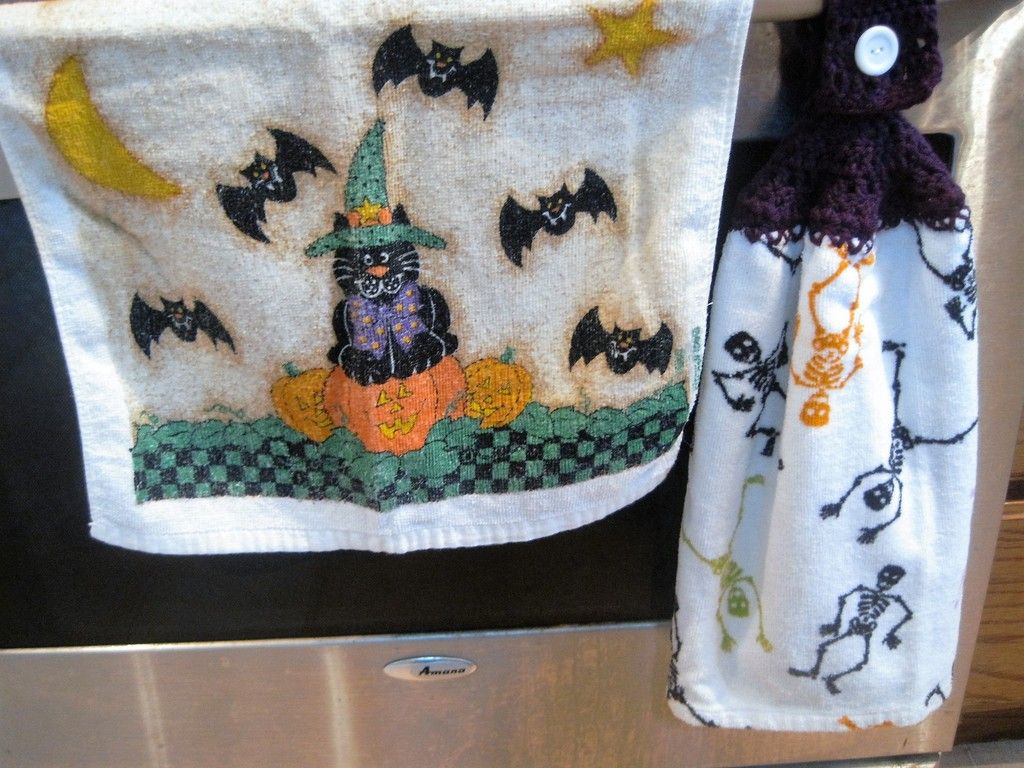
I have been wanting to work through the pattern again so when I found these skeleton towels in my Halloween decor I knew what had to be done.  I love these towels but I could never find an appropriate way to display them.  I have Halloween decorations that take up almost the entire rack for hanging on the oven so these guys were often left out in the bathroom which never did them justice.  Enter some bright and creepy acrylic yarns in my stash and we have a recipe for thrifty functionality. Not only do I get to use my pattern again but I get to make my cute towels functional. Epic Win!

The pattern belongs to Harlean at Thrifty Fun! Considering how inexpensive the supplies are and how fast you can whip up a satisfying and functional craft I support her aptly named site.  You can find the original pattern here: Crochet Kitchen Towel. 

Halloween Crochet Kitchen Towel

Fingertip or Hand towel
4 ply yarn in whatever color makes you happy
Large metal knitting needle or Ice pick (this makes the holes in the towel material)
Size G crochet hook
Fun button and needle and thread to sew it on
Sicssors

ch= chain
SC= Single Crochet
DC= Double Crochet

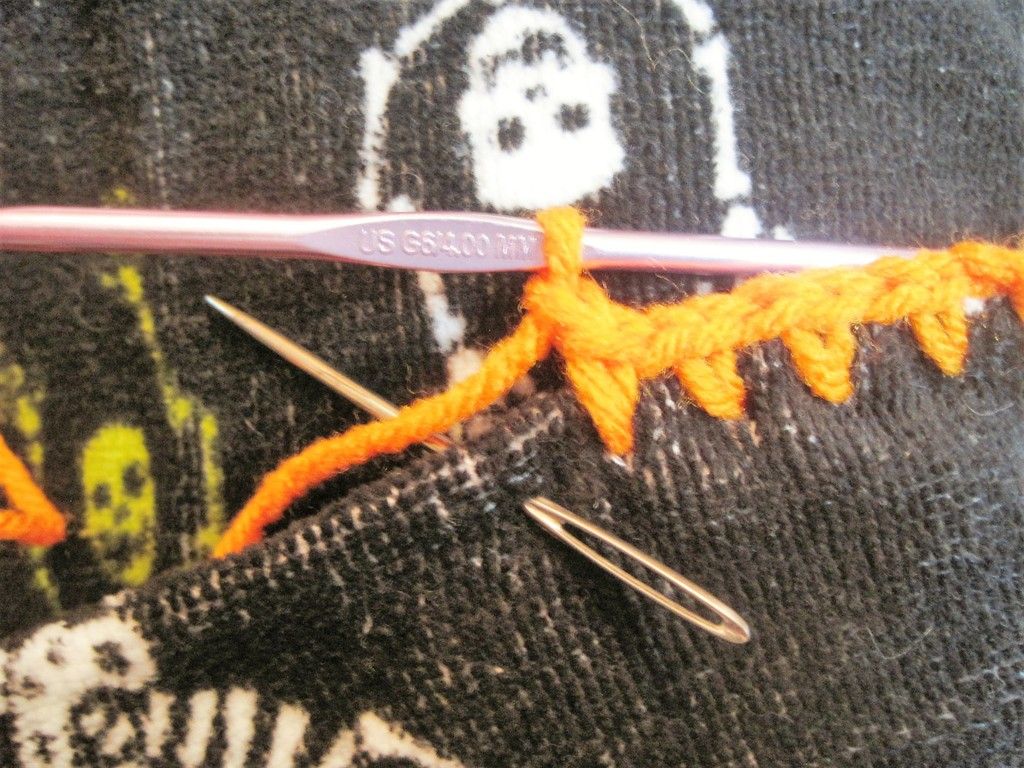
Fold towel in half width wise evenly or you can cut the towel in half to make two thinner ones. Using the metal knitting needle or ice pick, punch holes through both layers of the towel 1/2 inch apart and about 1/4 inch down from the fold of the towel.  This will be your base holes for your stitches.  I crocheted into each hole as I punched it but you can always punch the holes all out and then go back and start your crocheting.

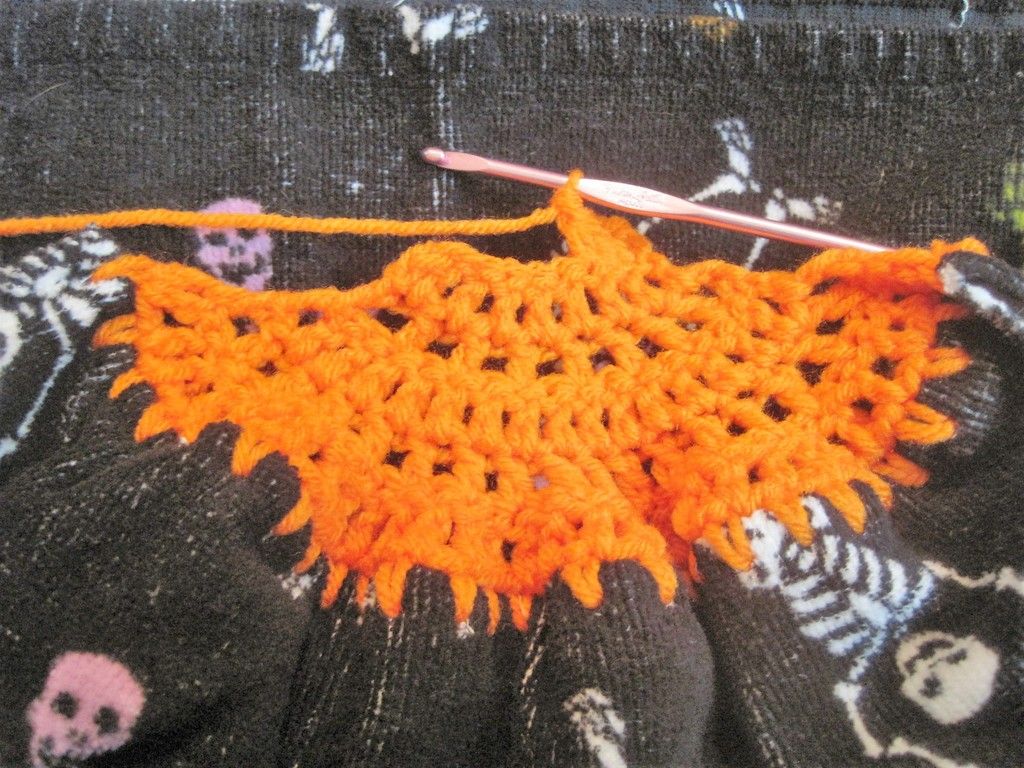
Base Row (into the holes in the towel): SC in First hole, ch1* SC in next hole, ch1. Repeat from * across. ch2, turn.

2nd Row: DC in each SC (Skip the ch1 stitches) across, ch2, turn.

3rd Row: Skip one DC, *DC in next DC, skip next DC. Repeat from * across, ch2, turn.

4th Row: DC in each ch1 space ending with a DC in turning ch, ch2, turn.

5th Row: Skip first ch1 space, DC in next space*Skip next space, DC in next space. Repeat from * across with DC in turning ch, ch2, turn.

6th Row: DC in each DC across, ch2, turn. You should have 8 DCs.

7th-15th Rows: Repeat row six.

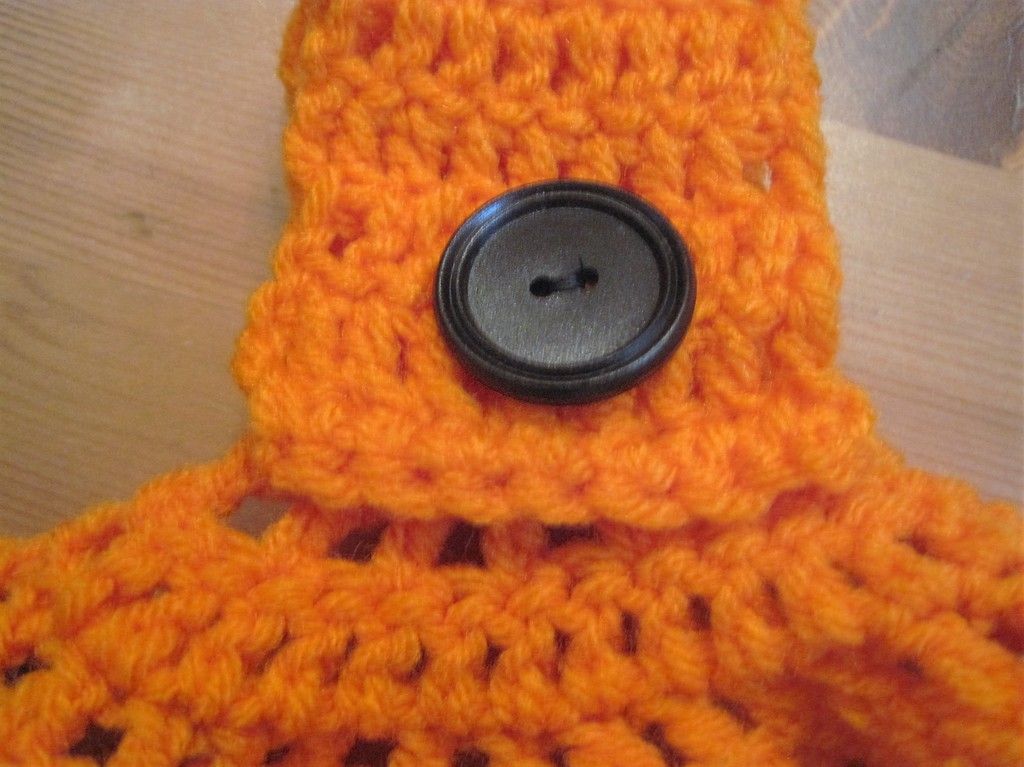
16th Row: DC in first 3 DCs, ch2, Skip 1 DC (this makes the button hole), DC in next 3 DCs, ch2, turn.

17th Row: DC in first 3 DCs, 2 DCs in ch2 space, DC in next 3 DCs, ch2 turn.

18th Row: SC in each DC across. Fasten off and weave yarn end into your work. Fasten your button into the center of the 6th row.  Now sit back and admire your thrifty ingenuity!


I well admit this is not a massive crafty undertaking, but it is no less satisfying.  As I seek to clean out my world, to consume less and enjoy more, crafts like this fit right in.  I can use things I already have to create useful decorative items.  They are also a handmade gift I feel good about giving, not just a nice trinket, but a thoughtful gift my loved ones can use daily. I hope you enjoy these as much as I do!

Kelly

Here is a little "treat" for Halloween....my original towel!

Sunday, October 18, 2015

HTTC - Costumed Canines, Auntie Bellum


Abby is quite stylish in her Auntie Bellum costume.  She may not be the greenest thumb though, she has planted many a tennis ball tree, yet so far, none have grown. :(

Friday, October 31, 2014

Costumed Canines - The Bloody Beagle


Don't be fooled by this adorable tiny dog. Her small size means the evil in this mastermind is even more concentrated.  In addition to mind control, via her cuteness, over humans, she takes every opportunity to make other pooches submit to her will with her tiny paws of fury. She is in constant battles with Sgt. Smashy over who will rule the tiny dog Kingdom, Puppytopia. 

Note- Sgt Smashy has yet to discover her weakness but we all know there are two things .... Treats and eyeball scratches. (She has really itchy eyes. )

Monday, October 27, 2014

Costumed Canines - Super Bubs

I though long and hard about what type of superhero Abby would be.  She is way too silly to be anything hard core tough and has been known to hide behind her momma when other dogs come around so bravery is not her thing either.  She has tried to get the stuffed bunny we put out for Easter to throw the ball for her and has offered to trade her chewies for human food so she is too sweet to be a villain.  Naps are her weekend plans meaning super speed is out, and she could never stay focused long enough to even attempt to control someone mind.
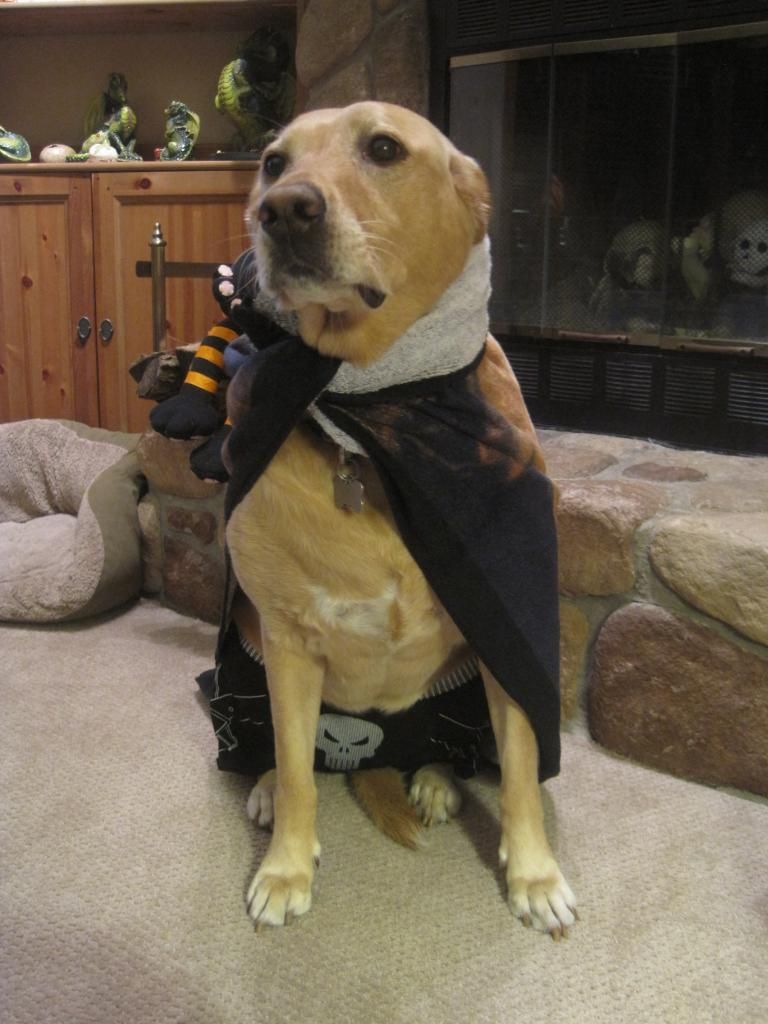
So that leaves only one type of superhero.....the one that thrives in the imagination of little kids, complete with dad's clothes and a towel cape!
Mild mannered Abby by day, working a desk job for the man.

Super Bubs by night, Punisher underwear wearing vigilante keeping the streets safe for puppies everywhere. I've heard tell she might have a bit of a crush on Sgt. Smashy.

Monday, October 20, 2014

HTTC - Molasses Sugar Cookies


Fall is by far my favorite season.  The changing of the leaves is the most gorgeous reason we have to look forward to cooler temperatures after the glory of the summer heat.  But beyond the yellows, reds, oranges, and golds, we get even more reasons to love fall: pumpkins and squash, adorable little kid costumes during Trick-or-Treating, fall baked goods, hoodies, and possibly the best reason after those amazing leaves is the local fall festival.  I live out in the country and we are inundated with them during the month of October.  Hay rides, antique sales, and craft fairs are the staples of any fest, flesh it out with a carnival or possibly a tractor show and you have your Saturday planned out in rural NW Illinois. 
You can start a great fall fest morning with a rampant increase in Garage/Yard sales to catch the crowds, the wonderful aroma of fresh apple cider doughnuts sold by the local Boy Scouts or Kiwanis group, and finally a tour of the craft show at the high school equipped with the ever present bake sale to help raise money for worthy group.  This small town bake sale is where I got my inspiration to back up some yummy fall flavored cookies.  While my husband and father were off perusing the finest farm tractors the 1930’s and 40’s had to offer I took in the crafts and baked goods.  The craft fair had the normal offerings: Pampered Chef, booths full of knitted and crocheted items, smooshed wine bottles turned cheese trays, tied fleece blankets, and for some reason a guy who did custom paintings of sports figures, he did great work, but had a few to many Green Bay Packer Players displayed for a craft fair in Illinois.  Go Bears!
 There was a very nice quilt show tacked onto the craft fair.  The organizers wanted each person to vote for their favorite and even gave you a latex glove if you wanted to touch the quilts, to turn them over and admire the back or delve deeper into the stich patterns.  I voted for one that was an appealing mix of off white, a soft pink, and a sage green, the creator had named it “spumoni”.  Anita had recently taught me how to paper piece a quilt block so this show turned out to be much more interesting than I had originally thought it would be.  Seeing how I could manipulate the patterns in blocks to create a wondrous work of art proved quite the joyous adventure!   
 I had wandered a school full of pillow covers and handmade bird houses, I had admired hours of planning and stitching of fabric, I even managed to check out a few tractors in the ever present battle of red vs green, after all that I thought deserved a treat in the form of a bake sale goodie.  This one was to benefit the marching band, and from the looks of things the every parent had brought the A game.  Cakes and pies, brownies and cupcakes, popcorn balls and candies, snack mixes, and cookies of every kind all offered up by teenagers in ridiculously loud homemade band t-shirts.  I did not know they still made puffy paint.  We got some oatmeal raisin cookies and some small molasses buttons.  I adore molasses cookies but I never think to make them, well after I ate one of those buttons I was sold.  I was inspired to make a big chewy molasses cookie with lots of spice and fall flavor.  This whole recipe mixes up in a sauce pan but makes three dozen cookies, saving you from having to get out the mixer.  I added a candy corn to add a bit more fall feeling to the cookies, and because I love how cute candy corn is!
Molasses Sugar Cookies
3/4 cup soft butter
1/3 cup of you favorite type of molasses
1 cup sugar
1 egg, or egg substitute equivalent
1/4-1/2 tsp ground cloves (1/2 tsp will be quite strong)
1 tsp ground cinnamon
1/2 tsp vanilla
1/2 tsp salt
1/2 Tbsp + 1/2 tsp baking soda
2 cups all-purpose flour
Candy corn, optional

Melt the butter over low heat and let cool.  Add the molasses, sugar, and the egg and beat well. Mix in the cloves, cinnamon, salt, and baking soda.  Mix in the flour.  Chill in the pot for 60-90 minutes, it won't be overly firm.  Preheat oven to 360.  Roll into 1 inch balls and toss in sugar, you do not need to flatten.  Bake for 10-12 minutes.  Press a candy corn into the center of each cookie when they come out of the oven before you cool them on a rack.  Store the dough in the refrigerator between batches. Makes 36+ cookies.

I will never forget to make molasses cookies again with how easy and tasty this recipe is. So chewy and full of depth, each bite makes me happy! I hope your fall baking makes you feel happy and full of life, the way fall should.   

Kelly   


Saturday, October 18, 2014

HTTC - Witchy Wreath Part 2

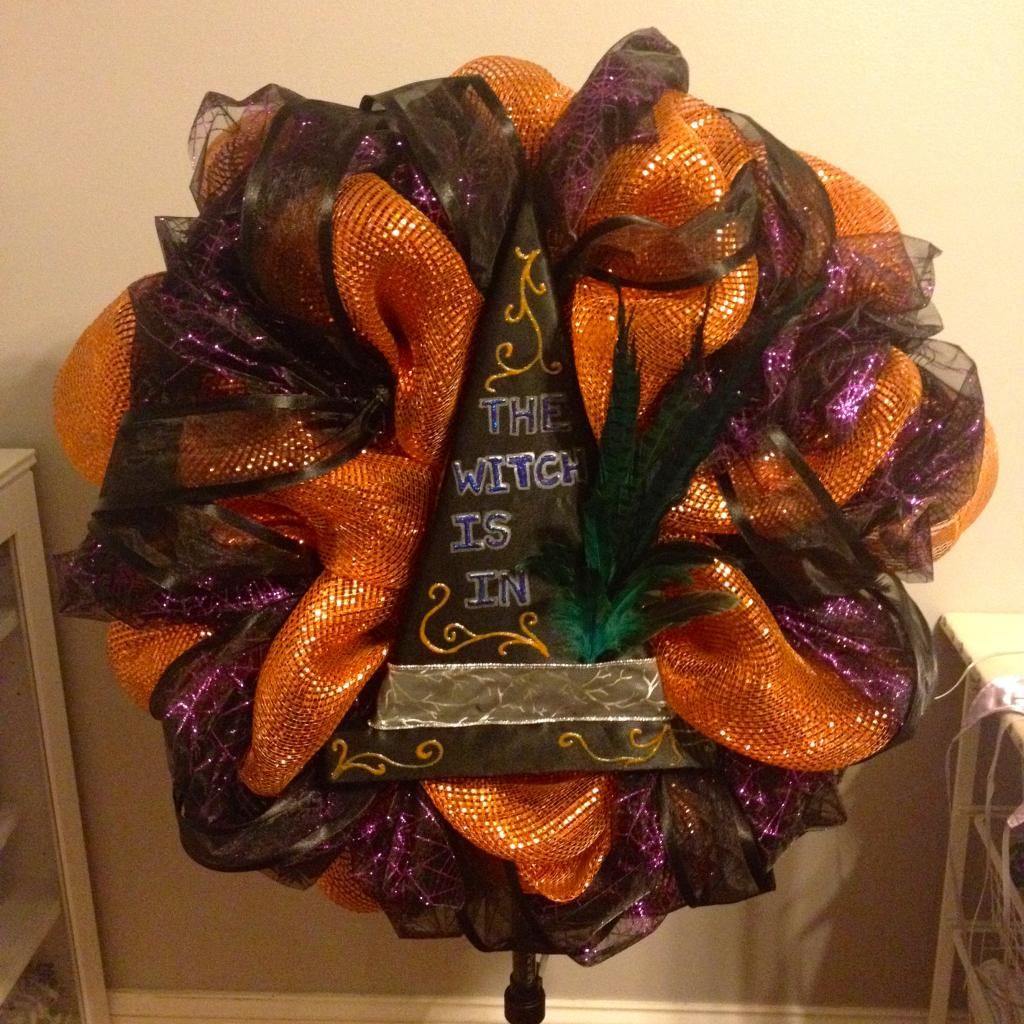
Part 2 of this tutorial basically consists of making the witch hat form in the middle.  You could use this technique to make a center form for any holiday decor.

Supplies
Deco mesh wreath from part 1
Craft Styrofoam board - mine was   I got it at Joann in the styrofoam/wreath area.
Black fabric - I chose a polyester cuz it will be outside.
Black craft felt sheets - 2 pieces
Ribbon - 20" piece for hat band
Feather spike - Also in wreath section
Puffy Paint - 2 colors
Small gauge wire - 2 pieces, 12" each
Pipe cleaners - use the same color as in the part 1 tutorial
Glue gun and sticks
Scissors
Box cutter or something to cut the foam

*I've numbered a lot of the photos and they will be notated in each step with a colored number.*

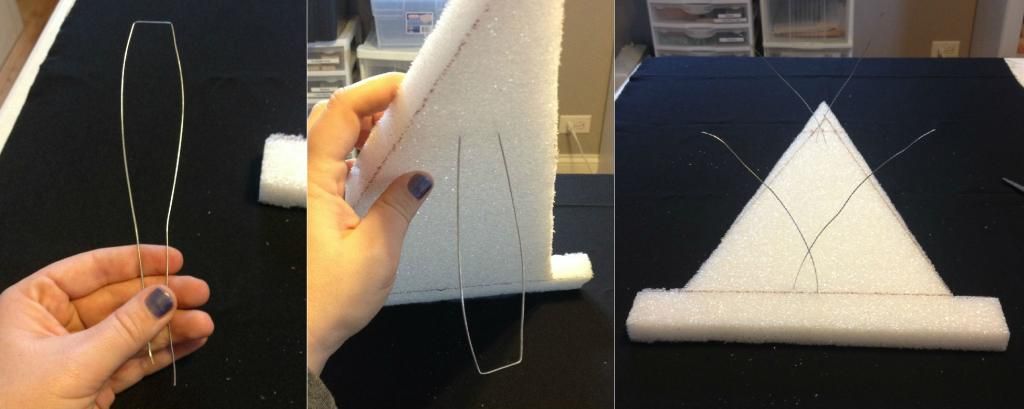
1.  First you will need to cut your hat shape from the foam.  I drew a 1.5" X 12" rectangle for the brim and then a tall triangle on top.(1)  Now use your box cutter/blade to cut it out.(2)  EASY!

2.  Next we will insert your two pieces of wire through the foam.  Bend the wire in half will a squared off edge like in the picture.  You can just push the wire through the foam till the squared edge is flush with the surface.  I put one towards the top and another closer to the base.

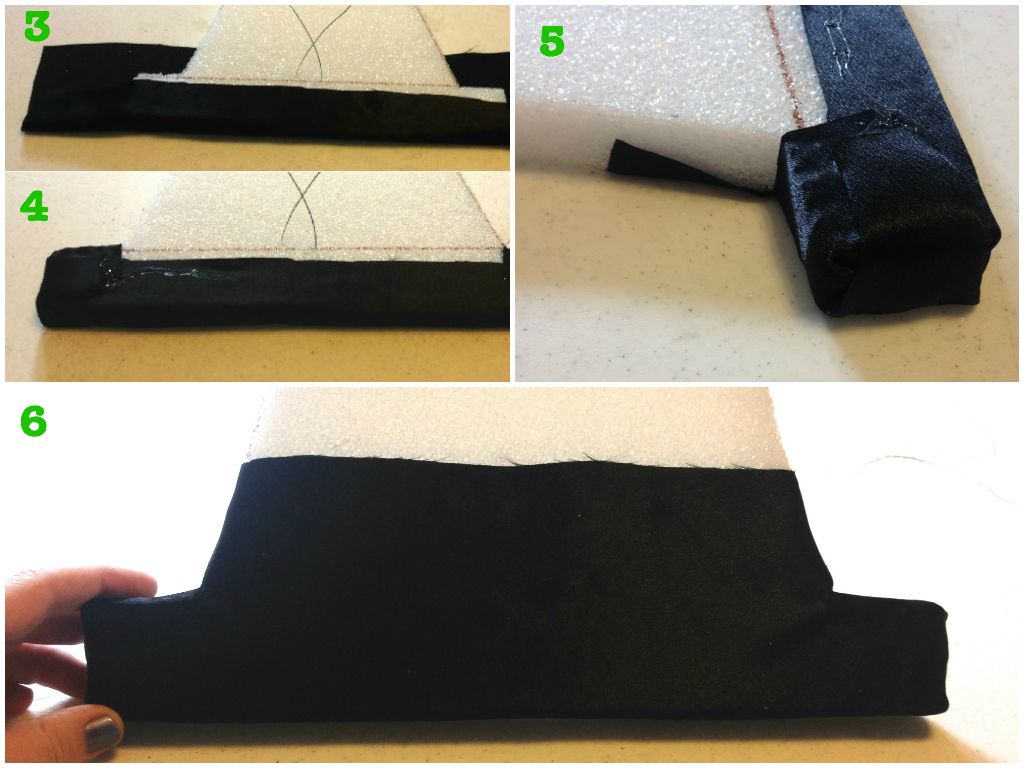
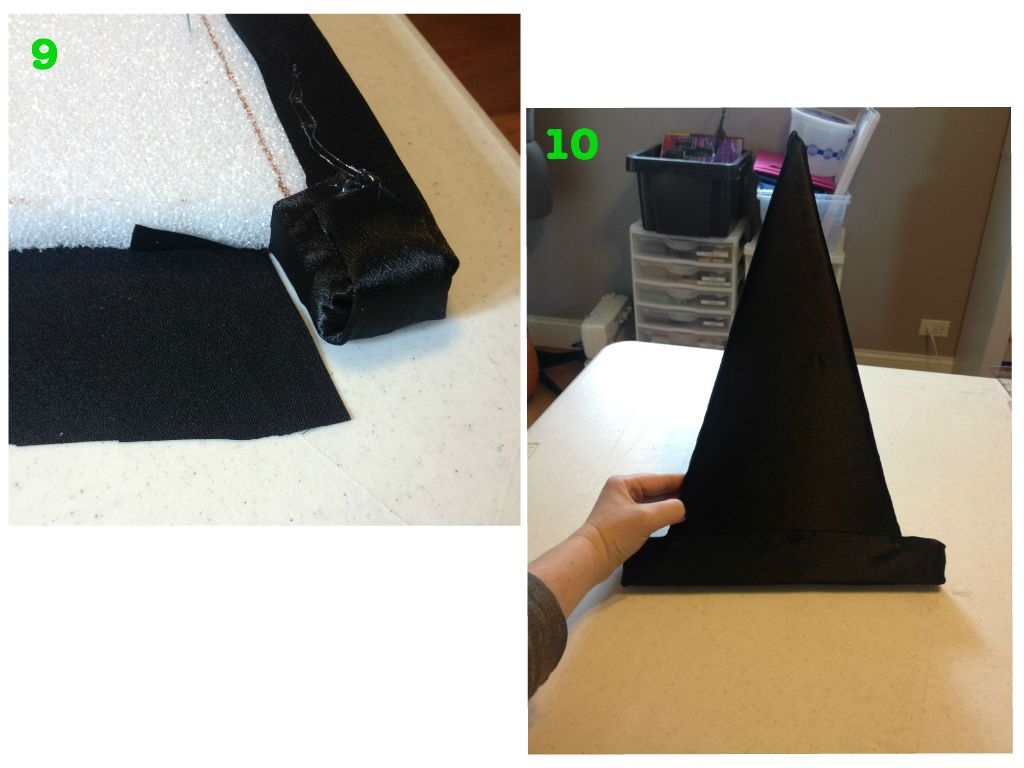
3.  Now we will cover the hat form with fabric.  You basically just wrap it like a present, using the glue gun instead of tape, but in two steps.  Do the brim first following the photos from 3 through 5.  When you are done the front should look like 6.

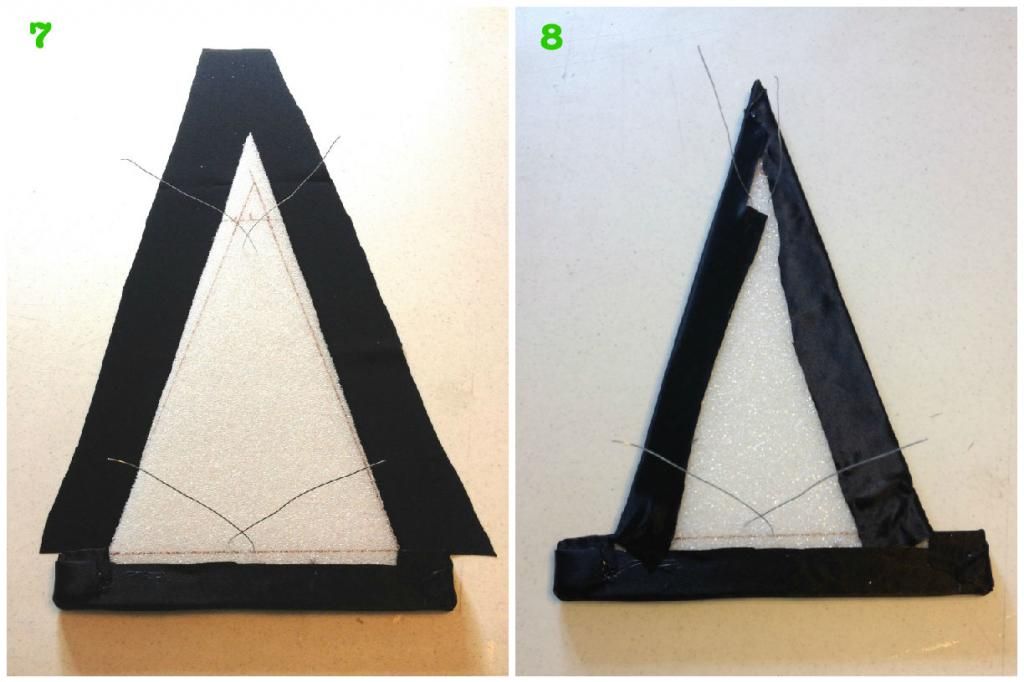
Now you will wrap the top "triangle" part in another piece, keeping all the edges wrapped around the back of the form.  There will be one raw edge on the front where you overlapped the pieces but don't worry we will cover it.

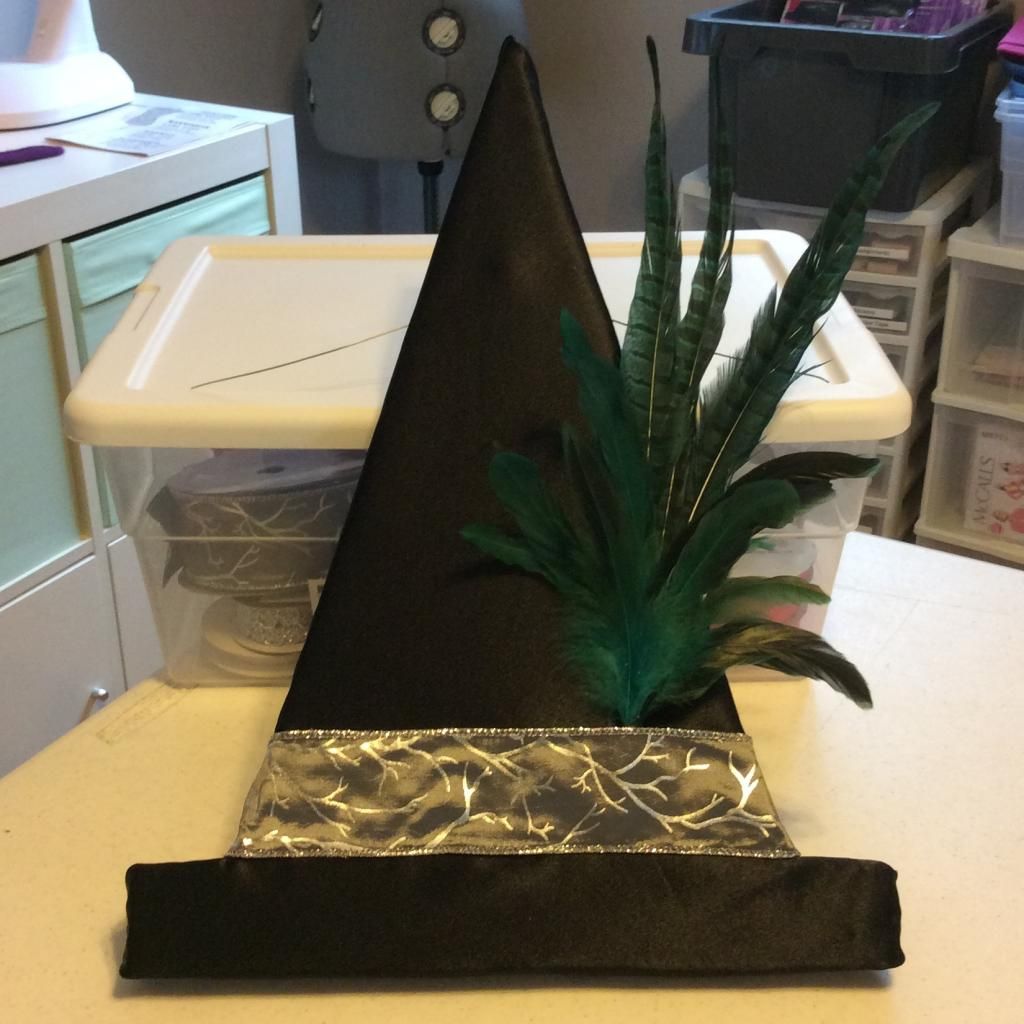
4.  Next you will add your feather spike.  I trimmed mine down with a wire cutter and glued it on right about where the band goes above the hat brim.  That way it will be covered by the ribbon.  Be generous with the glue here.  We don't want it falling off.

5.  Now you will add your ribbon hat band covering the raw edge of fabric and the glued end of your feather spike.  Wrap the ends around to the back and glue in place.

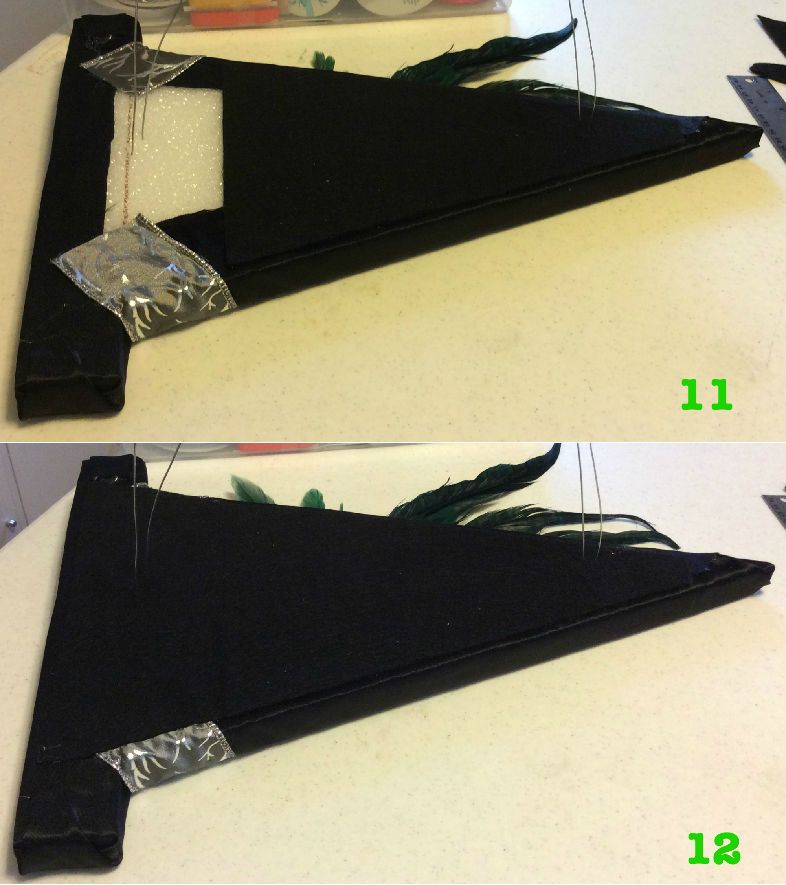
6.  This is really an optional step but I like my wreaths to look clean from the back since I can see them through the window.  Take your felt and cut it to fit over the back of your form coming about 1/4" from the edge.  I had to do this in two pieces since my hat was bigger that the felt I had on hand.  You can poke little holes into the felt for the wire to go through.  I also recommend adding a bunch of extra glue around the wire when applying the felt.  This will keep them extra secure.

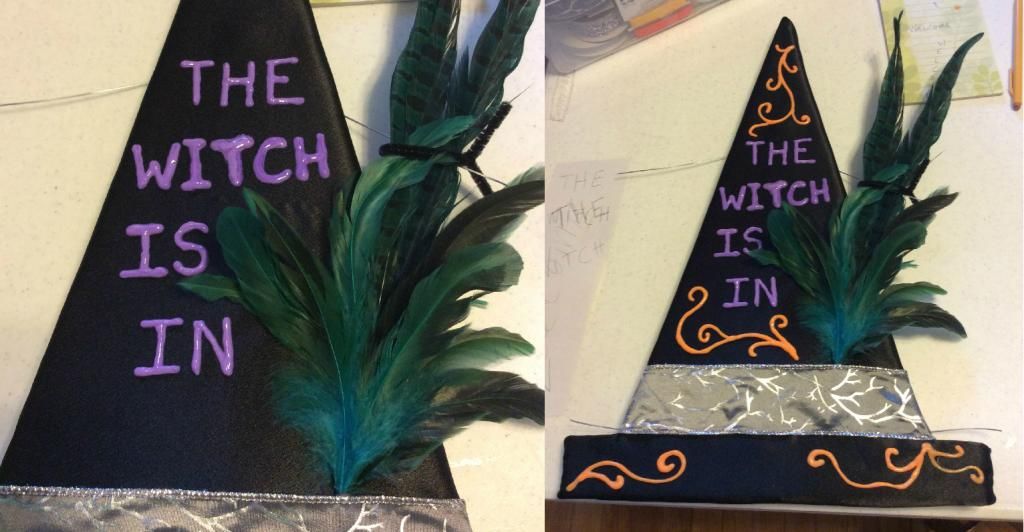
7.  Now we will break out this paints I had in the supply list to add our festive message.  If you have another way you'd like to add the letters instead have at it.  I painted the letters first and then filled in some of the blank spaces with a few swirls in a contrasting color.  Note I tied the feathers out of the way while I painted.  
The puffy paint takes a while to dry so watch a spooky movie or do a load of scary laundry.  When it's dry just attach the hat to your wreath using the wires on the back.  

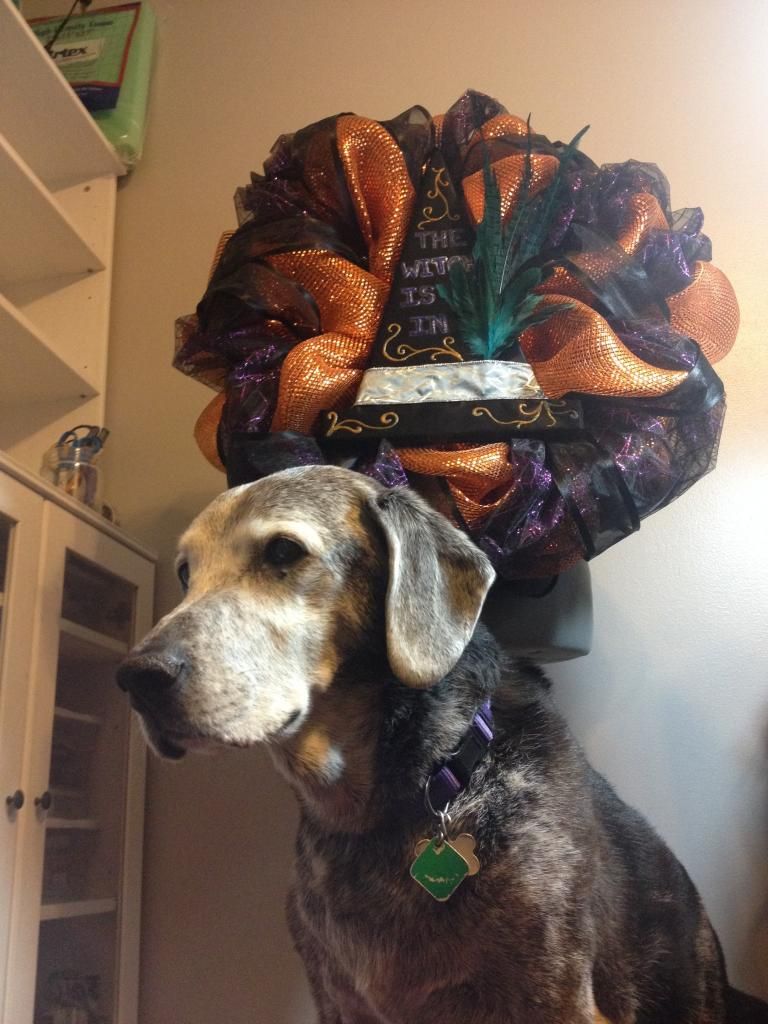
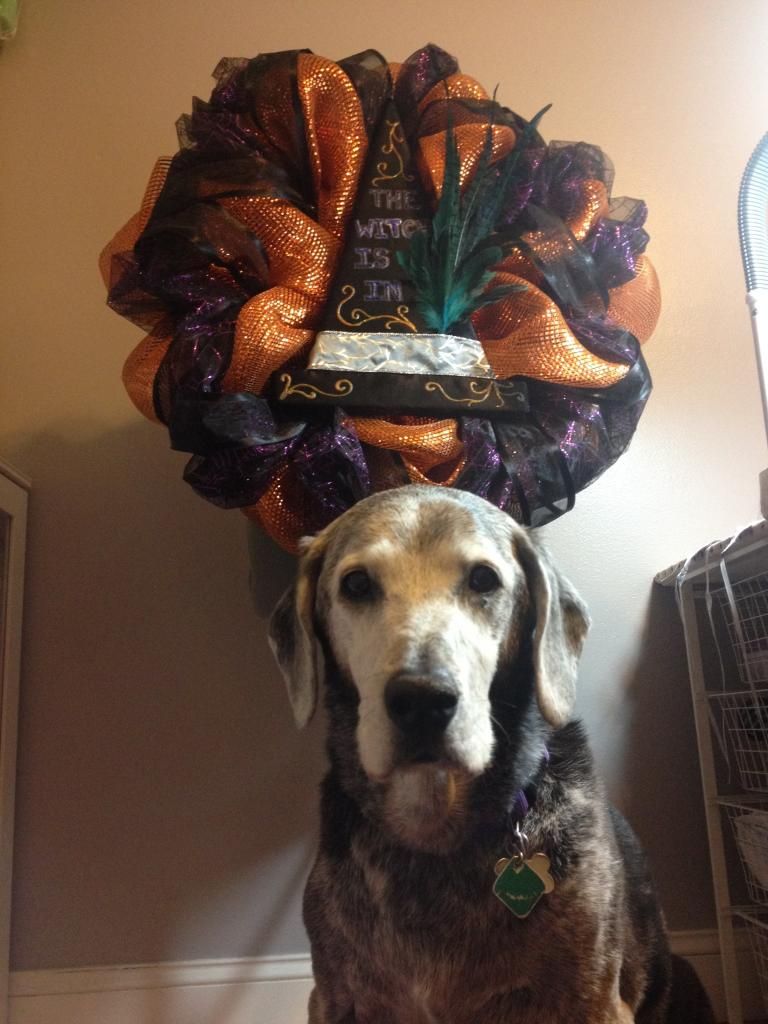
TADA!  You're done.  Now you can hang it up and just wait for the complements to roll in.  Here's Sadie in a couple dramatic poses with the finished product.


Cast on!
Anita

Tuesday, October 14, 2014

HTTC - Witchy Wreath Part 1

I decided to split this tutorial into two bite sized posts to make it easier to digest.  The first will show you how I put together a deco mesh wreath for the base and the second will be all about decorating.  Lets get started.


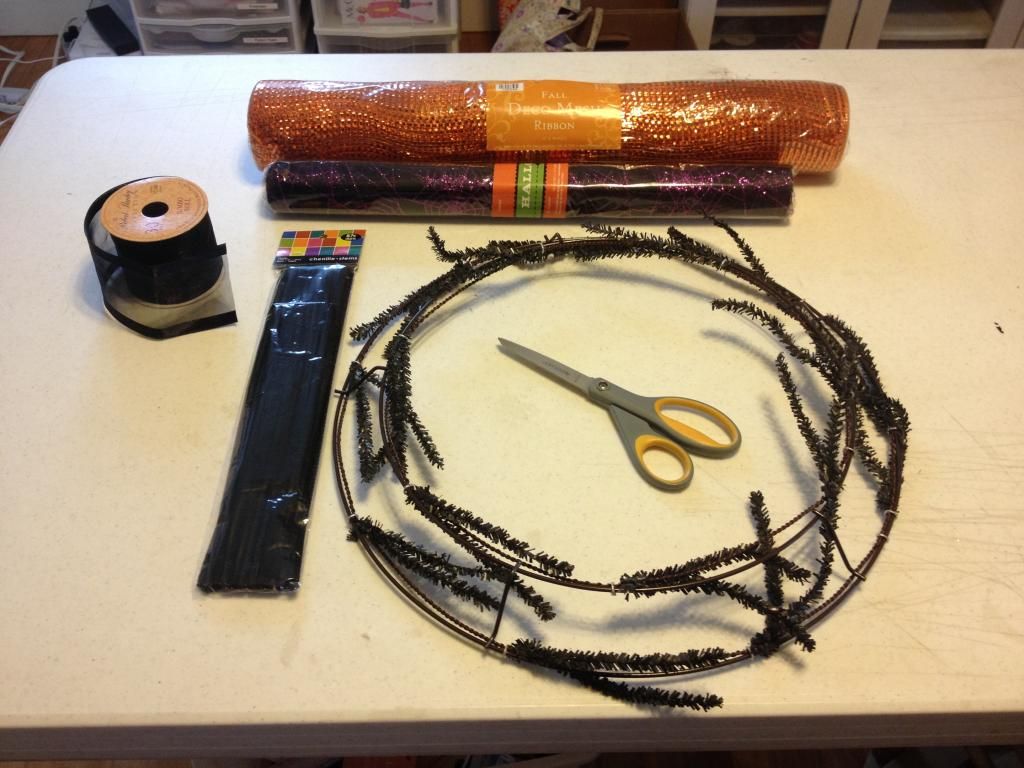
Supplies

Work Wreath - I got mine at Hobby Lobby.  Try to get one that will blend in with the colors of mesh you're using.
Deco Mesh - I used one roll of a metallic orange kind and another roll that ended up being more of a decorative tule.
Ribbon - Wired kind really helps with shaping.  Wish I had thought of that before I put this one together.
Scissors
Pipe cleaners (just in case)


1.  First you will want to adjust all the twist ties on your work wreath so they are sticking straight out instead of lying against the frame.  This makes it much faster and easier to attach your mesh.  Sorry there's no pic of this.

2.  Now take your first/major color and fold the end over by about 6-8 inches and attach it to one of the ties on the inner rim of the wreath.

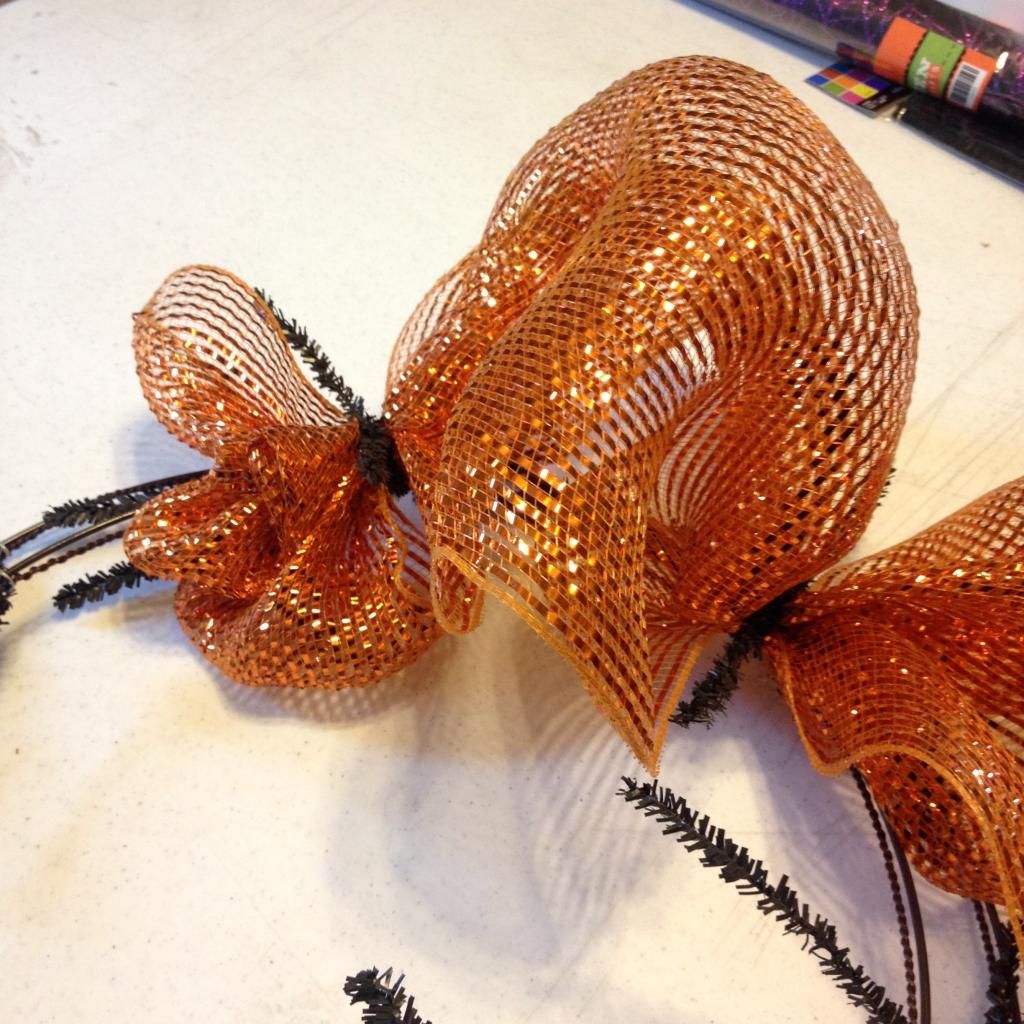
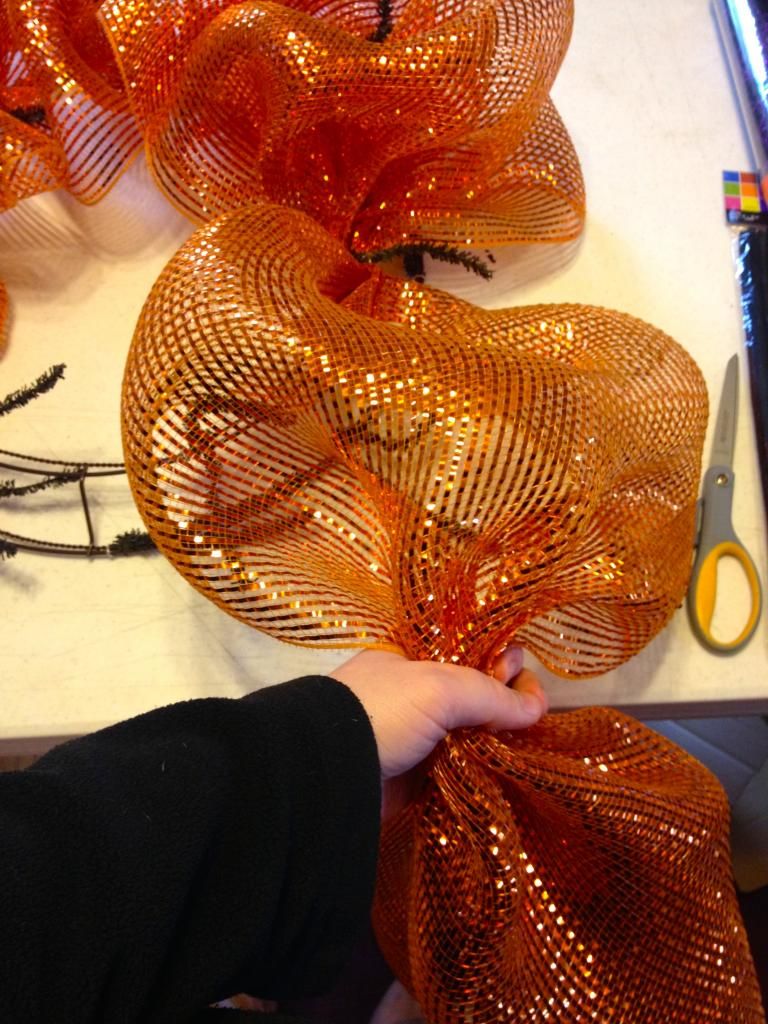
3.  Now about every 12 inches or so down the roll you will be gathering to make the big bubbles of mesh.  Run your hands down the mesh so you are about 12 inches or so away from your first tie.  Gather the mesh into your fist and attach it to the next tie.  It will make a bubble/hump like this.
Continue gathering and attaching your mesh to the wreath until you get all the way around on the inner part of the wreath.

This is just the inner ring of ties.
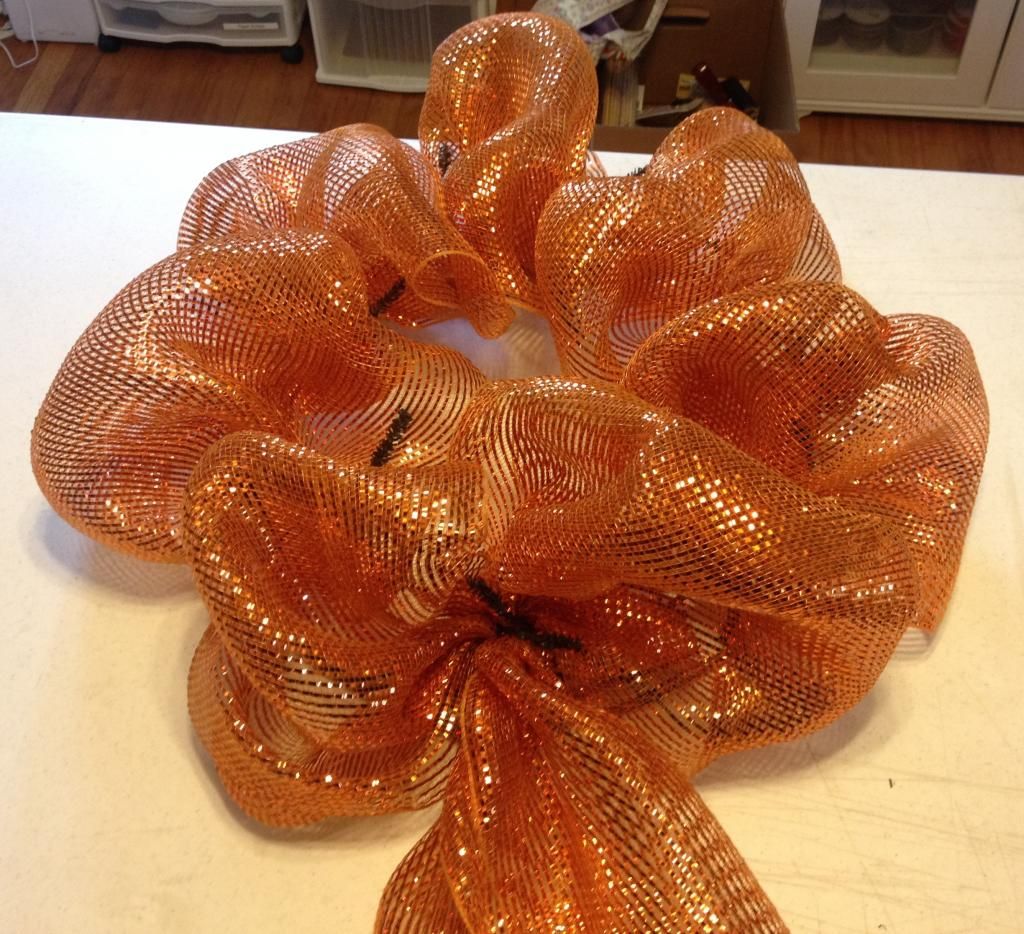
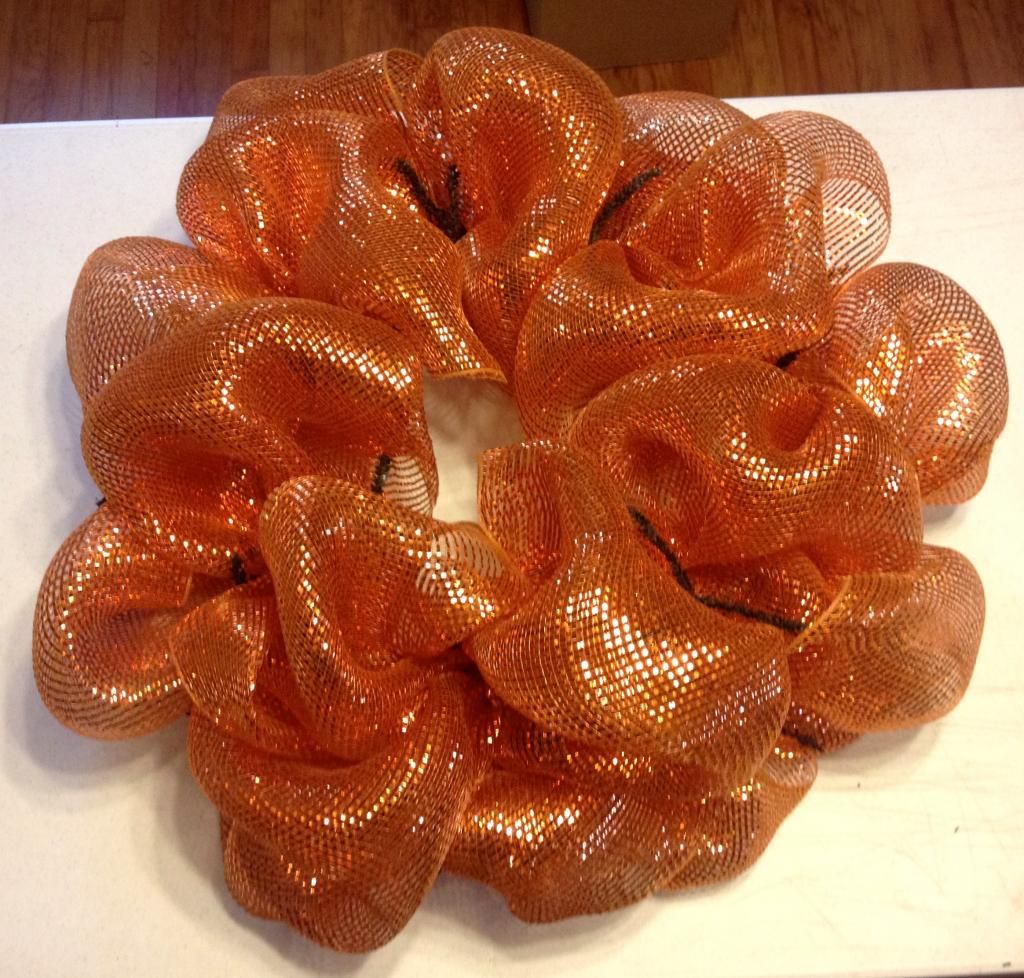
After you have finish the inside ring of the wreath you'll do the same thing on the outer ring.  Don't bother cutting the mesh.  Just start attaching it and run around the whole thing.  When you get to the last tie to complete the circle just cut about a 6-8 inch tail and fold it over to hide the raw edge and attach it to the tie just like you did at the beginning.

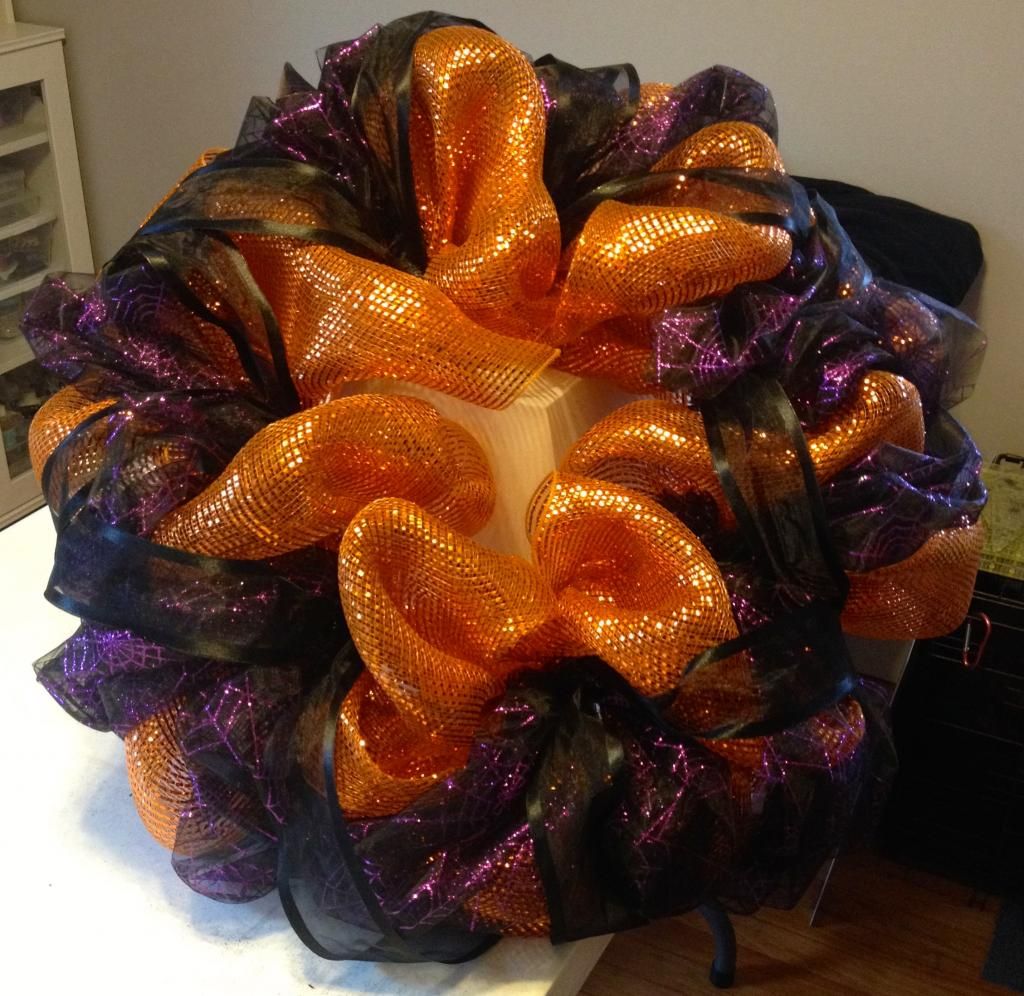
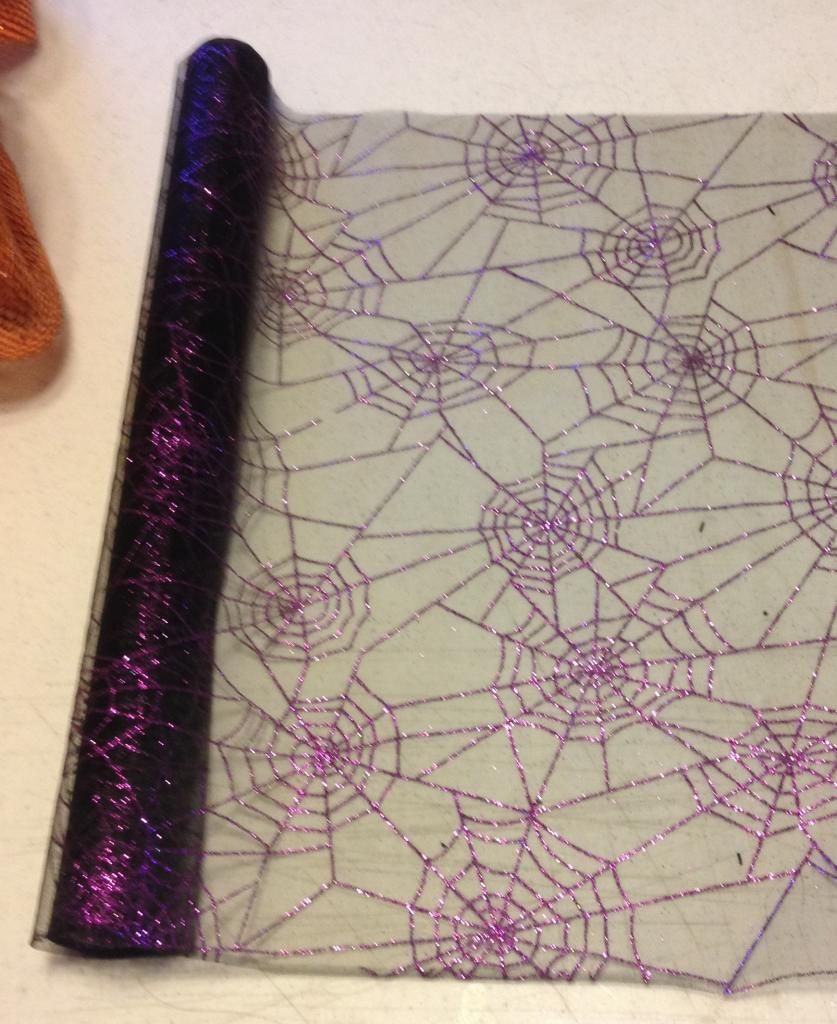
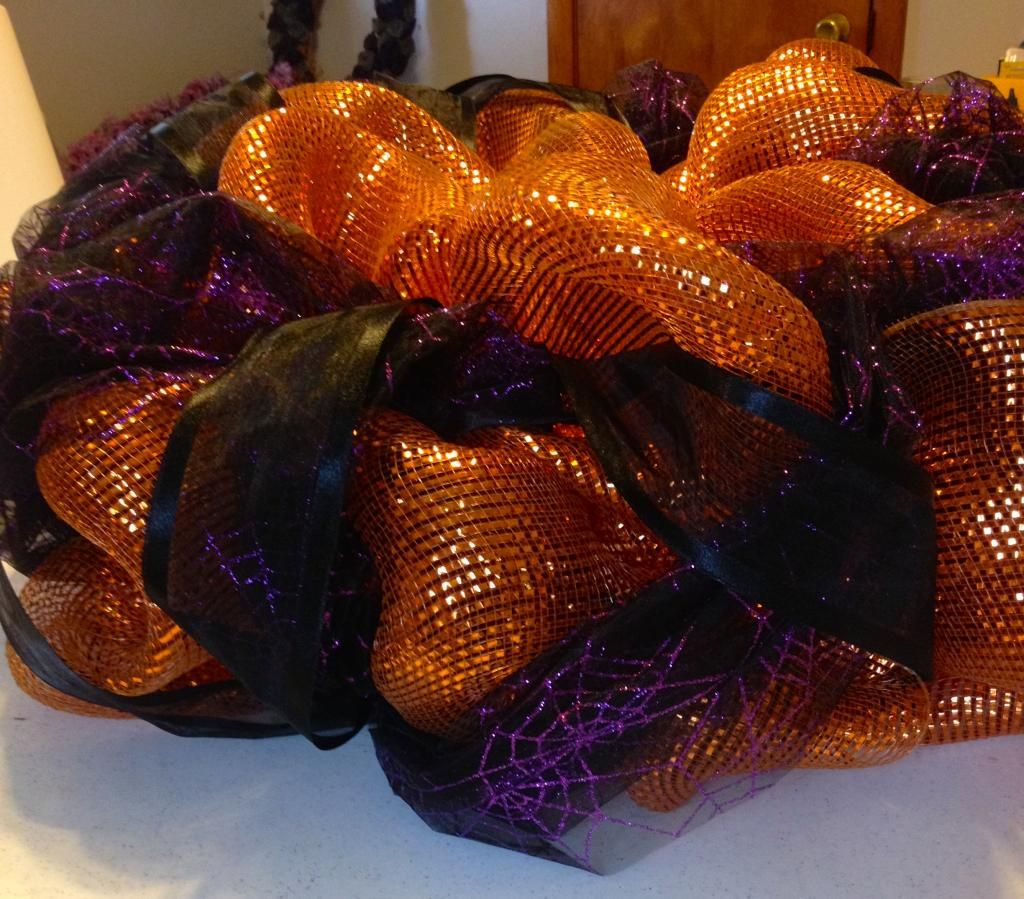
4.   Now we will add your second color/decorative tule.  I love this one I found that is shear except for the glittery spiderwebs.
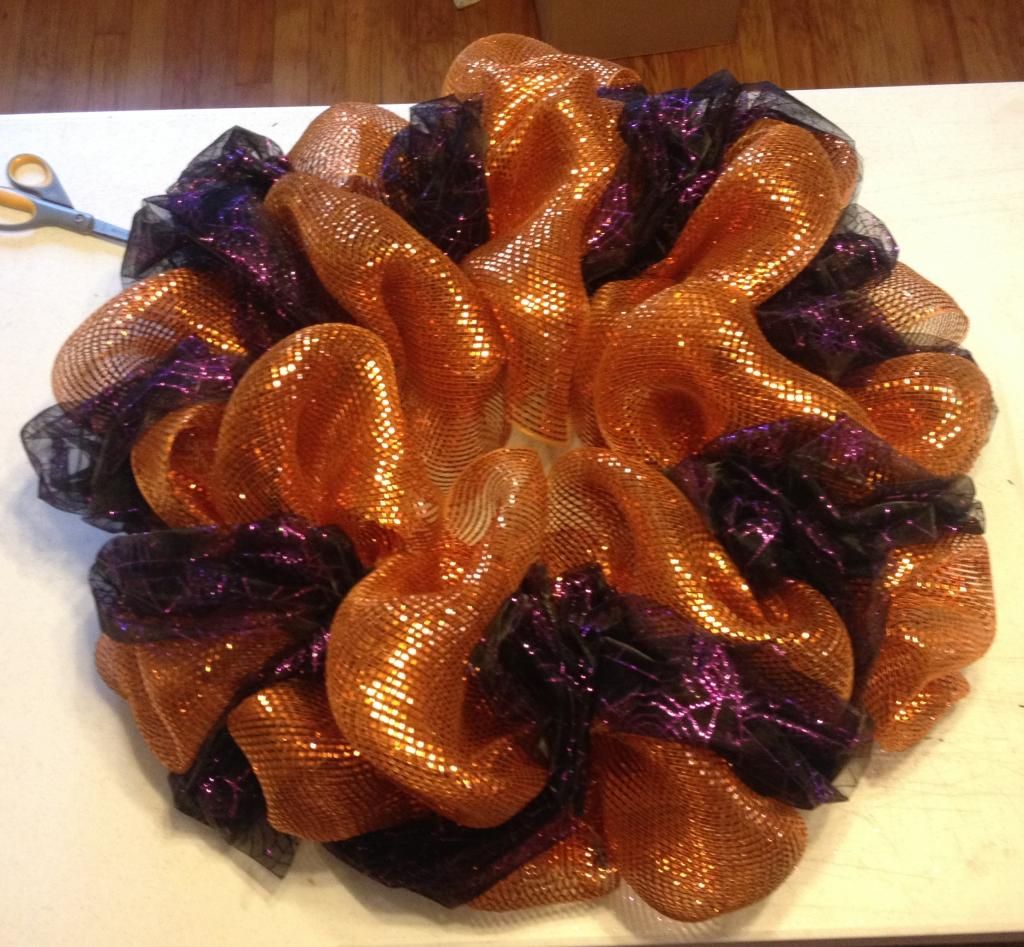
You will be doing the same process as with the orange mesh.  The only difference I choose to do is to zig zag between the inner and outer ties to make it look more random.  You can see how I gather the tule to make a poof below.  I insert and tie it in the same way as the mesh.  I just did one pass zig zagging all the way around and tiring it off in the back like with the mesh.
Orange mesh + purple web tule

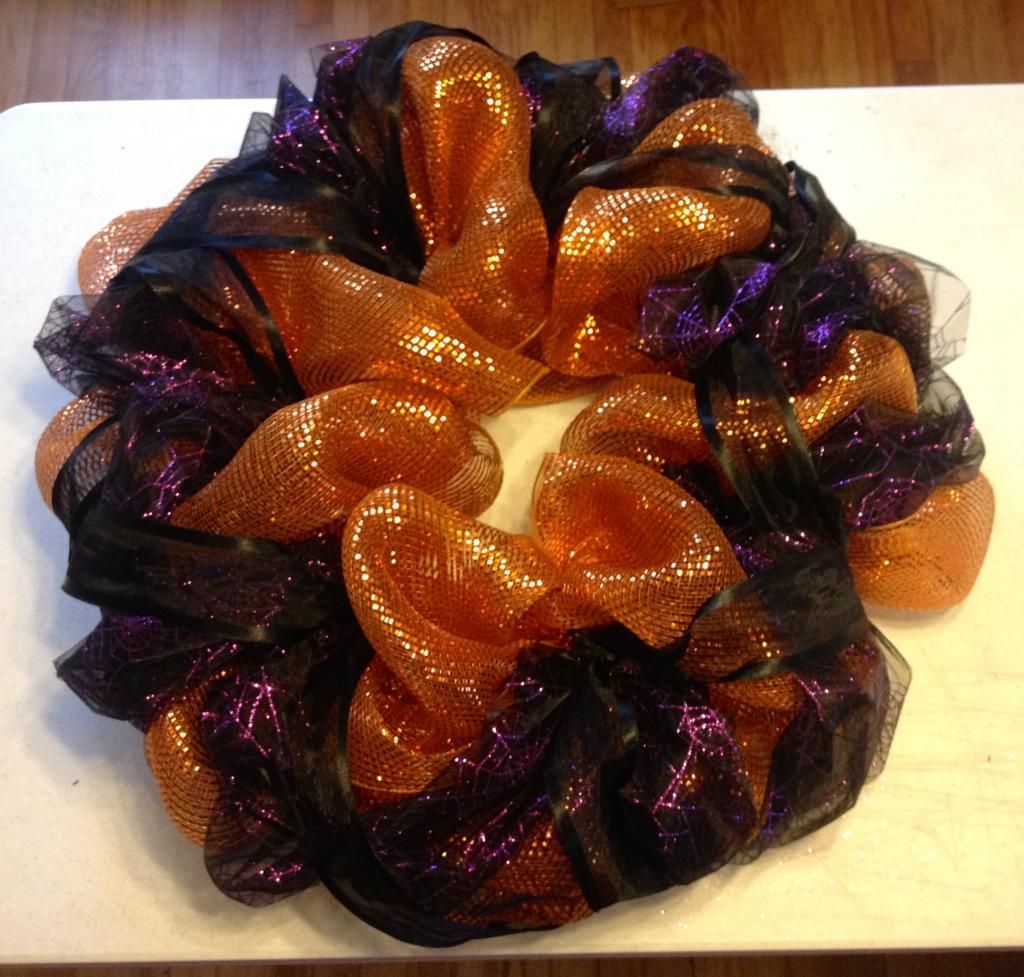
5.  Final step for this part of the tutorial is to add the ribbon.  It is done the same way as the previous two steps just not much gathering cuz its pretty narrow.
I tried to stagger my ribbon from the tule to make them overlap a little but you can do whatever you want.  This is the step where you would use the optional pipe cleaners.  I keep them handy so in case there isn't a tie where I want the ribbon to go I can attach one to the frame as needed.
Mesh+tule+ribbon
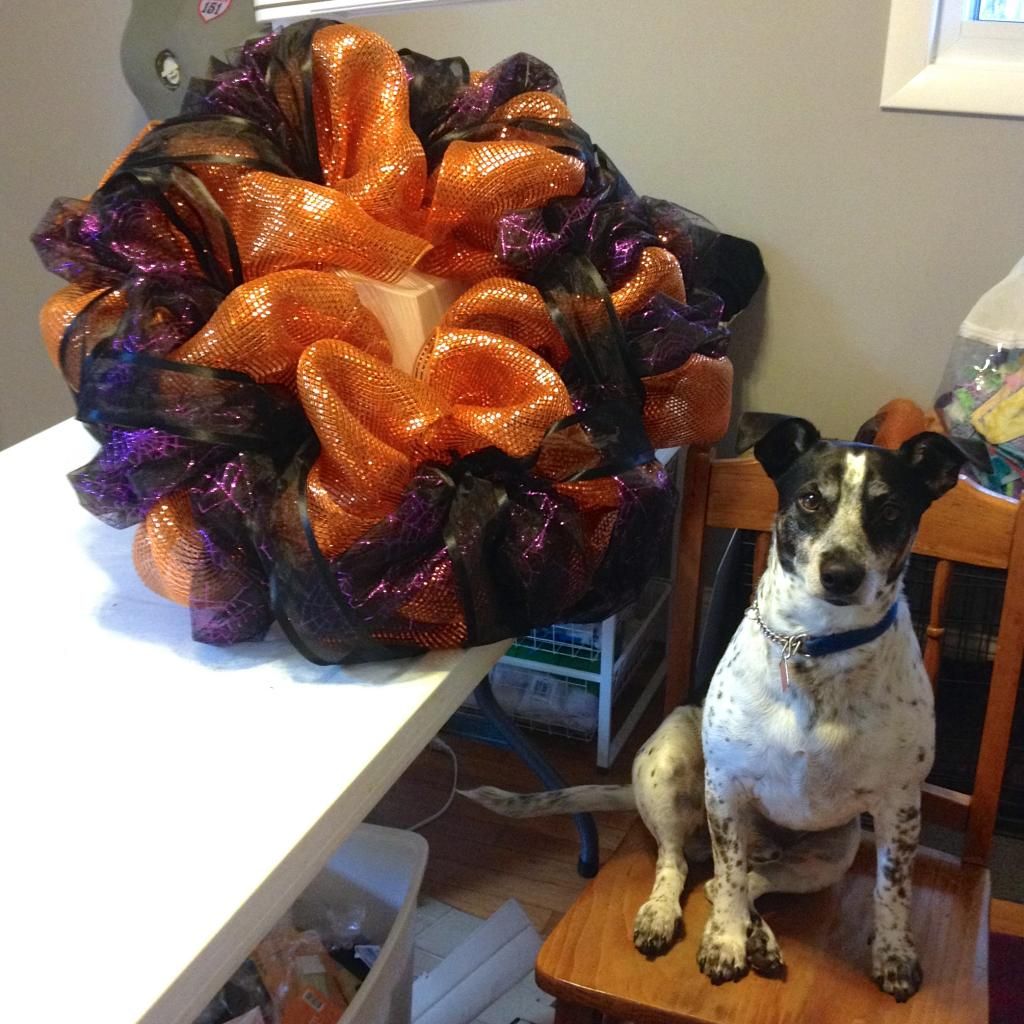
Feel free to adjust and shift around any of the fabrics until you get a balance that's just right.  I like a lot of color towards the middle so the center piece we will make next, that is black, will stand out.

YOU'RE DONE!  Mr. Biscuit volunteered to inspect my wreath and I got the paw print of approval.

Stop by Friday to see part 2 of this tutorial.

Craft on!
Anita

Monday, October 6, 2014

HTTC: Little Kid Ghost

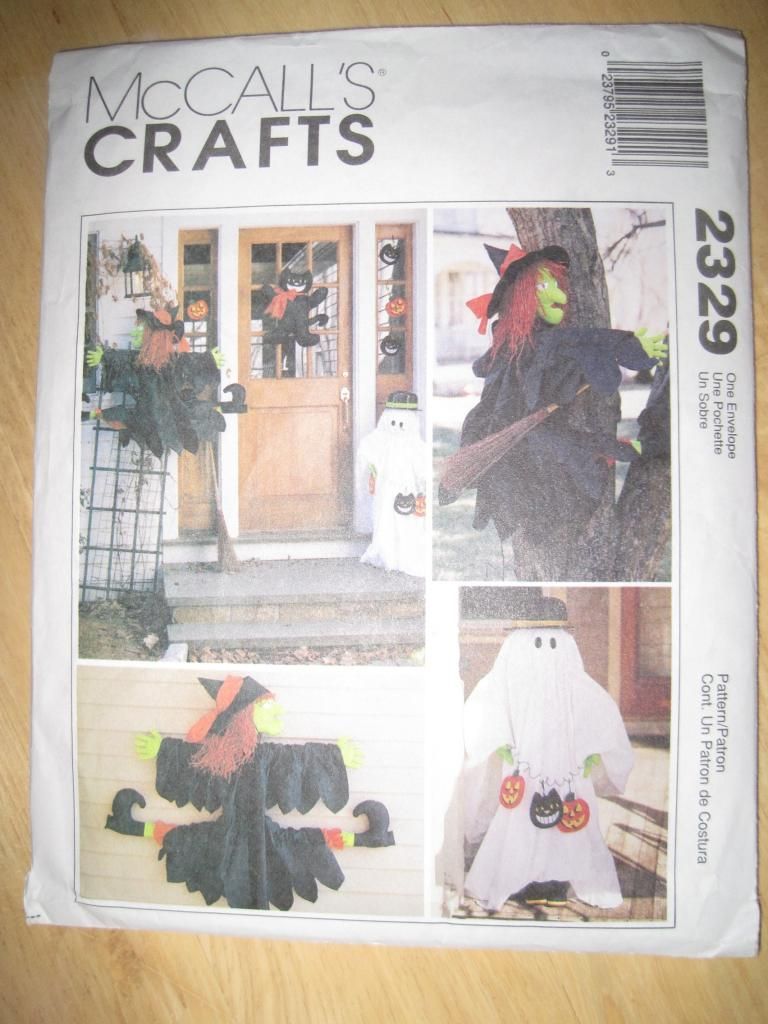
I learned a very important lesson while making this little guy; I may love the look of the draped fabric ghost, but I do not have the patience or the math skills to pull one off without pulling out my hair.  At first I tried to make a cute light up ghost with a tomato cage, a sheet, and some Christmas lights but that was not even close to looking anything like a ghost, more like a lit up tomato cage with a piece of garbage trapped on it fluttering in the wind!  I worked off of McCalls's Crafts pattern 2329 with a few changes.  Some of the things that were needed as per the pattern were ridiculously priced or would not add enough to the craft to be worth the cost so they got nixed.  You really don't need the pattern to make this guy all you need are a few tips and you can make one of your own with all the customization and upgrades you want!

Little Kid Ghost:

2&1/2 yards 120" white muslin
scrap of black felt
one wire hanger straitened out
masking tape
pair of shoes
stuffing
30"x 30" square of white fabric
2 36" 5/8 inch diameter wood dowels
scissors
glue gun
cording or twine

Start by cutting/ripping the 120" inch wide piece of muslin in half width wise so that you have two 60" wide pieces that are 2&1/2 yards long.  Cut/rip off two 2 inch thick by the 60 inch wide strips from each of your pieces of fabric.  You will have four strips total, set these aside. Place the two big pieces on top of each other, these will be the covering for your little guy.

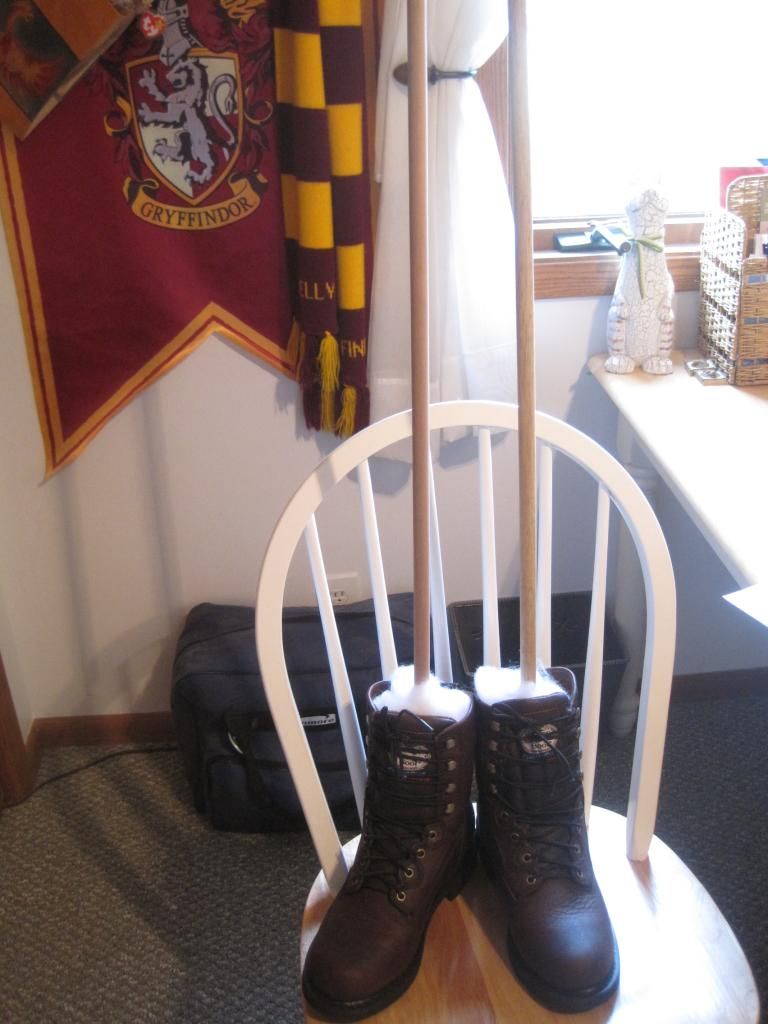
Next take your pair of shoes and stick your dowel rods in them.  Pack around the rods with fabric scraps or stuffing so that they stand up in the shoes.  Measure and mark four inches down from the top of the dowel sticking out of the shoes.

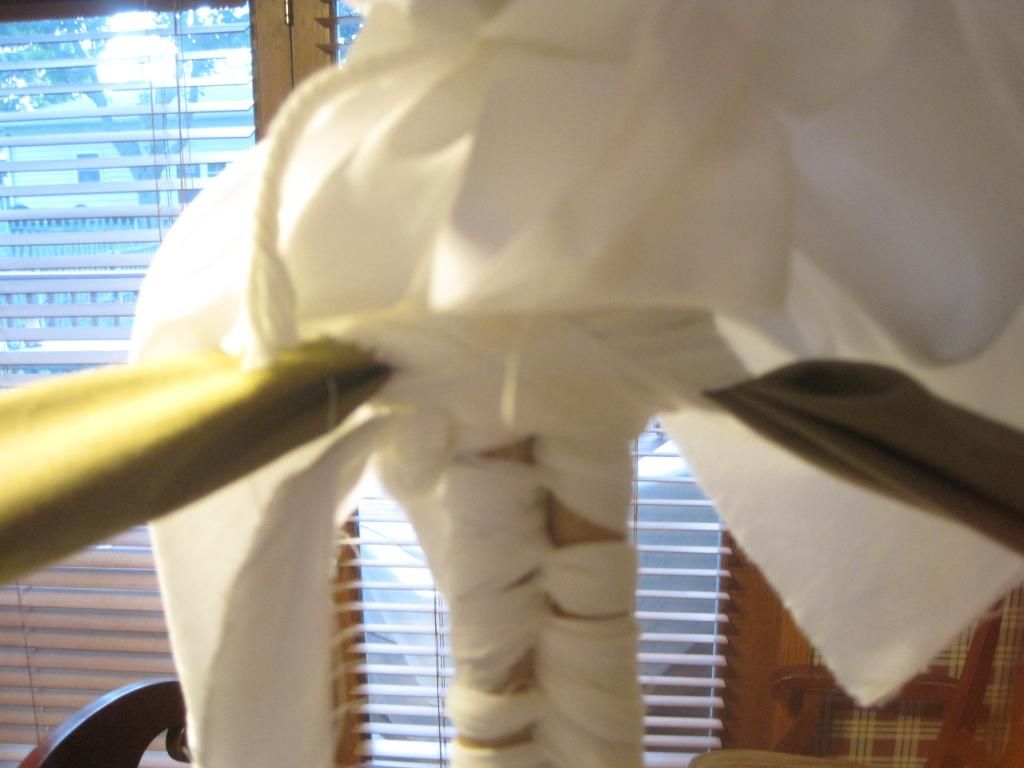
Using one of your 2" x 60" strips of muslin, starting from the marks on the dowels and working down, weave the strip in and out of the dowels securing them together.  Tie the ends together.
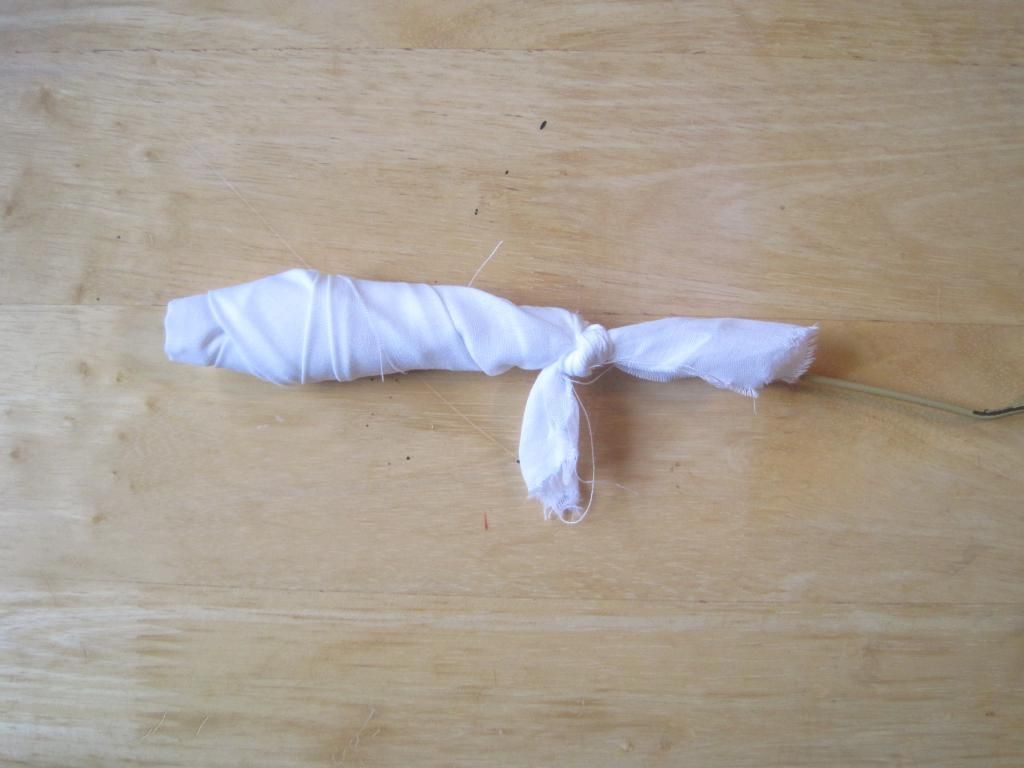
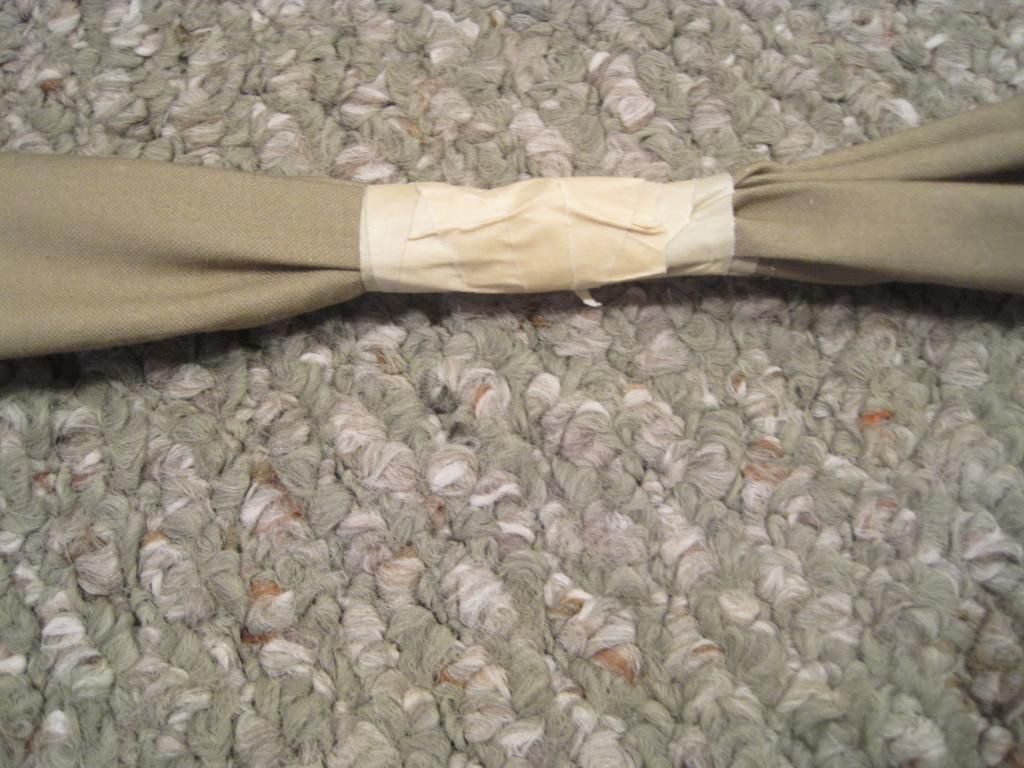
Bend over three inches of the end of the wire hanger.  Using one of the strips wrap the end securely and tie into knots. Repeat with the other end of the hanger and another strip.
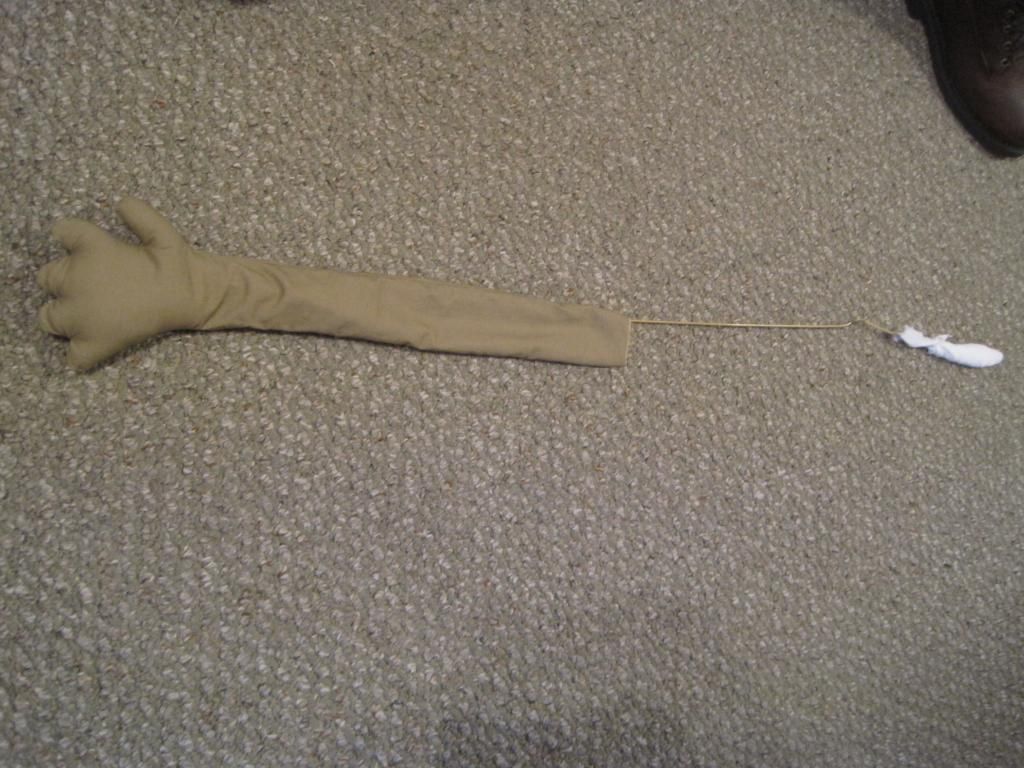
Cut out and sew hands in whatever pattern and fabric you like, making sure that they are long enough to cover a bit more than half of the wire hanger.  My hands kind of look like muppet hands.  Clip all curves and turn right side out.  Stuff to the wrist and slide the hanger in so that the covered metal end ends up in the stuffed area.

Repeat with the second hand and wrist.  Place both hands on the hanger, one end overlapping the other, and tape in the middle with the masking tape. 
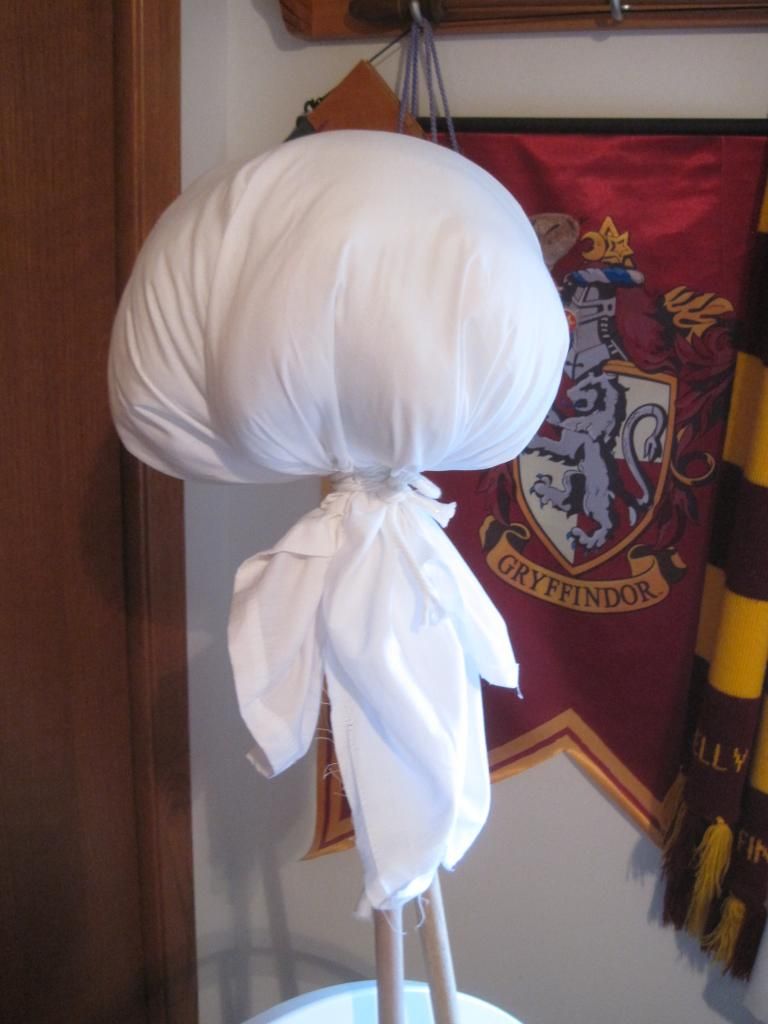
This is where I deviated from what McCall's wanted.  The pattern called for using an 8" styrofoam ball as the head, and if I had one I would have used it, but I didn't.  So I trek off to Joann's to get one only to find that they wanted $16.99 for it! Yeah, no.  So a 30" x 30" square of white fabric filled with stuffing and tied onto the dowel with white cording around the neck may not be a perfect round head but its free and I like it! 
Using the last strip secure the arms directly beneath the head on the dowels, tie the ends tightly.
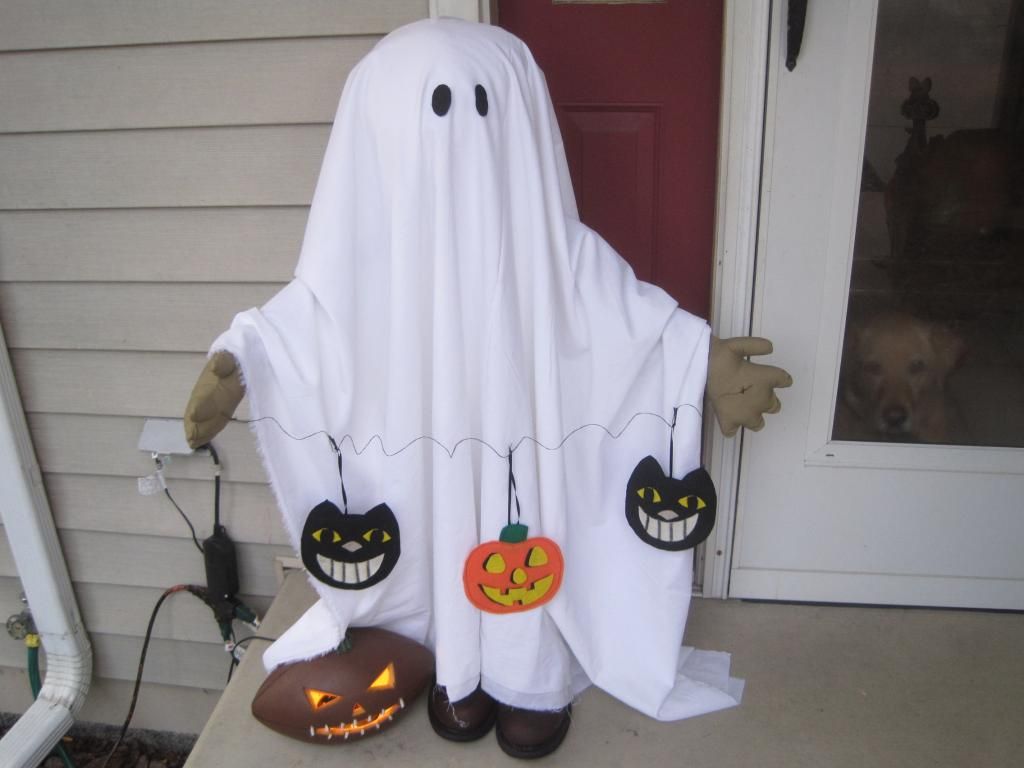
All that is left is to cover your you dowel with head and arms with the fabric, glue on two eyes cut from the felt, and decorate as you see fit.  I made the little garland from the pattern, but how cute would this look with a little trick-or-treat bag!  Check out Abby giving a disapproving photo bomb. As the fabric is draped on him and not stuck down he is not weather proof.  He will stay inside until Halloween and then he will go out to entertain the kids looking for candy. He can be taken apart at the end of the night to be packed away until next year!

I hope you make some great crafts for Halloween this year and thoroughly enjoy your candy haul.
Keep it spooky ,
Kelly

Saturday, October 19, 2013

HTTC- Sprout

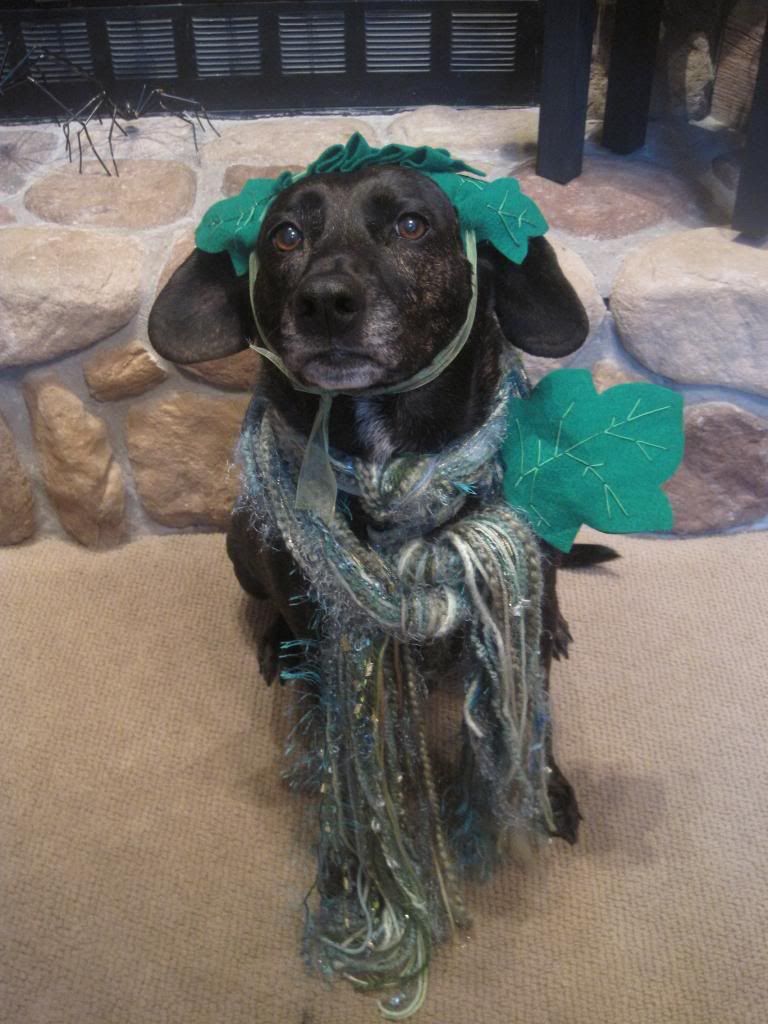
Sprout wants to wish you a very Happy Halloween.  As you can see, she is not thrilled to be in her woodland fairy costume, but she will wear it just for you!
Happy Trick-or-treating!