Showing posts with label furniture. Show all posts

Saturday, June 28, 2014

Media Console DONE!

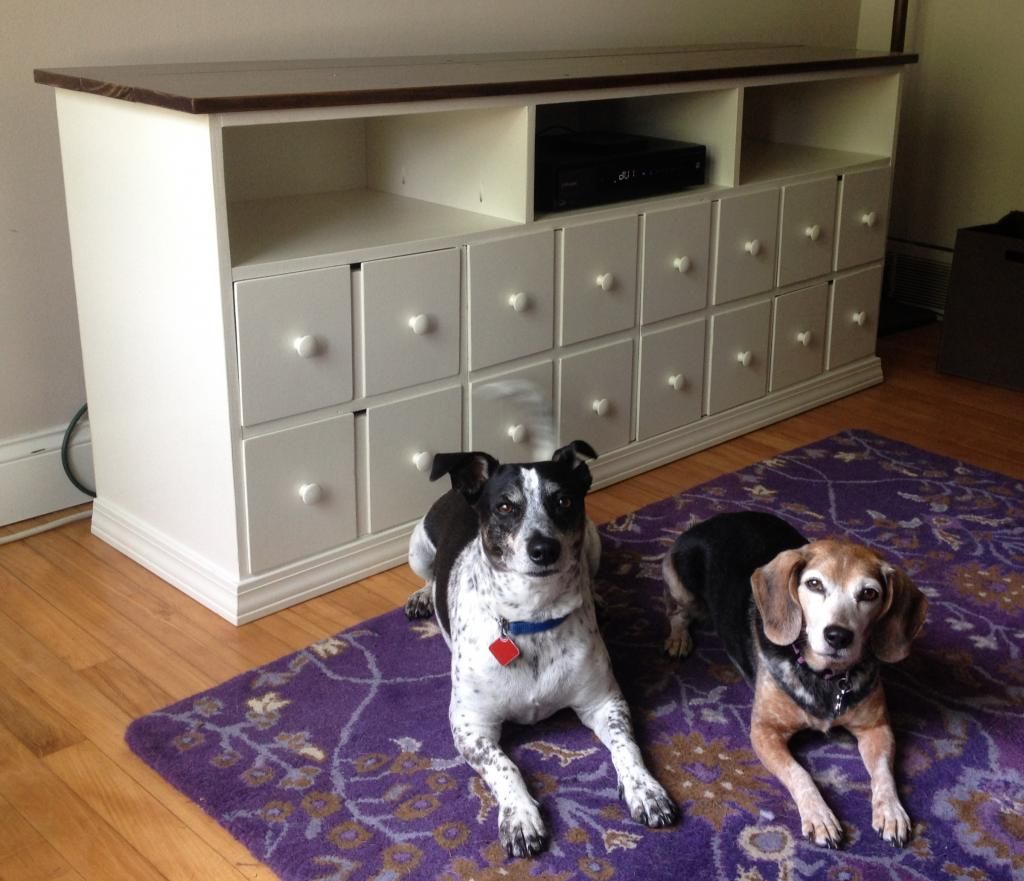
Mr. Biscuit couldn't hold his tail still cuz he's so happy with the new cabinet.  He asked me to hide treats inside.
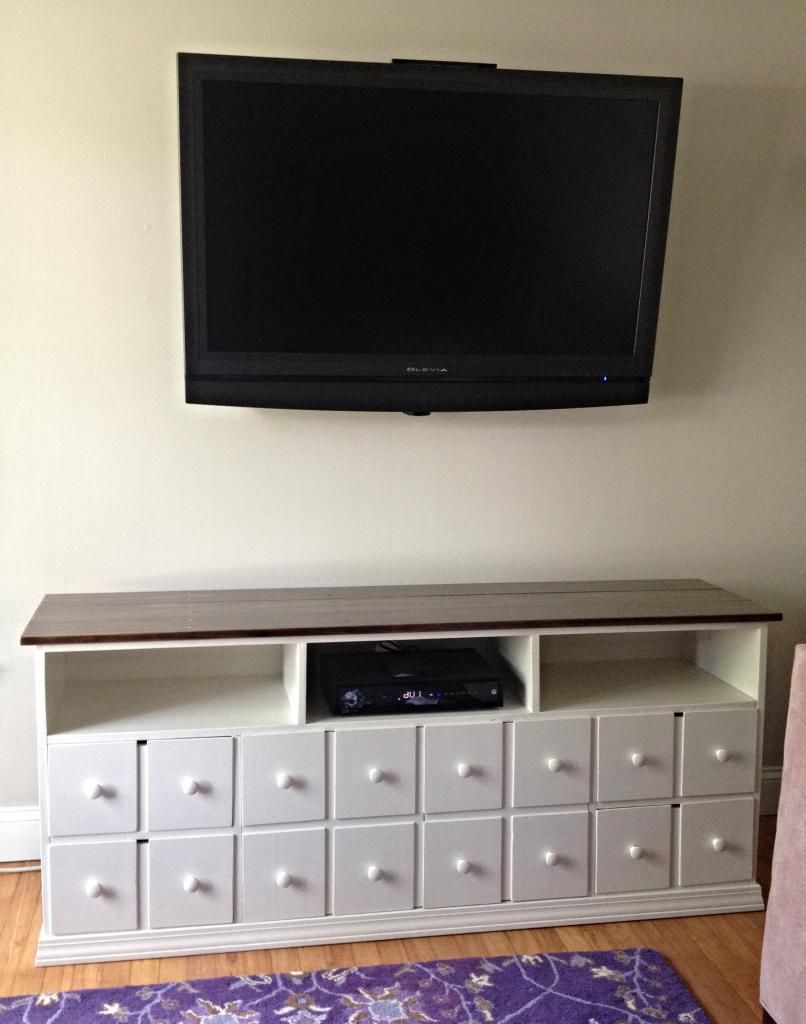
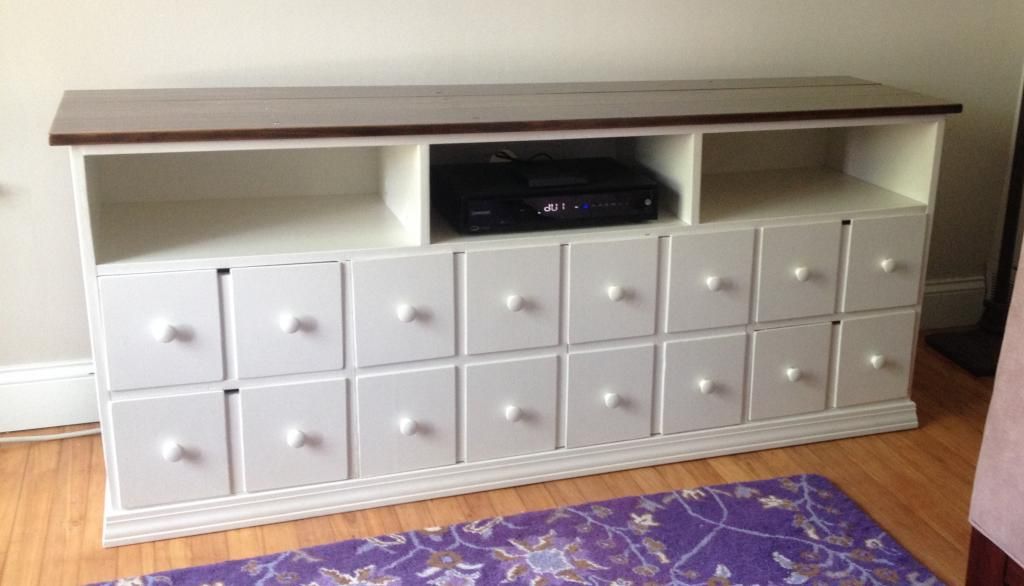
I started this crazy project over two years ago. (You can read two other posts about it here and here.)  It has since been sitting in my garage waiting for the final three or so steps to be accomplished.  Totally normal right?  I got the plans off Ana White's website.  This is called the Apothocary Console and the plans were pretty easy to follow.    Well I had a day off with nothing particular scheduled so off I went.  The base of the cabinet was totally done with the exception of adding the back panel which I also needed to drill a couple holes in for the cables to run through.  The only other thing missing was the top three boards which were already stained just waiting to be attached and coated with poly.

In true Anita fashion these couple of steps took much longer than I anticipated but in about 6 hours I was done.  Thank you, power tools.  I added an additional coat of poly the next day to make it three layers and let the cabinet cure in the garage for the prescribed 24 hours.  The result?  For my first piece of furniture I'm really happy.  It's not perfect but I'm pretty proud I made the whole thing myself.  It is a huge change from the Target piece we had before.  Tons more storage space, almost double actually, it fits the space so much better and it's about as sturdy as a rhino.  I'm super excited about having a large space to display holiday decorations since we don't have a mantle.

Any big projects waiting to be finished in your garage?  I'm sure I've still got a couple hiding in there but I'm glad I can check this one off the WIP list.

Build on!
Anita

Saturday, January 11, 2014

DIY Cheap & Easy Fabric Storage Station


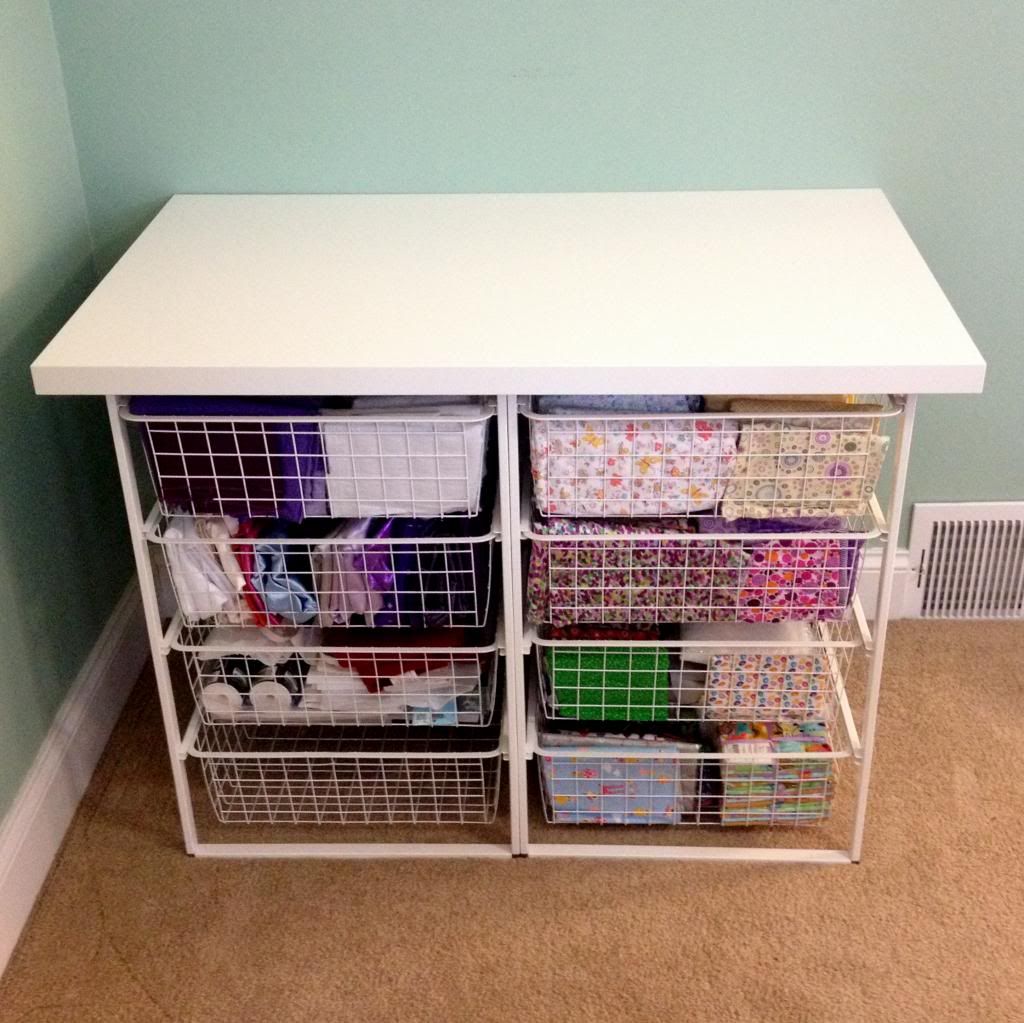
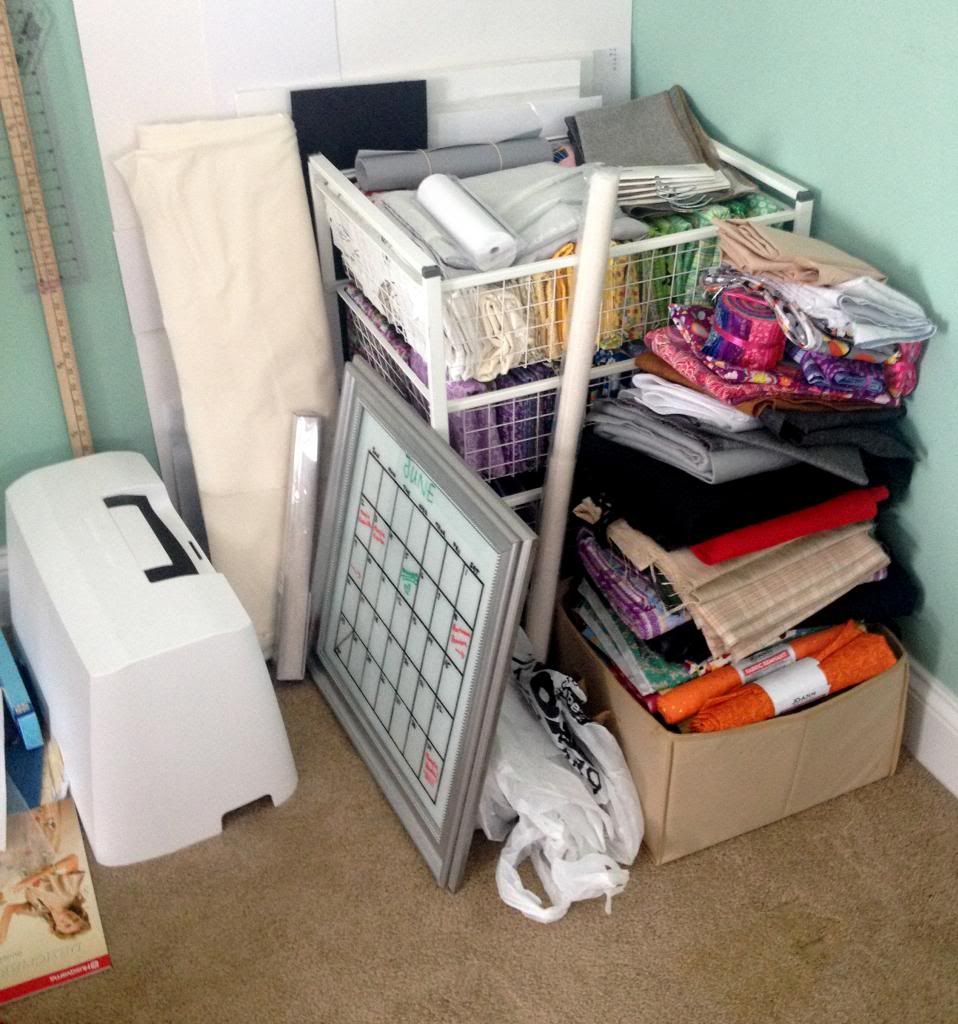
I knew I was in trouble last week when my fabric stash started looking like this.
Yes I even had batting/interfacing and other fabric stuffed into rubbermaid totes next to my sewing table.  I just didn't have anywhere else for them to live, until now that is.

I've been a fabric horder for a long time and I have a sickening weakness for the remnant section of any fabric store.  I don't think it has completely gotten out of control yet but I was well on my way with that wonderful mess/pile forming.  It was conquer the pile or get swallowed by it so here's what I came up with.  The best part is that this only cost me $30, not counting the drill and hammer I used to put it all together.  I got the shelving units on sale for $10 a piece.  They normally only sell for $20 each so it would be more like $50 for you to make this full price.  Still a steal for a fully functional piece of furniture.  Here's what you'll need.

Supplies
Antonius wire basket shelving unit from IKEA - $19.99 ea
1 small Linnmon table top from IKEA - $4.49 (I picked white but they also have black.)
8 Metal conduit straps, 1/2" w/ 2 holes - $.99 for a bag of three 
16 screws (I used wood screws but I've also seen drywall screws recommended for MDF.)
16 small metal washers 
3 white zip ties
a couple pipe cleaners to help with assembly
drill with bit to fit your screws
hammer

1.  Assemble both the Antonius shelving units according to IKEA's instructions.  Leave the baskets out for the time being.

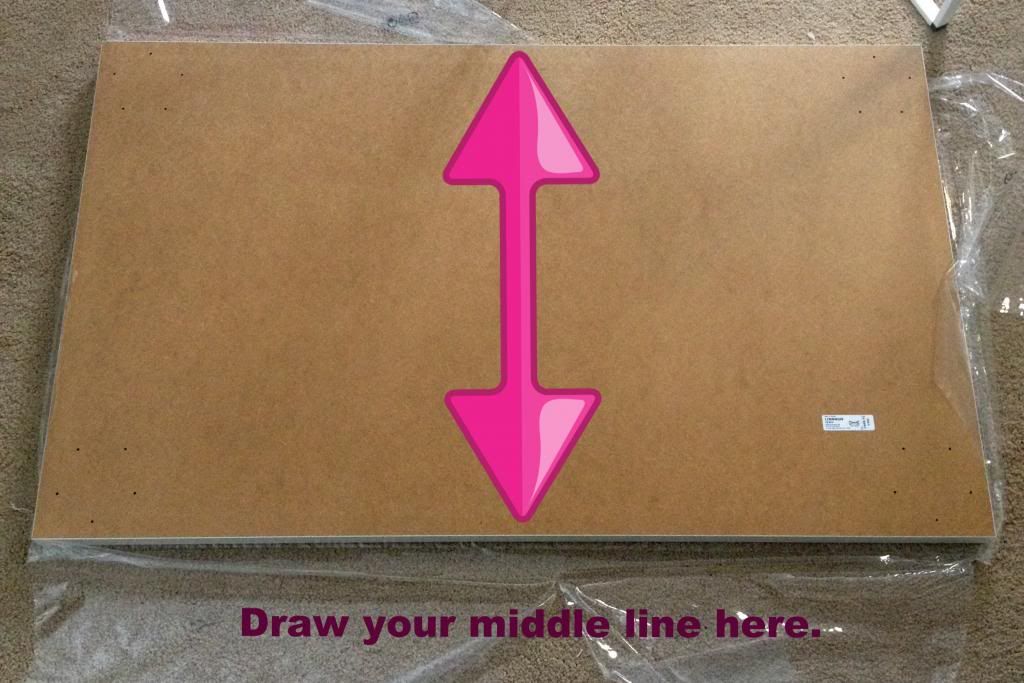
2.  Now unwrap your Linnmon table top and place it wrong side up.   Find the center and draw a line down the vertical middle of the long side.

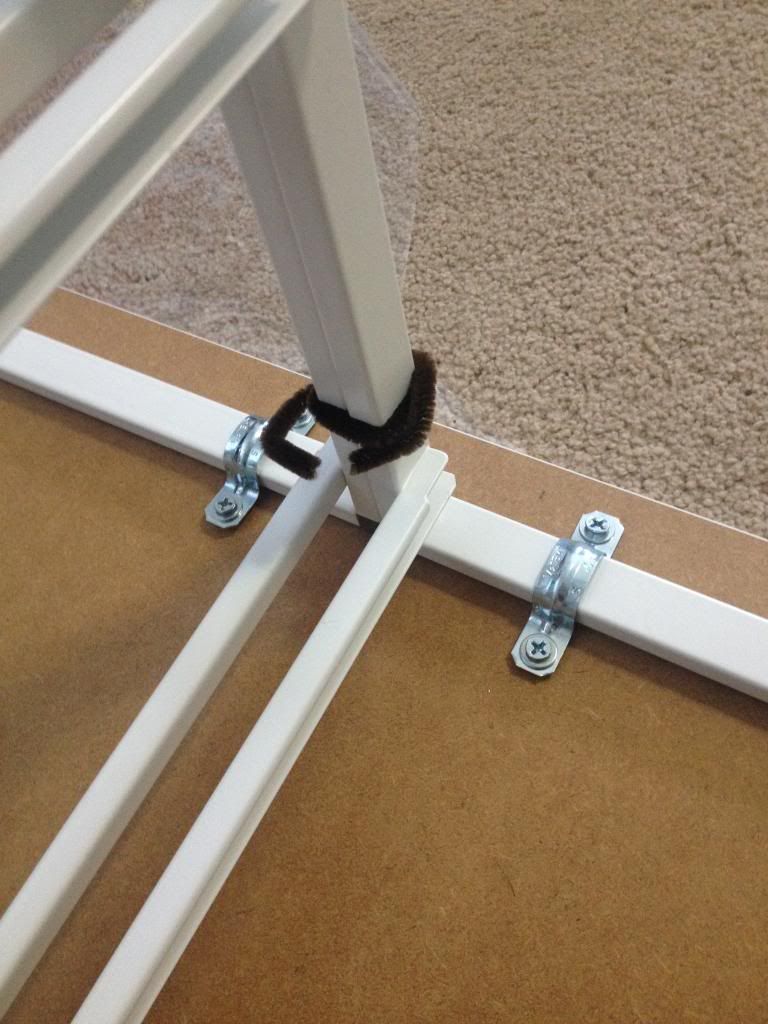
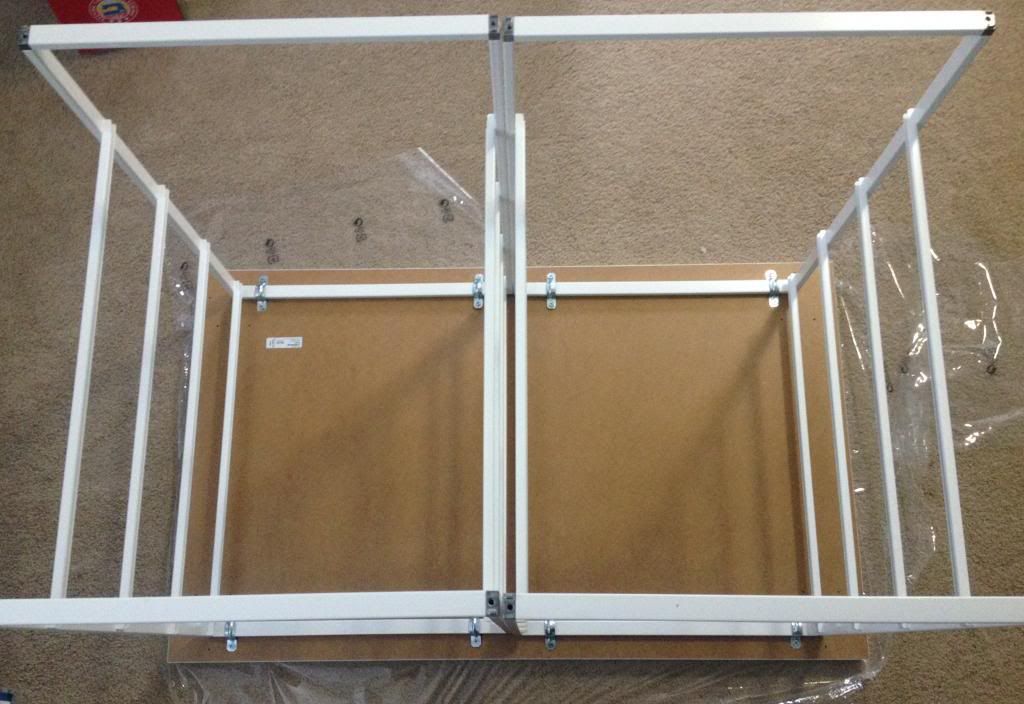
3.  Place your shelving unit frames side by side on top of the table top. ( I used the pipe cleaners to snug them together for the time being.)  Line up where they meat on that center line you drew in the last step. 

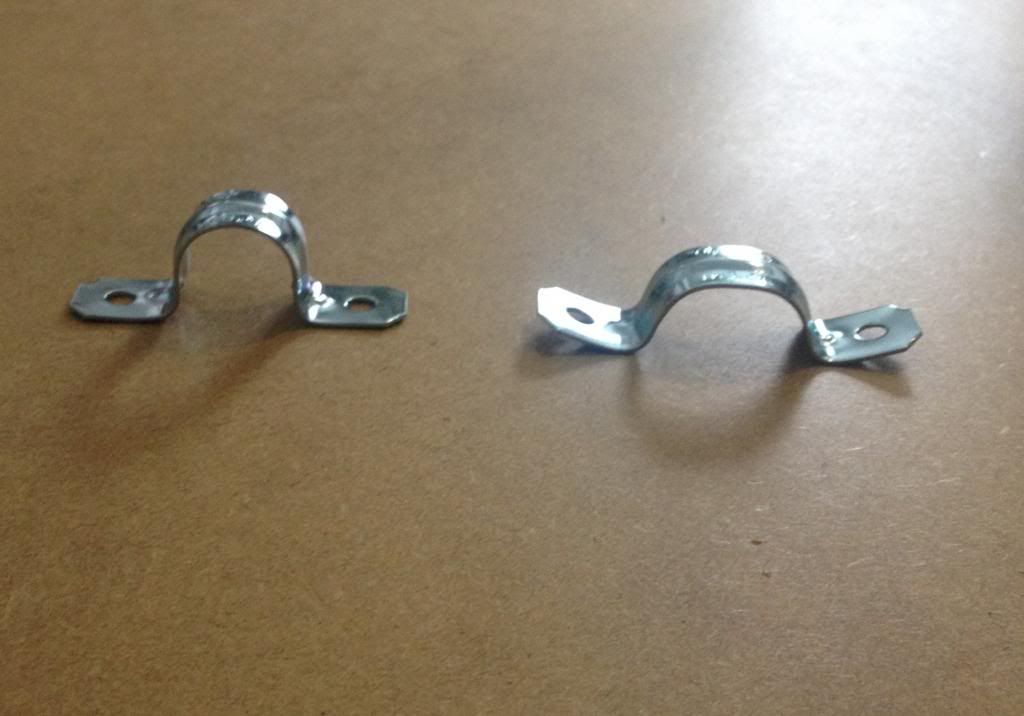
4.  Now we need to attach the frames to the table top.  Here's where those metal conduit straps come into play.  Before you can use them you need to flatten them out a little so the opening isn't so rounded. This will help them hug the shelving unit frame better.  I just placed them one at a time on the underside of the table top and used a hammer hitting them on the curved opening until they start to look like this. 
Don't worry about how the ends are upturned.  You can just use the hammer to gently tap them down.

5.  Now place the adjusted strap across one of the shelving unit frame pieces and screw it in on one side with a washer between the screw and the strap.  Don't over do it with trying to get the screw in too tight.  MDF isn't as strong as wood so if you put too much force on it the screw will strip the hole and it will become wobbly.  Just go until it is sunk all the way and feels snug.  Screw in the other side the same way and repeat for the other 7 straps.
 

Here's how I laid them out on the under side of my table.  I used 4 on each frame with two in the front and two in the back.  

6.  One last thing I did before turning the unit over was to zip tie the vertical pieces together where they meet in the middle but only at the back so you can't see them.  I did three ties, one at the very bottom of the shelving units and two more moving up toward the table top.  

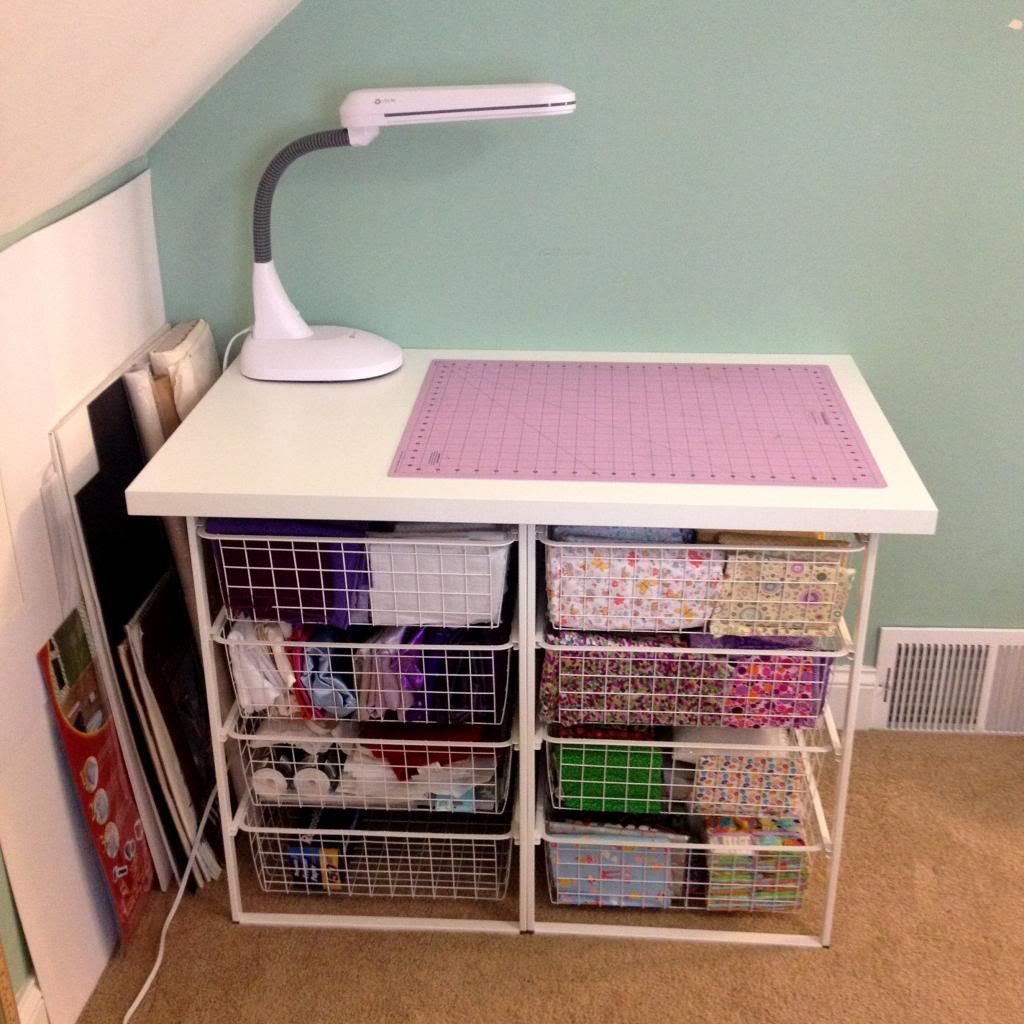
7.  Now turn it over and slide in your baskets.  TADA!

Of course it took me longer to organize my fabric than it did to assemble this entire storage station but I loved every minute of it.  I get so excited about purging and organizing.  It's totally rejuvenated my crafty spirit for the new year.

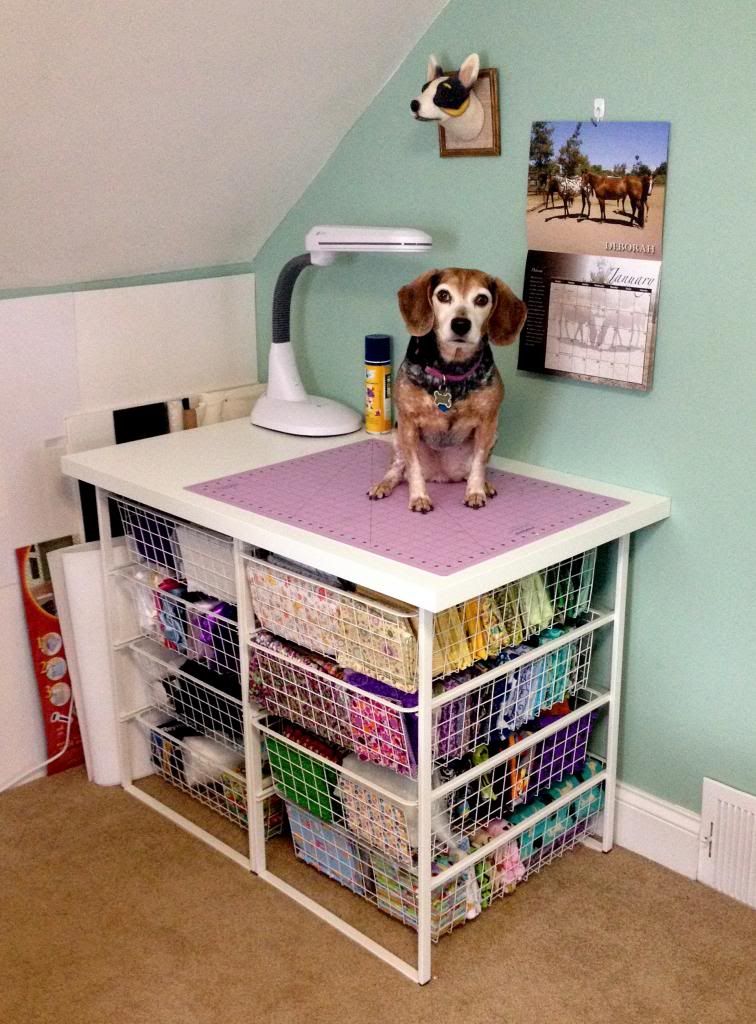
I use the station as a cutting table, complete with one of the Ott lights my wonderful hubby bought me for christmas.  It's also my new favorite place to charge my computer.  I don't need to tell you how much the dogs love to model new things so here's a pic just to emphasize it.

Gidget loves the craft room by the way.  I think it's the soft carpet and that there are tons of places to take naps.

Have you ever done an IKEA furniture hack?  Let me know all about it in the comments!

Saturday, May 19, 2012

Idiots Guide to Mess Free Knob Painting

Have you ever painted/stained a piece of furniture and got all the way to the knobs only to get paint/stain all over your hands and lots of finger prints on your finish?  Well enough of that!  I have a super easy and super cheap solution.  Check it out.

Supplies:
Wooden Knobs
Piece of styrofoam (you can also use a few pieces of cardboard sandwiched together but foam is easier)
Toothpicks

1.  First take your toothpicks and start shoving them in the opening on the bottom of your knob.  Make sure you jam enough in there so that they are snug.  I used between three and four for each knob.

2.  Now hold onto the toothpicks and start painting.  By holding the toothpicks you keep your hands nice and clean.

3.  After each coat stick the exposed pointy ends of your toothpicks into the styrofoam so your knob is upright.  That bad boy isn't goin anywhere.  

4.  Make sure you let them dry thoroughly before removing the toothpicks so you don't get any fingerprints after all your hard work.  

5.  Make sure you have a dog standing by who wants to get his head accidentally painted when he jumps on you in the middle of your project.  This step is optional.  

Thats it!  Hope it brings a little more sanity to your furniture finishing process.

Paint on!
Anita

Sunday, March 25, 2012

Hot Mess

This is how I feel right now.
Yes I would definitely say my crafting world is a hot mess right now.  Still working on those "works in progress" but unfortunately got distracted last week.  I was doing so well too.  So here's what happened.  I had started my new project of a crocheted cowl after finishing off painting the wooden ornaments in my WIP box.  They are all ready to be personalized for Christmas gifts.

Now I have to say this cowl did take a bit longer than I expected as I un-did and re-did it twice.  I'm still a little unhappy about the seam along the back but I took a big girl pill and realized it's not that big of a deal and I'm the only one who would notice anyway.  It has also taken a little longer than usual because its almost entirely done in single crochets, except two rows. 

That's over 7500 stitches, but I'm super happy with the texture of it.  I ended up using Caron's Simply Soft acrylic yarn and have to say I'm a fan.  This is the second project I've used it on and have plans to start a brimmed beanie for myself as the next new project, after I finish two current ones of course.

That's not much of a distraction, you say?  Listen to this.  My loving husband decided spur of the moment to go out of town for a few days and I got a hair up my butt to build him a piece of furniture as a welcome home gift.  (How proud I thought he would be to see me accomplish something big on my own from start to finish.)  We recently got a new couch and ottoman for the living room so now I have renewed urge to remodel rooms in the house.  I've been wanting to try my hand at building for some time now and what better time than when your capable husband is out of town to get yourself in what could be an over-your-head project?  But I had a plan.  Granted it was made in about an hour but a plan all the same. 
I took an extra day off work and headed to my parents house to recruit my dad.  I showed him the plans for this apothecary media cabinet from Ana White that I fell in love with.  Now I had read all the instructions and it didn't look all that hard.  Just a bunch of geometry, which I happen to be pretty good at.  I have to say Dad was pretty skeptical but with some encouragement from me and Mom we headed off to the store to buy the wood.
Seven hours later we had finally finished cutting all the necessary pieces to put my puzzle together.  By that time I was worn out, my Dad looked pretty tired and even the dogs were ready to call it a night so we headed home.  Thankfully Mom volunteered my Dad to come over the next morning to help me get the frame put together.  And we did just that.
After only one extra trip to the Menards(a record for one of my projects) we were able to put the frame together in only 3 hours.  That included time for breaks to throw Mr. B's frisbee and scratches for the Sadie.  I felt really good about the progress and told Dad I could handle it from here, plus I had a girls night out to get ready for.
The next day however is where an unexpected surprise slowed me down.  My husband showed up at 6 in the morning, and a whole day early.  He had driven 12 hours and through the night just because he wanted to be home.  Now while I love my husband and really missed him, I was secretly upset that he had ruined my surprise.  How dare he?  After explaining what I was up to he also decided to point out that one of my shelves was pitifully crooked, and after taking a second look I had to agree with him.  How dare he again?  Now what to do?  Well I'm entirely too anal to have left it that way, so I dismantled the right side of the cabinet and re-screwed the shelves so they would be level.  I have since been able to start on the drawers but it took me some engineering to figure out a system to be able to assemble them on my own as I refuse to let Dan help me.  This is my project and I'll be damned if I can't finish it.  (I have a very strong response to someone telling me I can't do something.  Watch me.) 
So here I am with another unfinished project on my hands and a big mess in the garage.  Plus I need to get my butt in gear to start planning the garden and yard work to start.  OMG if I only had two more hands and 10 more hours in the day.  Stay tuned for more developments and keep your fingers crossed for me!

Build on.....and on!
Anita