Showing posts with label paint. Show all posts

Monday, December 22, 2014

The Evil Ornament Challenge Part 2


If you read Kelly's last post you'll know a little about the title of this post.  I bought about six of these 4 packs of glass ornaments after Christmas from the clearance bin a couple years ago. Yep I said years. They were a deal too good to pass up being only .99 for a four pack theater was originally 3.99. They have been taking up valuable storage space in the craft room ever since. As Kelly mentioned I recently moved the craft room to the first floor of our house(reveal post coming soon) and decided to purge them in the best way I know how....a Crafty Challenge!  The only rule was that you have to make 4 different ornaments, medium was up to the crafter.

I'm all about glitter this year so I knew it would play a part of at least a couple of my ornaments.  Here is instructions on how to apply the glitter to the inside of the ornament.  Other than that I winged it the whole way.  Here's what I came up with.

In true Anita's-fashion I couldn't just stop at the assigned 4 ornaments. There were two additional rogue ornaments in the storage bin so I decided to do something with them as well.  So here's the run down of what I did with each one.
I took inspiration from a Santa ornament somewhere on the net for this one. Inside was coated in fine red glitter and suit elements were made from ribbon.  A classic look.

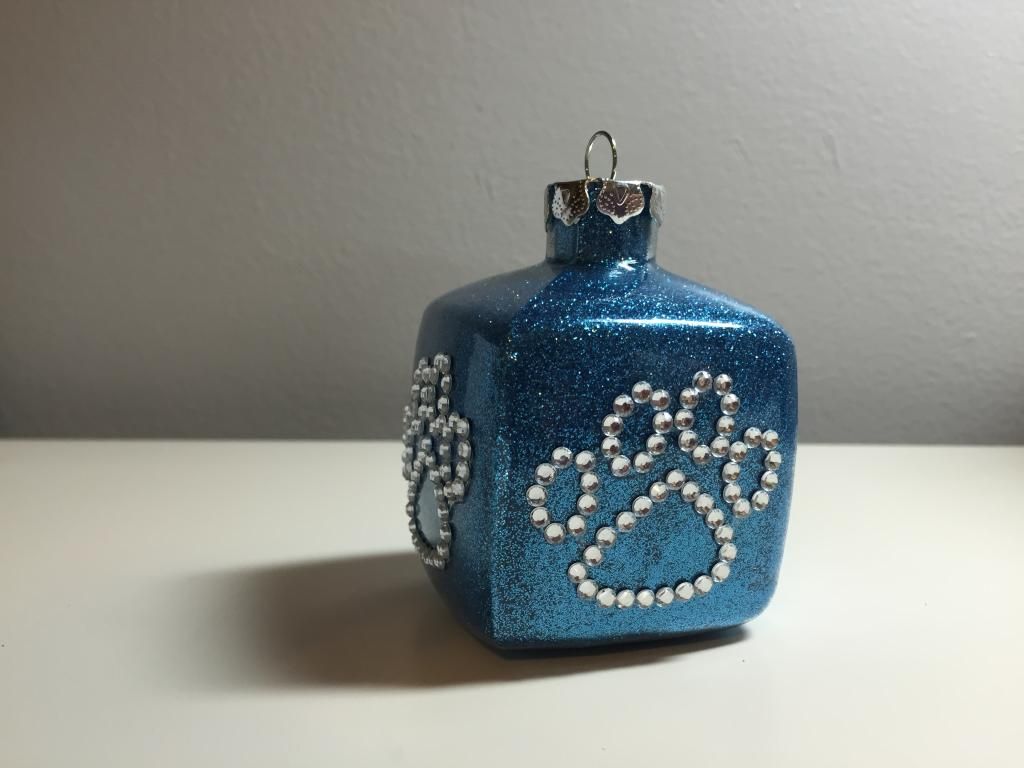
This was the easiest of all six. I coated the inside with blue glitter and stuck on rhinestone paw print stickers to all four sides. That's it!

In contrast this was the ornament that took the longest. I sifted through my button jar and found enough festive red buttons to plaster the exterior of my if my blanks.  This was a little like putting together a jig saw puzzle.  After all the buttons were hot glued in place I filled it with fake snow to make it look so much nicer.

Then there's the polka dot glitter ornament. For the remaining ornaments I painted the outside with glass specific paint, baked them according to the bottle instructions and then filled the interior,  I felt it needed a little something extra so then came the bow.  This one may become a gift.

The snowmen were pretty easy aside from using a super tiny brush to paint their features.  The hubby even picked out the glitter color from my stash because I couldn't decide.  GREAT CHOICE!

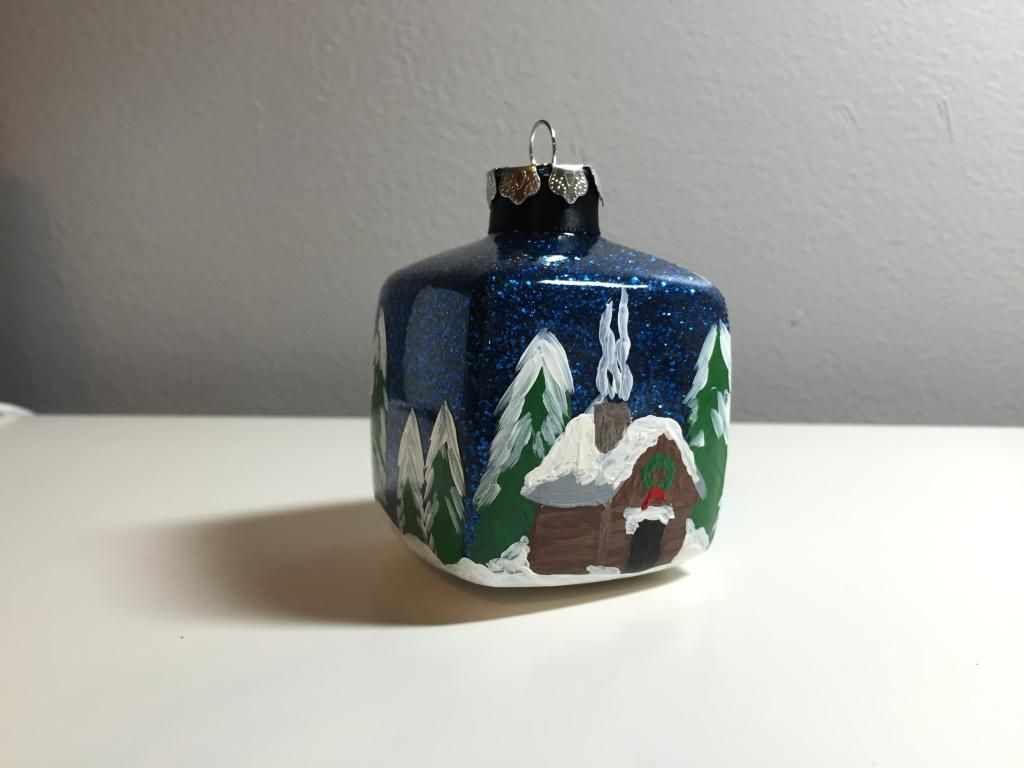
And then there is my favorite.  I painted on this woodland cabin scene and then coated the inside with a dark blue glitter.  Its like a twinkly star christmas night.  Really proud of this one.

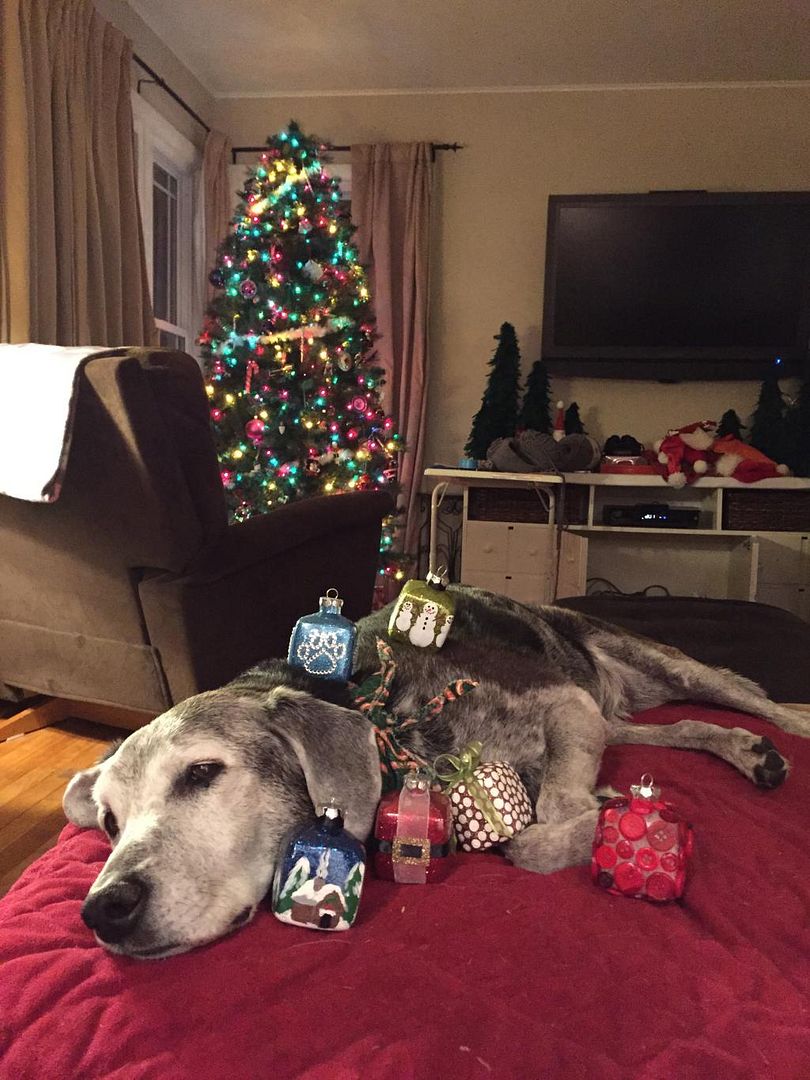
Sadie liked them all so much that she tried to decorated herself instead of the tree with them.
Nice try, adorable old dog.

Craft on!
Anita

Tuesday, December 16, 2014

The Evil Ornament Challenge

My co-blogger was kind enough to start a challenge this Christmas: The Christmas Ornament Challenge.  The inspiration for her challenge was cleaning of all the crazy things.  Anita moved her craft room downstairs and in the process did some cleaning and organizing of the cool bits and nubs one might find in a well stocked craft room.  The new room looks amazing, is quite spacious and comfortable, and the windows let in the crazy amount of light so as to inspire your inner most artist, tres awesome!  While working through this transfer of creativity she found several four packs of glass ornaments she had purchased at a deep discount for a Craft Club project two or three years ago.  Well what does one do with several boxes of plain ornaments, you trick your friends and relatives into taking them while baiting them into a false sense of security with a smile and a gentle tone of voice.

"Hey would you like a box of these? I have several and I can't use them all".
"I bet I could think of some....."
"Too late! You touched it now you have to take it! This is the Ornament Challenge, you have to create four different ornaments and post it in December".
(this whole exchange she did with a big ole smile on her face)

These little glass squares brought me much consternation as I pondered my approach to the challenge at hand. I could think of two or three different styles but I could never quite get to four.  Alas, would I never be able to complete the challenge and be saddled with these little glass squares of doom until the end of eternity?  I think not, the idea finally came to me on my commute home one day.  Kids crafts!  I would decorate my ornaments using the mediums I so adored as a child: clay, glitter, paint, and collage.    

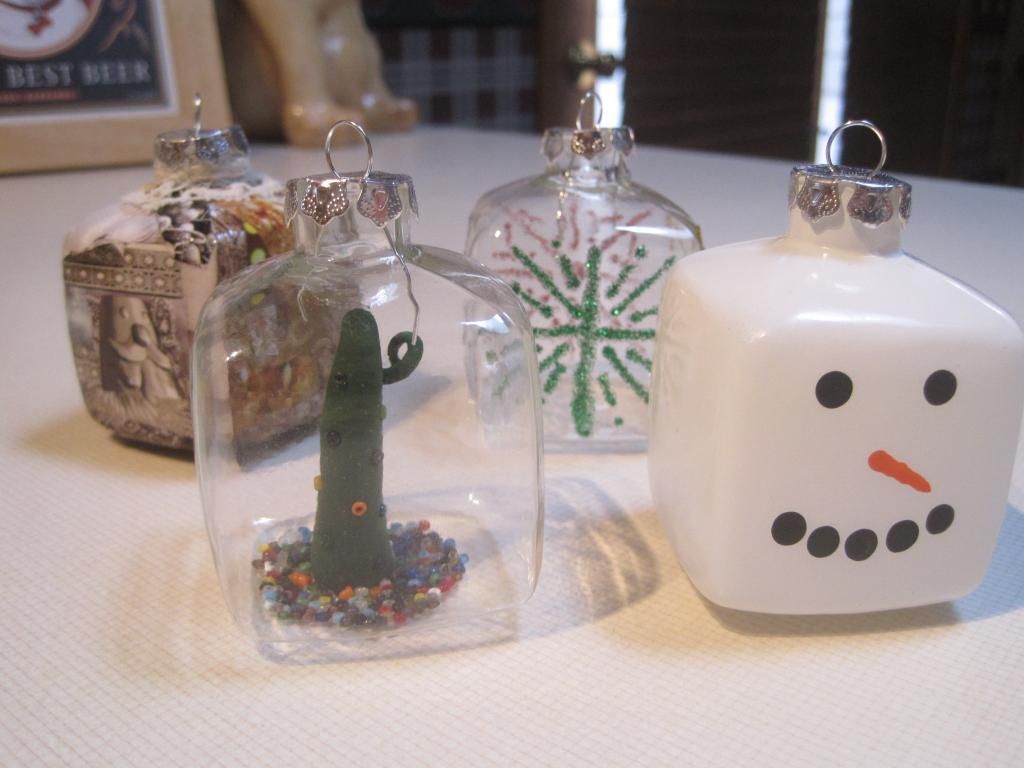
The first one was Paint.  I wanted to make a snowman out of one for sure, I had that idea right away when I was still unsure of how I would approach this bunch of Christmas cubes.  I sprayed him white, used a Q-tip for the eyes and coal smile, and painted on a cute little carrot nose.  He is so happy looking.  This guy took all of ten minutes, not including dry time.

My second inspiration was Glitter!  Oh how I loved glitter as a little girl.  I wanted glitter on every craft project I did back then.  I got some glitter pens and drew different colored glitter snowflakes and all four sides of ornament.  I tried to make them all different, which is why they kind of really look homemade but that makes me love it even more.

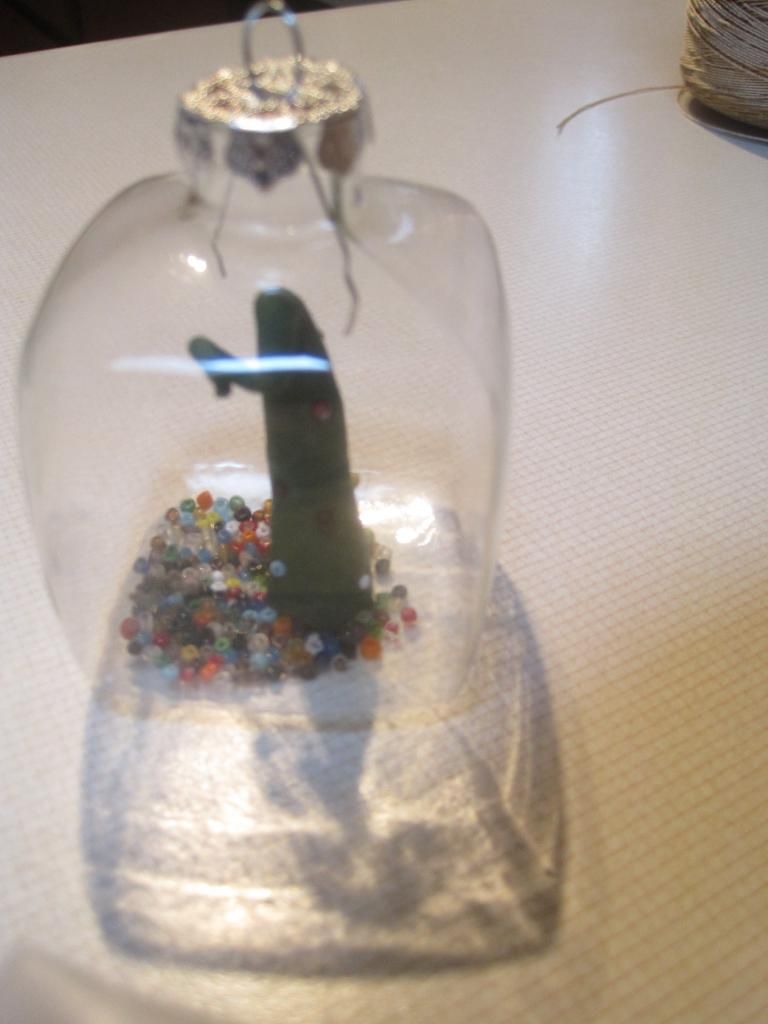
The third option was Clay.  The only clay I had was some Sculpy so I went with that.  I was jubilant to find I had a dark green in my stash as my idea was to do a Christmas tree.  I had to make it thin enough to be lowered down into the cube through the hole in the top.  I decorated the tree with colorful seed beads and gave it a curly top for an increased sass factor.  I glued him to the bottom of the cube and poured in some extra seed beads, they sound so nice tinkling around on the glass.

Finally I did Collage.  The ornament was created by cutting out lots of brightly colored clippings from a Pier1 catalog and modge podging it onto the glass.  I peeked in through the hole in the top occasionally to make sure I wasn't leaving any naked holes in the paper. I added a little touch of lace to the top to dress it up, it needed something to bring it together and helps it look a little more antique-ish.

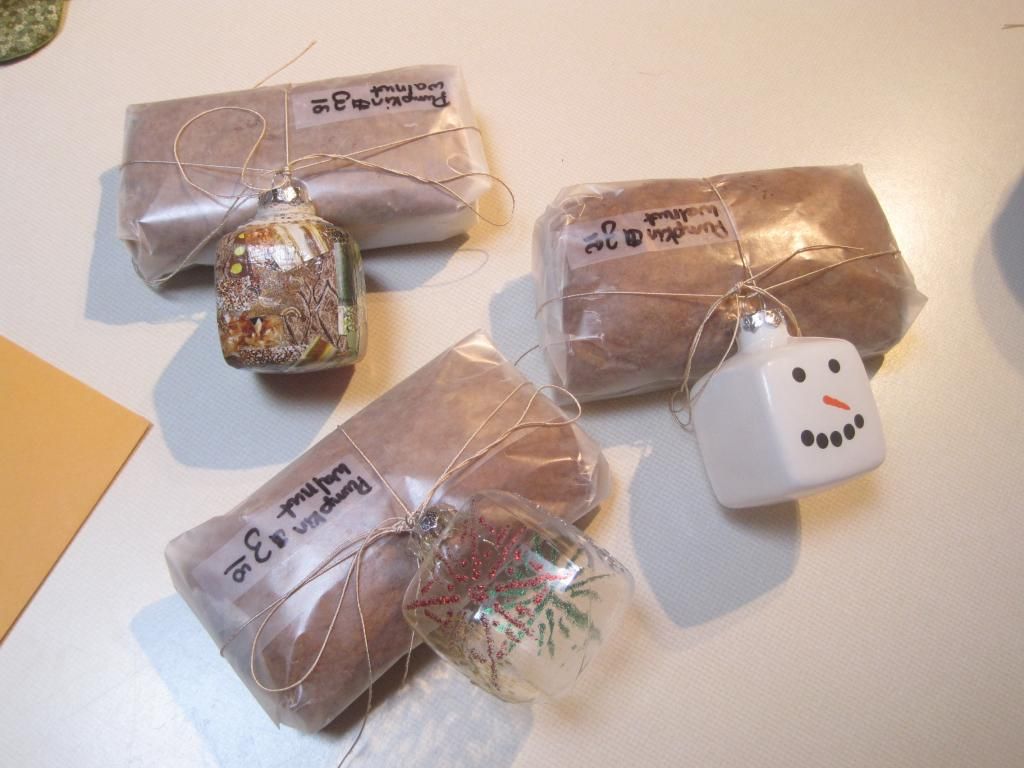
I like how happy it made me getting to delve back into my past and make these ornaments.  Three of them were attached to small loaves of pumpkin walnut bread and donated to Animal House Shelter for their bake sale.  There was one I liked too much to give away, the clay one, so I kept it for my craft room for inspiration.  Keep on keepin on, the 2015 crafts will be here soon!

You're up Anita!
Kelly

Friday, April 11, 2014

Painted Feather Mug

I made this beauty in about an hour, minus drying time.  This a great project for a quick crafting fix.  I'll show you how to paint the feathers on a flat surface but the idea is the same on the mug.


Supplies

Glass or ceramic mug (oven safe)
Glass paint  - 2 colors (I used martha stewart.  #33132 hummingbird in pearl and #33143 sterling in metallic.)
Glass paint marker - black (I used the DecoArt brand.)
Paint brush

FIRST!  Clean your mug.  Any dirt or grease could compromise your paint job and cause it to peel.  Practice one feather on a piece of paper before you start painting the mug.

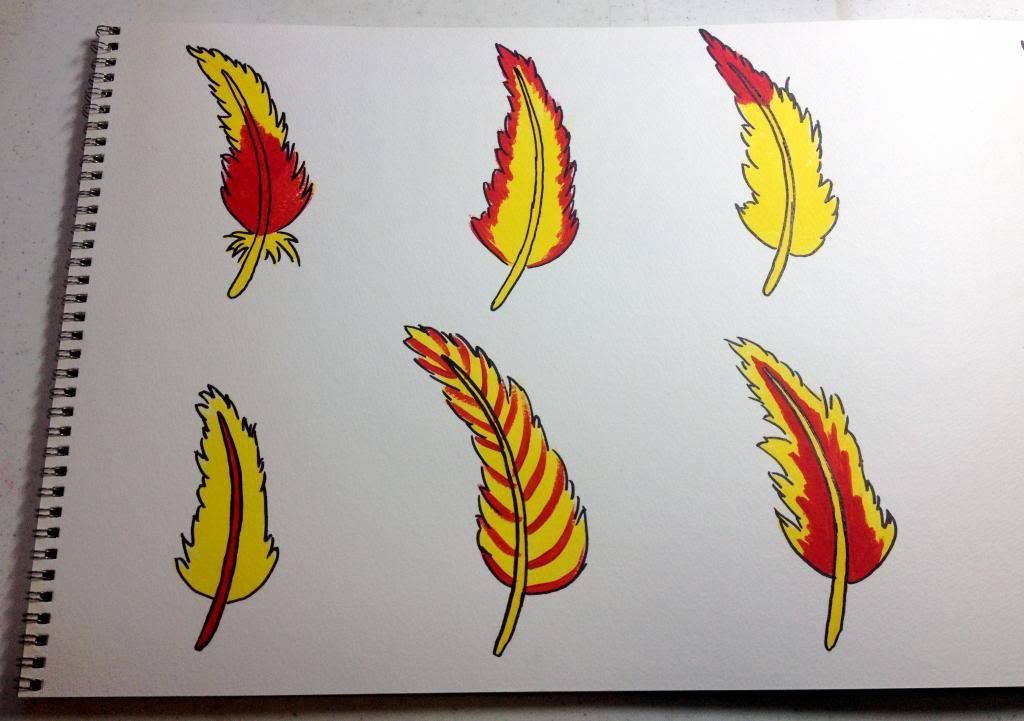
1.  Paint the feather shaft.  This is just a gently tapered line.  I mixed it up and made some of mine curved and some straight.  The curved feathers looked alot more realistic.

2.  Now paint the body of the feather in strokes swept toward the tip starting about 1/4 from the base.  You can leave gaps in the feather body and change the general shape from one to the other but try to get a tapered look to the tip.

3.  Optional*  Now make a couple strokes at the base of the body in the opposite direction.  This is those little downey bits on real feathers, but don't go over board.  Just a couple strokes is fine.  I did this on about half my feathers.

4.  Now take your second color and add some interest.

Here's a couple ides for patterns.  You can paint directly on top of the previous color.  This stuff dries really fast.
Don't worry about the black outlines.  That's coming in step 6.
5.  Repeat 1 through 4 till you cover the surface of your mug with feathers.  I even stuck one through the handle opening. 

5.  Now take your glass paint marker and load up the tip just like with a regular paint marker.  Now you will outline each of the feather shafts and the general outline of the body.  Don't worry about being perfect on the outline.  Imperfect and sketchy lines make it more interesting.  You're just adding texture.

6.  Now take your mug cure it according to your paint's instructions.  Here's what I did for the Martha Stewart brand I used.  Let dry for 1 hour.  Then place in cool oven.  Set oven to 350 and bake for 30 minutes.  Turn oven off and let mug completely cool in oven.  Wait 72 hours before using.  Also make sure to wash in the top rack of the dishwasher.

DONE!  Now you have a distinct mug you can take to the office that everyone will envy.

Gidget likes the mug but thinks my next one should be paw print.  More beagle-centric.


Paint on!
Anita

Monday, November 21, 2011

2 x 4 Turkey Triumph

What is the COOLEST craft in my life right now? Say it with me everybody.....2 x 4 wood crafts! Very good, you all get an A.  For October's Craft Club I sort of demanded, in a nice way mind you, we do these awesome 2 x4 turkeys.
Wendy over @ Craft Goodies is a master when it comes to this super sweet medium know as wood.  She has created some very nice things using all kinds of wood and wood products. Penguins, bunnies, deer, and all things cute. Wendy, if you are listening, I have kind of been stalking your blog but in a nice crafty way, not a creepy way, I promise!  She posted a wonderful tute for these happy guys on Ucreate where she was guest posting and as soon as I saw them I knew they were too cute to miss.
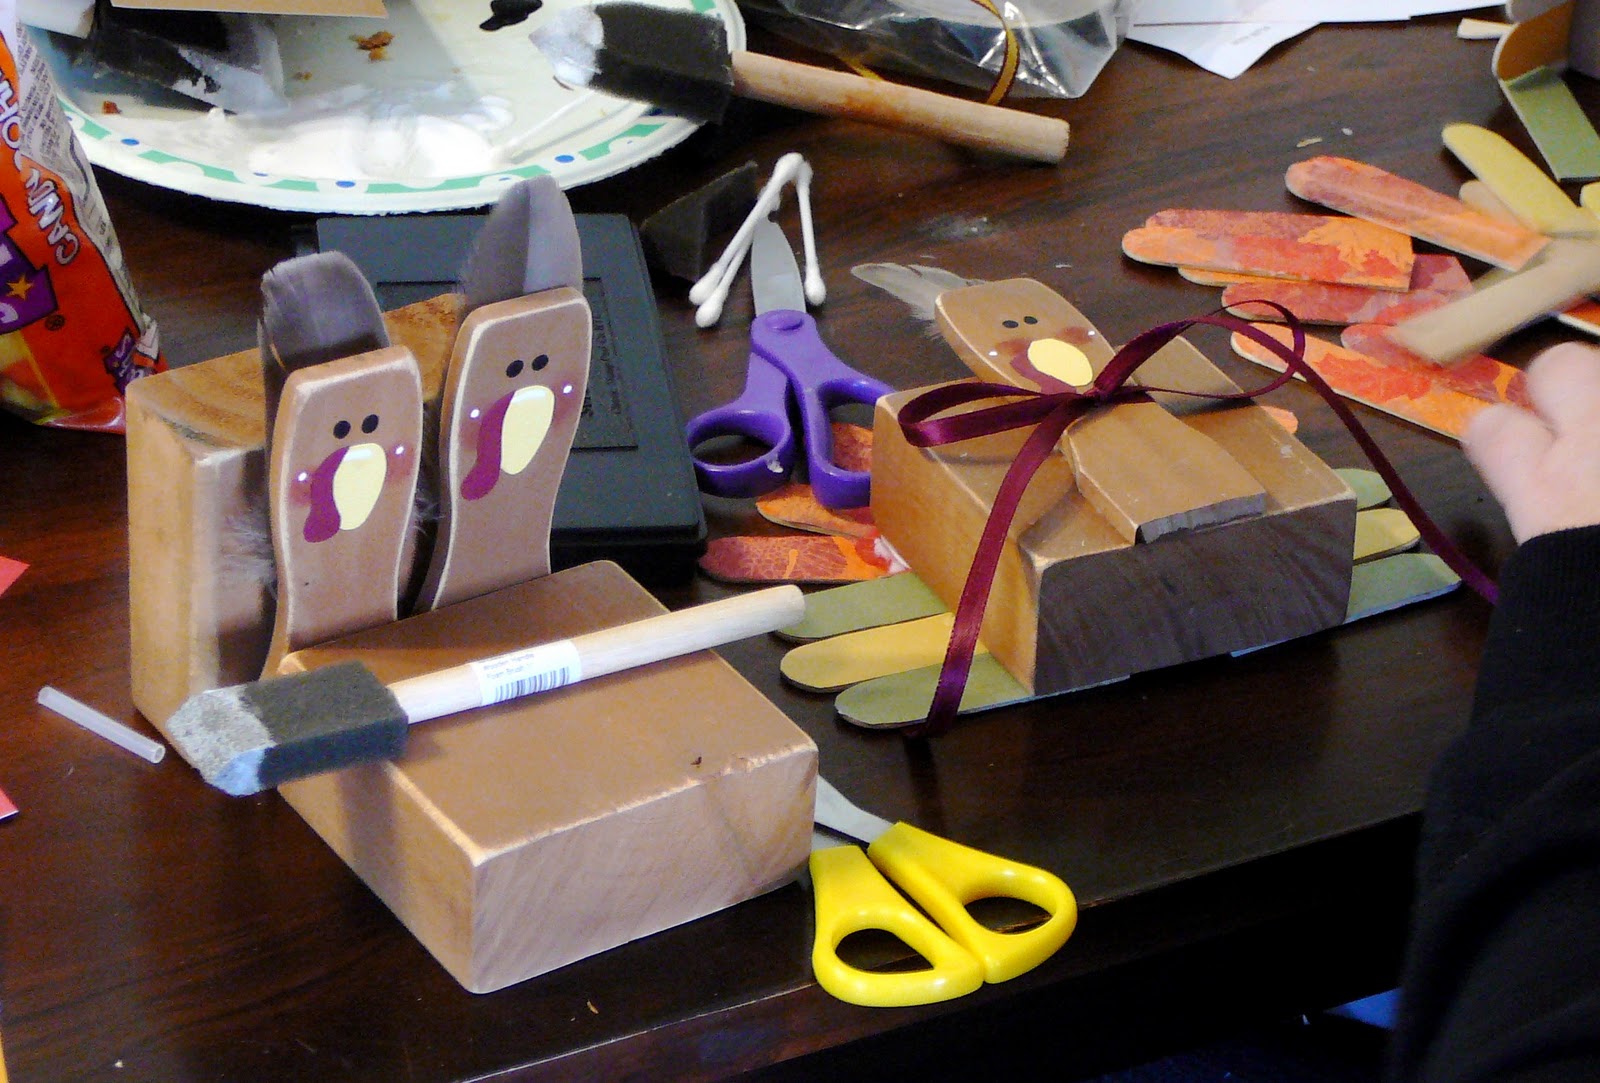
So the Craft Clubbers got together and got to work on our turkey lurkeys.  All the 2 x 4 wood is reclaimed just like the mummies we made for Halloween.  The scraps collected from assorted work sites and dumpsters let each crafter make as many birds as they could want.  We got the necks, which are large paint stirrers, for free at the Lowes.  Thanks Lowes! We had the paint, glue, ribbon, and sanding blocks already.  So all we had to buy in the end was the giant craft sticks and some pretty paper.
As we waited for the paint to dry, turned out not as boring as you might think because Sarah was getting a little too comfortable with one of the Halloween decorations, we enjoyed some pre-tricks-or-treats candy, which gave us a great sugar rush to power through the sanding.

So, if you don't pay attention to little dogs named Mr. Biscuit while said paint is drying you get the lesson taught to you in the saddest 2 x 4 turkey way.  This was the poor victim of crazy dog teeth, he totally got the sanding blocks too. Is that the saddest nibbled on head feather you have ever seen? We got our eyes on you now Mr. B!
We made adorable faces, cut colorful feathers from our papers, and glued on little head feathers in a bevy of turkey bodies and laughter: we had Conan the Barbarian playing in the background.  Have you ever gone back and watched that movie? You really should, it was great fun. I swear in the end we made like a thousand of these little dudes, and loved every minute of it.  I have the nibbled on one, I named him Barry, and his lady friend out on my mantle ready for the family fanfare coming this Thursday.  I hope you liked our turkeys and that you go check out the tute to make your own gobblers, or maybe you make a a fine flock of peacocks, or a marvelous murder of crows!

Have a wonderful Thanksgiving holiday!

Keeping it gobbly,
Kelly, the origami ninja

Saturday, April 16, 2011

Outdoor Inspiration Station

This month's craft day meeting was inspired by this project from Cleverly Inspired, with a small modification.  We added cute little paper mache birds to ours.


This was another field trip day to gather all our supplies.  First stop was to our local Goodwill to pick up frames.  If you're going to try this at home remember you don't need the glass pane that comes with most frames.  That way you might save a couple more bucks.  There was a variety of selections from square to rectangle, plain to ornate, large to small.

Next stop was our local forest trail.  Caution!  A note about collecting wood;  Only pick up sticks that have already fallen off the trees.  Its not good for the trees to cut green branches and its also bad for your projects.  The dry pieces on the forest floor won't warp like the green ones when they dry.  Also make sure you're collecting sticks from a local area.  If you're from an area that has been affected by the Asian longhorn beetle or Emerald ash borer you know what this is all about.  The last thing you want to do is help transport a wood boring pest.


I would equate this part of our day as an adult version of an Easter egg hunt.  Mother nature had dropped sticks and branches all over the trail and it was first come first serve.  From some stick hunters there was intense scrutiny over just the right branch, and from others it was more of a quantity goal.  Trust me we were having to do a little Jenga to get all the sticks into our two cars.

I have to say the highlight of the trip was meeting an adorable little pit bull named Zoe.  She really liked Kelly.


Of course we would be the people to approach a total stranger and ask him if we could take a picture with his dog.

Now when we got back to craft central, aka my house, first step was to make the paper mache birds to go in our frames.  Everything we did that day seemed to work around letting things dry out.  Check out this tutorial.  The aftermath of the paper mache-ing was pretty crazy.


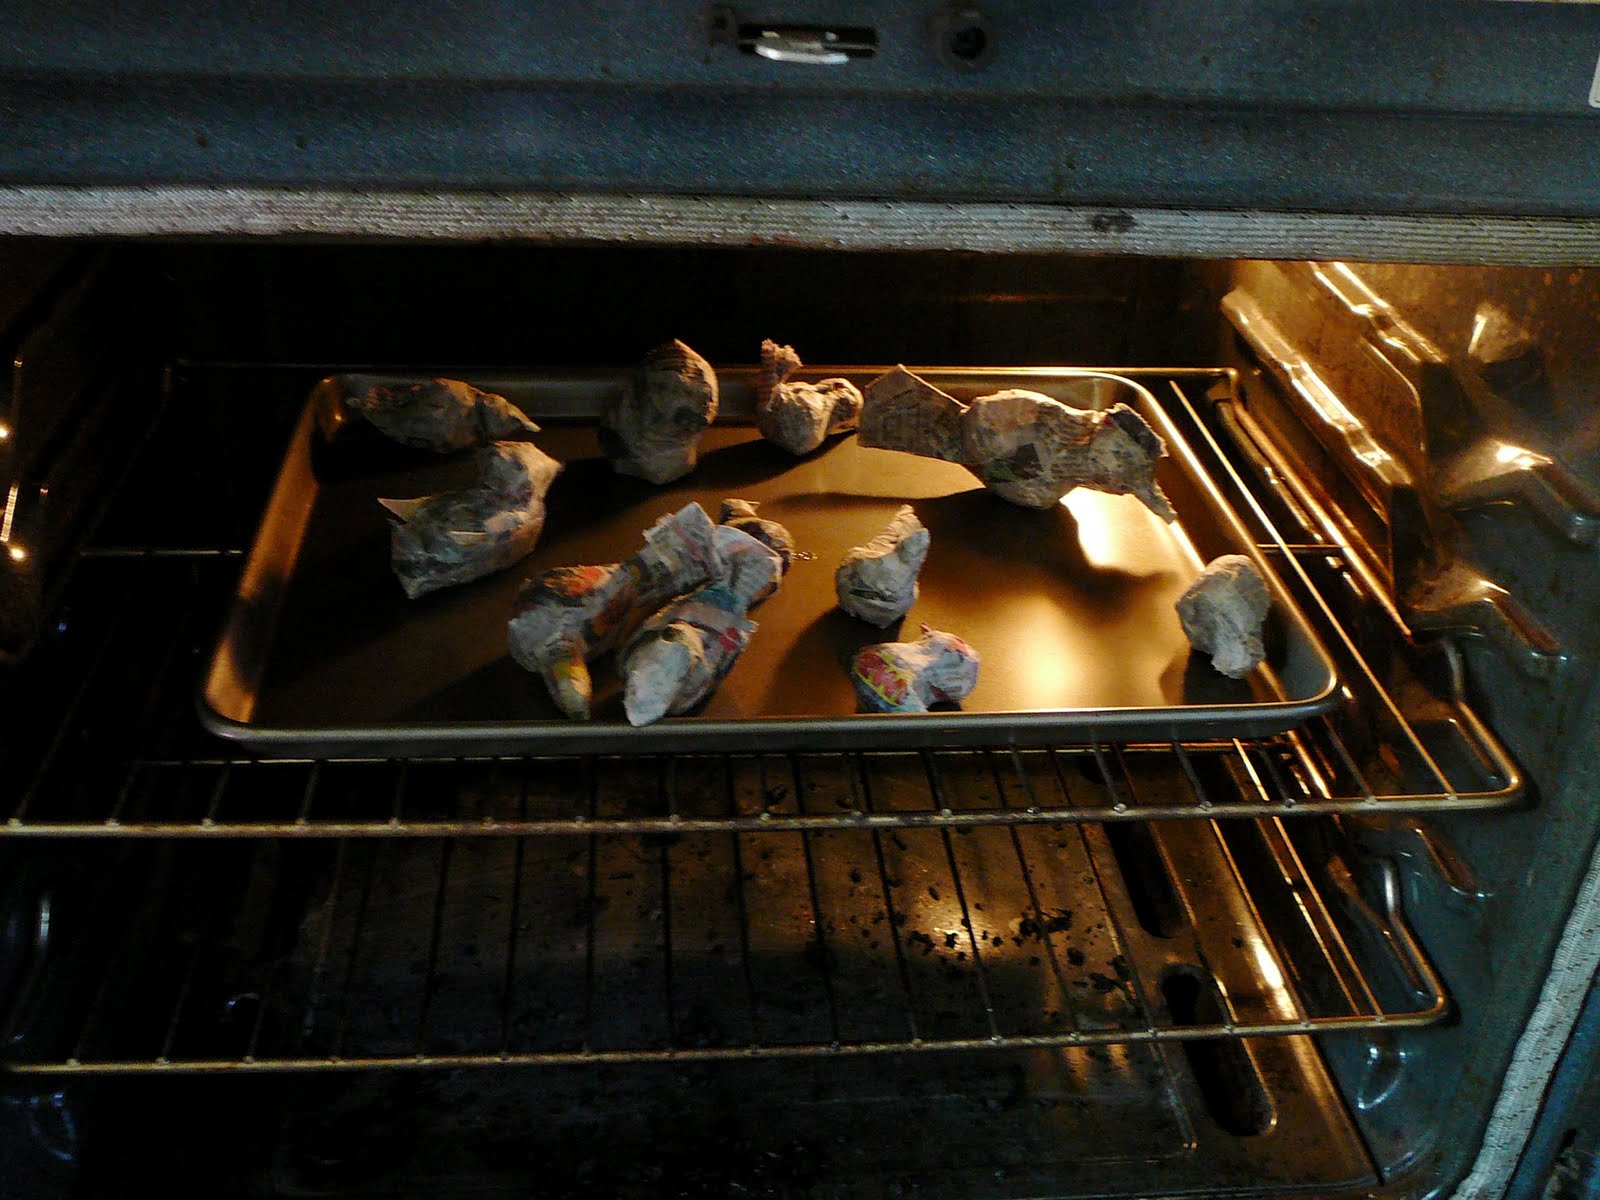
A good tip to help dry your paper mache birds is to stick them in a warmed oven.  Preheat your oven to 200-250 degrees and turn it off.  Now put your birds, on a baking sheet and let them sit in the oven.  This will help them dry out a lot faster than just air drying.  We had to repeat this process a couple of times to get them completely dry.


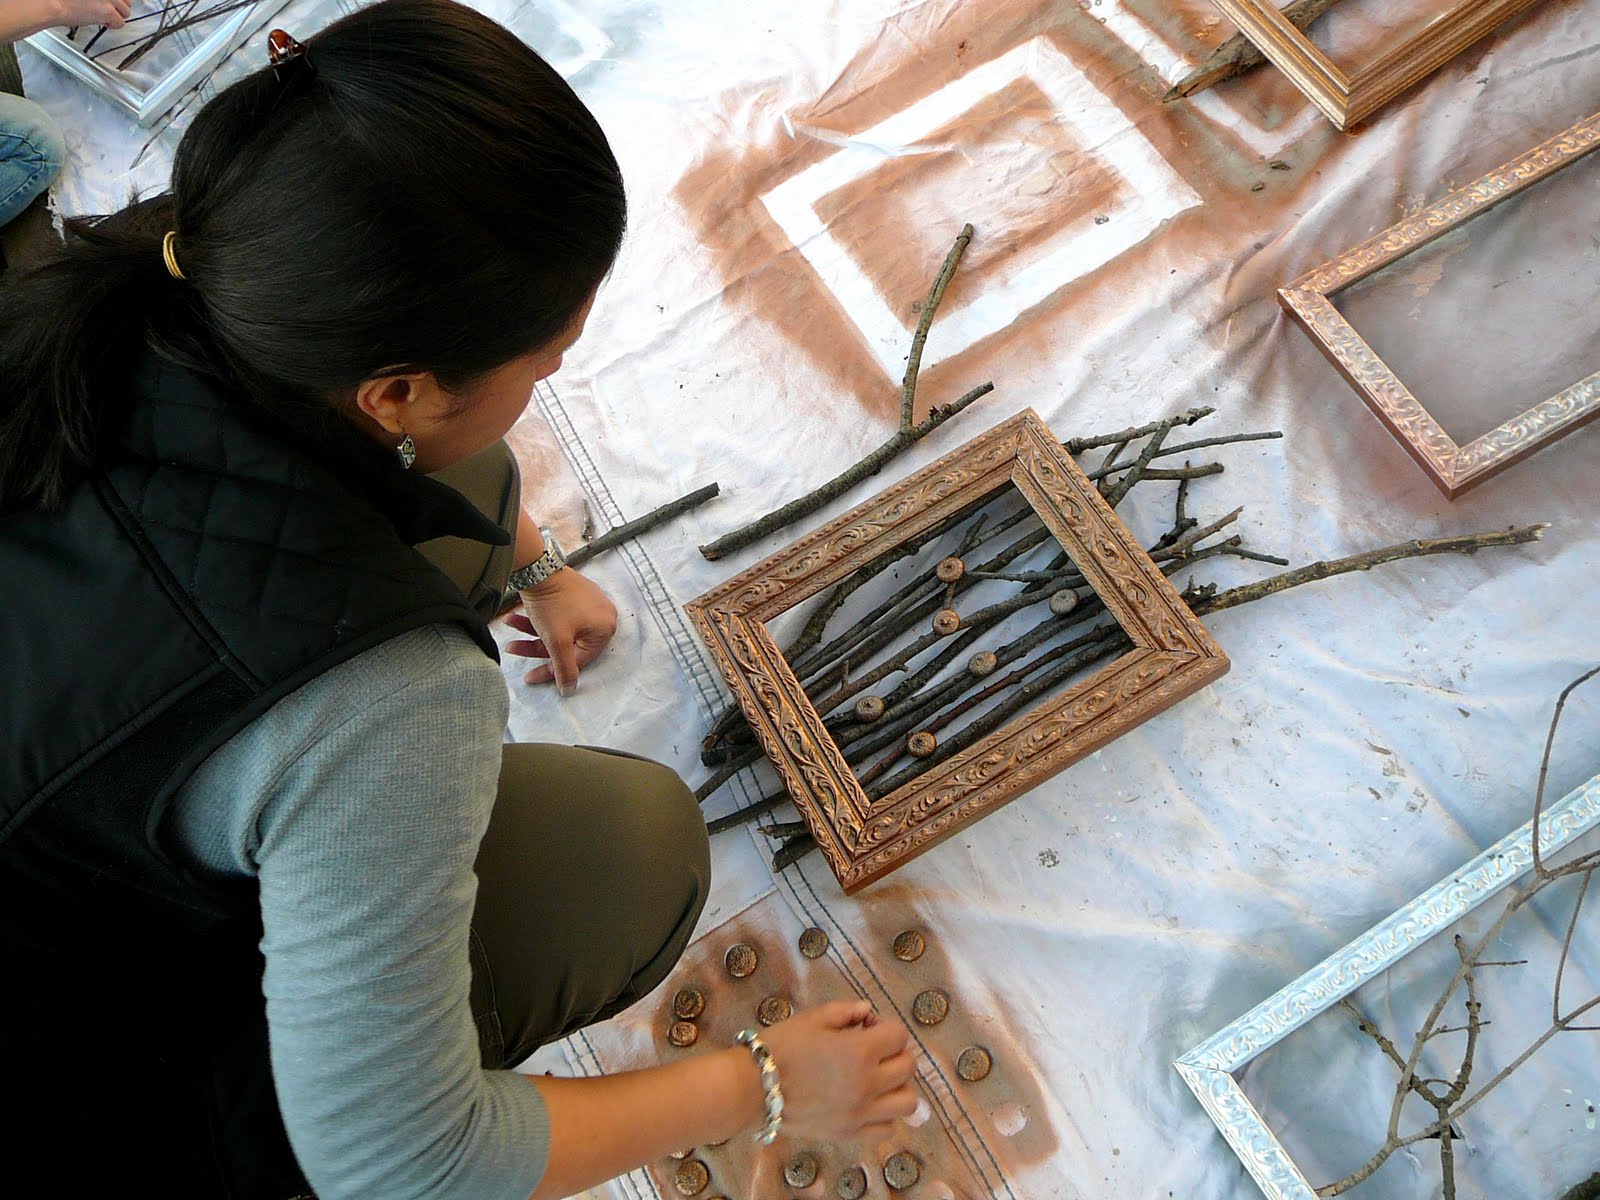
Next step was to go outside and paint our Goodwill frames.  Everybody had brought their fave spray paint.  Some of the girls got extra creative and painted some of their sticks and even acorn caps.  Remember when you spray paint you want to make sure your nozzle is about 12 inches away from your surface and do multiple coats to prevent drips/pooling and uneven coverage.   


Next up was to pre-fit our sticks to the frame.  It became very apparent that we had brought entirely too many sticks.  Sadie, however, saw this as a great opportunity to get some much needed fiber and fetch time in with our guests.  


Next up was more drying time so we supplemented the break with lots of yummy recipes for dinner.  We broke out the grill for the first BBQ of the season but  I have to say the highlight was a dessert Josie made for everyone; Tiramisu Parfaits.

Now the only thing left to do was paint our little birds and stick them in their respective frames and voila!


Some of the birds and frames were pretty enough to stand on their own. 


Have you been making any nature inspired crafts lately with the change in seasons?
 
Craft on!
Anita