Monday, September 26, 2016

Farm Quiet Book Page 6 - Big Red Barn


Next up on the farm tour is where all the animals like to sleep, especially cows. Who doesn't love a red barn?  No one, that's who.


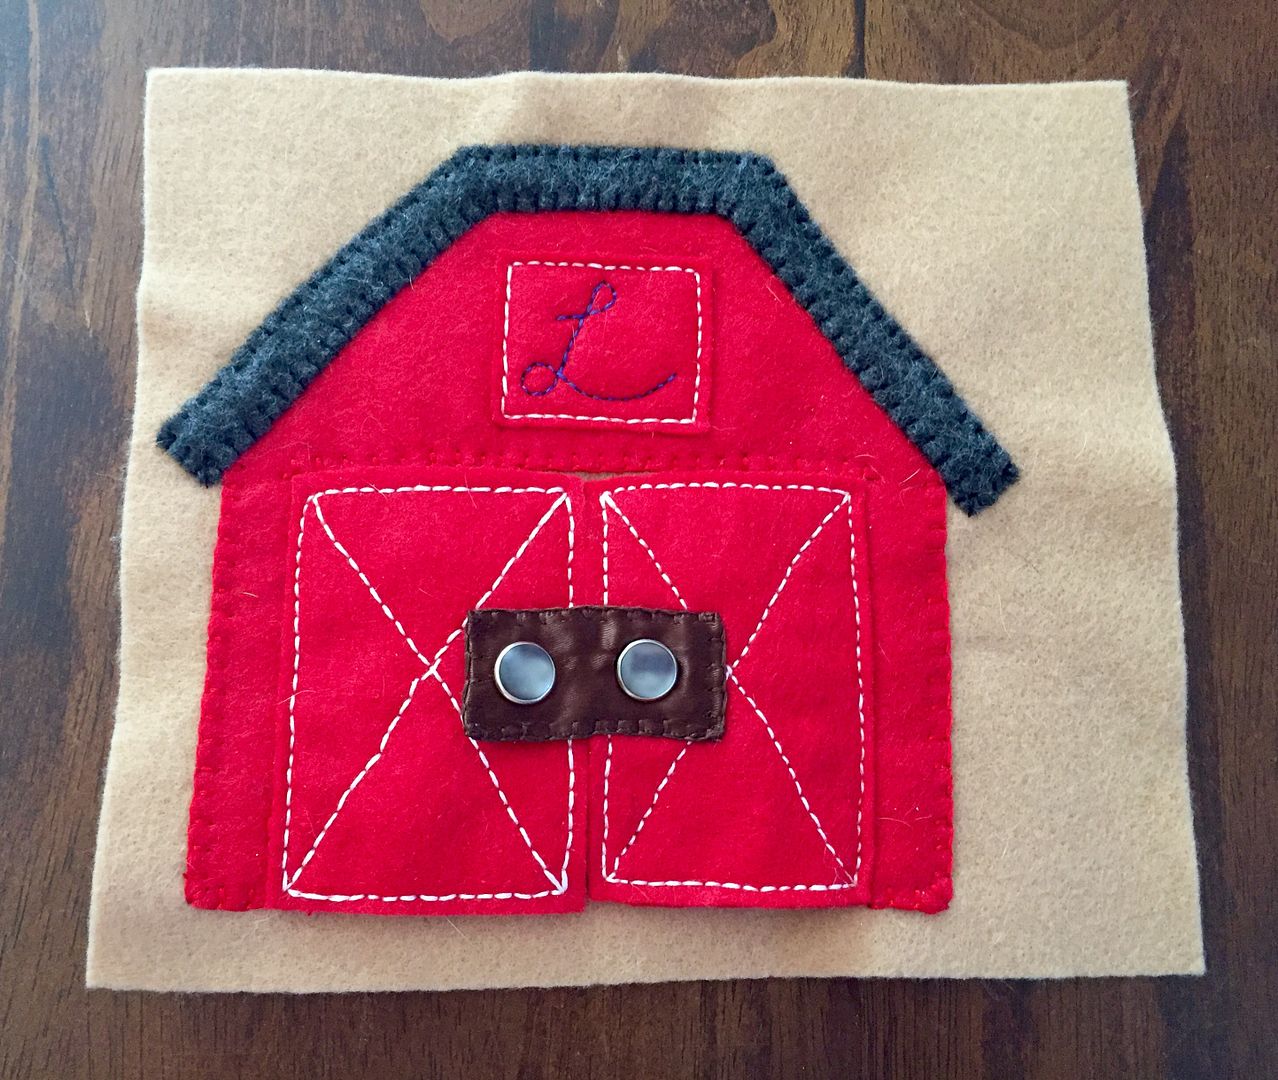
Did you notice the little L on the hay loft door?  It's my son's initial, love the little details.


I wanted to do another page with flaps and what better way then a couple of big barn doors. I added pearl snaps, which was easier than I thought, to add another tactile element to the page.


The snaps grab onto the felt, 2 layers, really well. The brown latch is just ribbon folded over with a piece of canvas in the middle for support.  The snap on the right side is just decorative but it helps to hold the ribbon onto that door. Here's hoping it will hold up to little fingers man handling it for a long time.

Last but not least I added in a Holstein, complete with udder, and this barn page was complete. Another page checked off the list.


 Stay tuned for the next page. Only a couple left and then I move onto assembly.

Craft on!
Anita

Saturday, August 27, 2016

Farm Quiet Book Page 5 - Busy Bees

Yes that is dog hair.  Its pretty much embedded into everything I make.
I loved the flowers so much from the pigs page that I needed to add them somewhere else.  Where better than to show how bees are raised.  I always remember seeing these white boxes on the way to my grandmother's farm growing up.


I added in what a hive looks like in nature just for variety too.


This page didn't end up being super interactive but I love all the details.  The bees are only attached by their faces, wings and stripes.  Their cute little eyes are French knots. 


I already love next week's page so stay tuned for more farming fun.  Only 5 pages left!


Craft on!
Anita

Saturday, August 20, 2016

Farm Quiet Book Page 4 - Dirty Little Pigs

Up next on my felt farm book tour is the pig pen.  I wanted to figure out a way to put a pig into a mud puddle without getting dirty so I made a pocket. 


This guy has a super long pink ribbon tail that is securely stitched into the bottom of the puddle. 


His piggy buddy hangs out by the delicious looking flower patch growing nearby.  The faces are stitched on to avoid any choking hazard and this time I added a little curly tail too.


The flowers are also stitched but just the centers so the petals stick out for dimension. 
Comments?  Suggestions for improvement?


Craft on!
Anita

Saturday, July 30, 2016

Farm Quiet Book Page 3 - A Horse of Ribbons


Next up on our quiet book is my favorite farm animal - the Horse.  Side note -  I actually went to school to study horses and worked in the field for a period of time after college until I decided I didn't want to be broke for my whole life and that horses would be a hobby in my life's future instead of a career.

This guy was surprisingly a lot faster than the chicks I posted last week.  First I drafted a little paper pattern for his head and ears and then we set off to make the mane.  I knew I wanted to make something fun to grab and opted for ribbon since I figure it will launder better than yarn in the long run.  I drew a line along the back of where his neck would be as a guide first. Then using my sewing machine I attached each of the folded over pieces of orange ribbon along the neck line.  No crazy measuring here, just stuck piece after piece under the foot as I went along.  When I got done with the orange I repeated the step with yellow for more color.  Each of the pieces of ribbon were 4" long.  I also added a couple pieces on his forehead since horses have mane that comes down between their ears too.

You can see the machine stitching in white thread on this picture of the back.

Next was to blanket stitch around his little ear in the back and then the main body.  I added a little nostril and smile to his face too.

Last but not least was his eye which I satin stitched on just like the chicks from last week's page.

Done!  Love this guy.  Stay tuned for next week's page.  I've got 7 more planned.

Craft on!
Anita

Saturday, July 23, 2016

Farm Quiet Book Page 2 - Peek a Boo Chicks


What came first, the chick or the egg?  Who says we have to choose.  Why not make a page about both?  This page is all about the way chicks break out of their shell.

I started out with an egg shape and stitched down some crack lines first before blanket stitching it to the page.

Next was a broken egg so that my Little One can lift up the flap to see who's inside.

Last but not least a happy little chick flapping his wings about.  I attached the wings only where they would come off the chicks body so they flap like real ones.

All the faces are satin stitched.  I'm not going to use glue in this book in the hopes of it lasting a long time so stitching was the only way to go.  I did add a little orange triangle under the beak stitching to make it a little more raised than the eyes.

Have to say I'm loving this quiet book more and more with each page.  Stay tuned for the next farm topic in felt.

Craft on!
Anita

Tuesday, July 12, 2016

Farm Quiet Book Page 1 - The Little Red Tractor

My little one is all of a sudden almost 6 months old.  I haven't yet finished a project for him and figure it's time to start.  With all the time I have been spending breastfeeding there has been a good amount of Pinterest surfing while stuck in a chair feeding him.  That means a lot of new boards and pins have been discovered.  One of my favorite new topics is quiet books.  I love the idea of making one just for him with things we love so Im going to start with a farming book.

I'll be posting each page as I finish and show you how I stitch them all together in the end for a finish product.  Here's the first finished page.....


I come from a farming family and my grandfather always had IH/Farmall tractors so rather than the John Deere green we went with red.  The tires are attached with white buttons so when he gets a little older he can practice taking them on and off.  I love how the blanket stitch around the edge looks like tread.  Inspiration came from this QB page.


Stay tuned for our next page.

Craft on!
Anita

Saturday, April 2, 2016

Easter decor made complicated....


So I've had these paper mache letters and bunny in the closet for about 2 years waiting to be finished. We don't have a lot of spring or Easter decor so I bought them with good intentions. Well, in the process of cleaning out the craft room closet I found them again for the umpteenth time and I took it as a sign. I didn't get everything 100% finished until the day before Easter but who cares, right?  Here's what I did.

First was the bunny. I had this idea to decoupage him with fabric but was a little nervous how he would turn out. I used some scrap fabric laying around and did it in layers until the surface was covered
Modge podge.....add fabric....more modge podge
I used Modge Podge to apply the fabric and then I sprayed it with a clear coat just in case. I like the extra shine the clear coat adds too. Bunny, check. 

I put them right side down on the backside of some awesome glitter paper that I had also been holding for this project for two years, traced the letter and cut it out.  Then I painted them a base yellow color, I glued the glitter paper to the front with good old Elmer's glue and added a plain blue paper to the back for a finished look.

Done, right?  NO!  The H and O would stand on their own but that pesky P was not balanced. It was right heavy unlike its letter cousin the R. What to do?!

Luckily I had a bunch of spare metallic plastic eggs laying around like any good crafty border.  Eureka!  I hot glued them in a little mound to support the right side of the P so it wouldn't fall over. Then I also added the remaining eggs to the H and O so it would look intentional and to add some standing support. Nothing like crafting under pressure to get your creative juices flowing. 

I'm pretty happy how the whole thing turned out. What do you think, Mr Biscuit?