Showing posts with label home decor. Show all posts

Wednesday, October 21, 2015

HTTC - Crocheted Spooky Kitchen Towels

This all started last year at a thrift store. My father was looking for some pictures to hang up in his home and is "thrifty" to say it nicely.  We found a very large Faith sponsored Thrift Store, and I mean huge, it took up most of the strip mall it was located in and then still had another separate store for furniture! I found a some cute decorations I used for work...and then there was this hand towel.

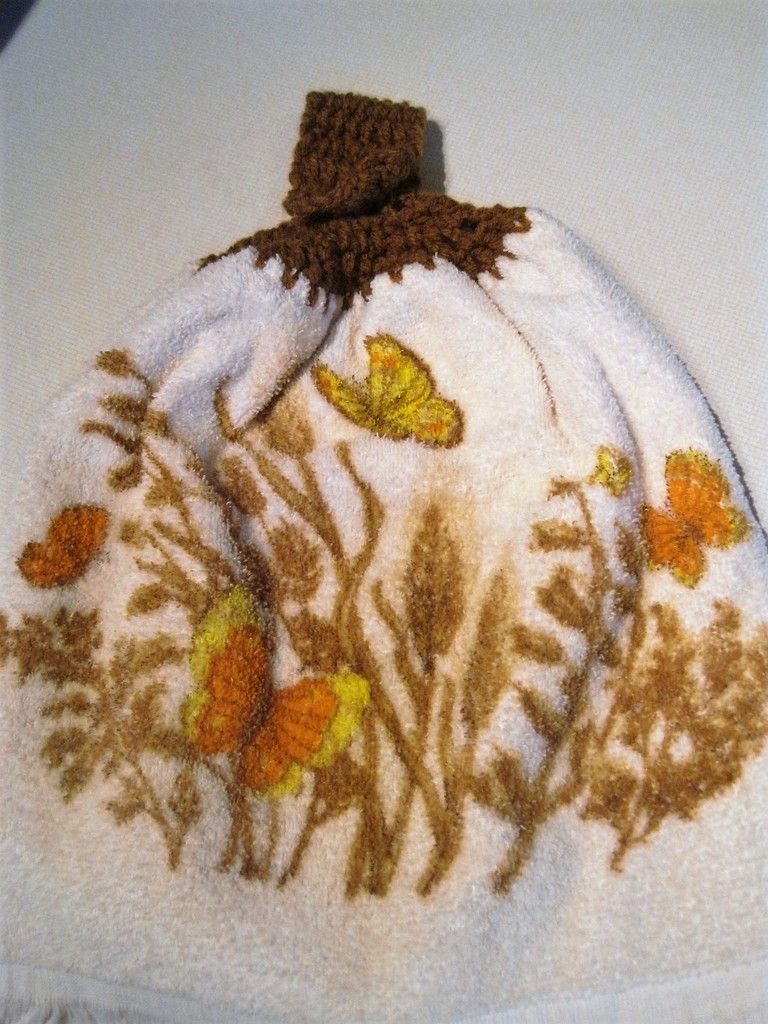
This hand towel was amazing, like when you see a piece or a bit or a bob of a craft that you have no idea how to do but it speaks to you so much, like calls out to your crafter soul, that you must purchase it.  Martha Stewart once said that if that happens you MUST get the item, you may not know what to do with it at that exact moment but one day you will and you will be all that much happier that you bought it!  This towel was all of that in one inexpensive package.  For $2 I got the hand towel and a matching washcloth.  These two were pristine, never been used, not even by a little old lady who drove it to church on Sundays.  The towel was plush and soft, it even had that fine thread fringe on the bottom, perfect for luxurious hand drying moments.  But what put the whole thing over the top was the immaculate brown and tan leaves and flowers with a delicate orange and yellow butterfly delicately alighting on one of the flowers. The Seventies decorating glory in one beautiful towel. 

I bought it post haste with the goal of learning how to crochet a hanger on top of it so I could display it in all its epicness in my kitchen.  Fast forward six months: I find the towel in my To-Do box and think now is the time to try this.  I wandered on over to the Pinterest and started hunting for a pattern to try out on my towel.  I found a classic looking hanging towel look and a pattern I felt I could do and set to work.  By far the punching the holes in the towel is the hardest part, and as my husband told me "it can't be that bad, old ladies make those", I admit it is not really that difficult.  I used a funky gold brown to match the color scheme of the towel and in less than two hours I had a new hanging kitchen hand towel!

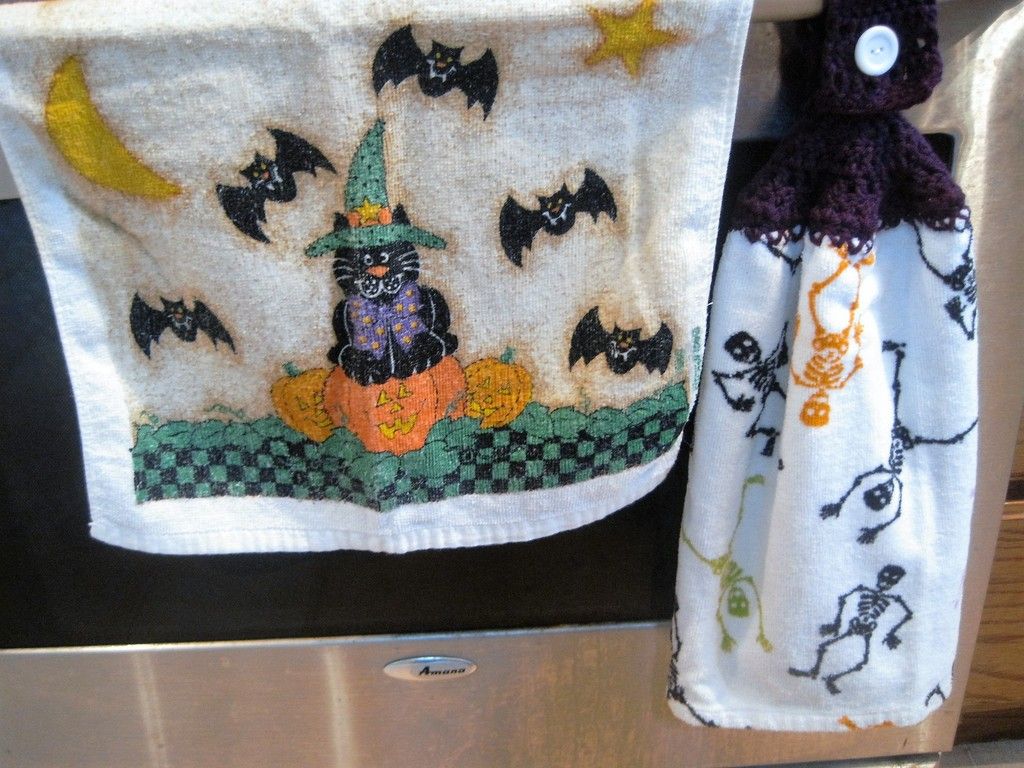
I have been wanting to work through the pattern again so when I found these skeleton towels in my Halloween decor I knew what had to be done.  I love these towels but I could never find an appropriate way to display them.  I have Halloween decorations that take up almost the entire rack for hanging on the oven so these guys were often left out in the bathroom which never did them justice.  Enter some bright and creepy acrylic yarns in my stash and we have a recipe for thrifty functionality. Not only do I get to use my pattern again but I get to make my cute towels functional. Epic Win!

The pattern belongs to Harlean at Thrifty Fun! Considering how inexpensive the supplies are and how fast you can whip up a satisfying and functional craft I support her aptly named site.  You can find the original pattern here: Crochet Kitchen Towel

Halloween Crochet Kitchen Towel

Fingertip or Hand towel
4 ply yarn in whatever color makes you happy
Large metal knitting needle or Ice pick (this makes the holes in the towel material)
Size G crochet hook
Fun button and needle and thread to sew it on
Sicssors

ch= chain
SC= Single Crochet
DC= Double Crochet

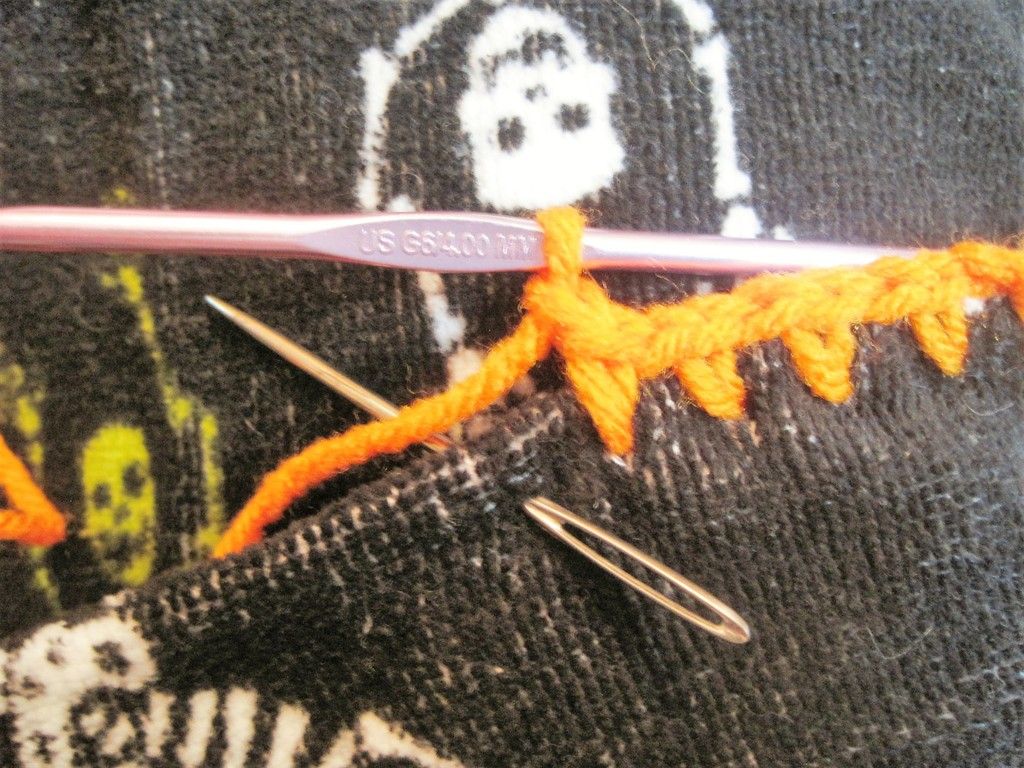
Fold towel in half width wise evenly or you can cut the towel in half to make two thinner ones. Using the metal knitting needle or ice pick, punch holes through both layers of the towel 1/2 inch apart and about 1/4 inch down from the fold of the towel.  This will be your base holes for your stitches.  I crocheted into each hole as I punched it but you can always punch the holes all out and then go back and start your crocheting.

Base Row (into the holes in the towel): SC in First hole, ch1* SC in next hole, ch1. Repeat from * across. ch2, turn.
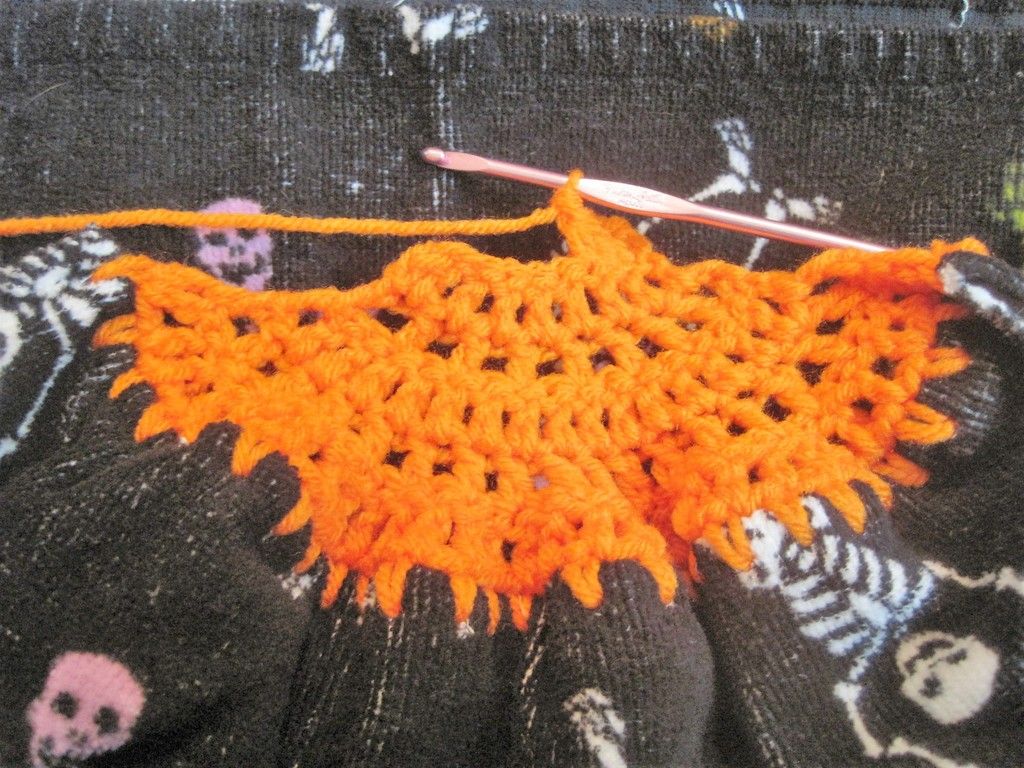
2nd Row: DC in each SC (Skip the ch1 stitches) across, ch2, turn.

3rd Row: Skip one DC, *DC in next DC, skip next DC. Repeat from * across, ch2, turn.

4th Row: DC in each ch1 space ending with a DC in turning ch, ch2, turn.

5th Row: Skip first ch1 space, DC in next space*Skip next space, DC in next space. Repeat from * across with DC in turning ch, ch2, turn.

6th Row: DC in each DC across, ch2, turn. You should have 8 DCs.

7th-15th Rows: Repeat row six.
16th Row: DC in first 3 DCs, ch2, Skip 1 DC (this makes the button hole), DC in next 3 DCs, ch2, turn.

17th Row: DC in first 3 DCs, 2 DCs in ch2 space, DC in next 3 DCs, ch2 turn.

18th Row: SC in each DC across. Fasten off and weave yarn end into your work. Fasten your button into the center of the 6th row.  Now sit back and admire your thrifty ingenuity!
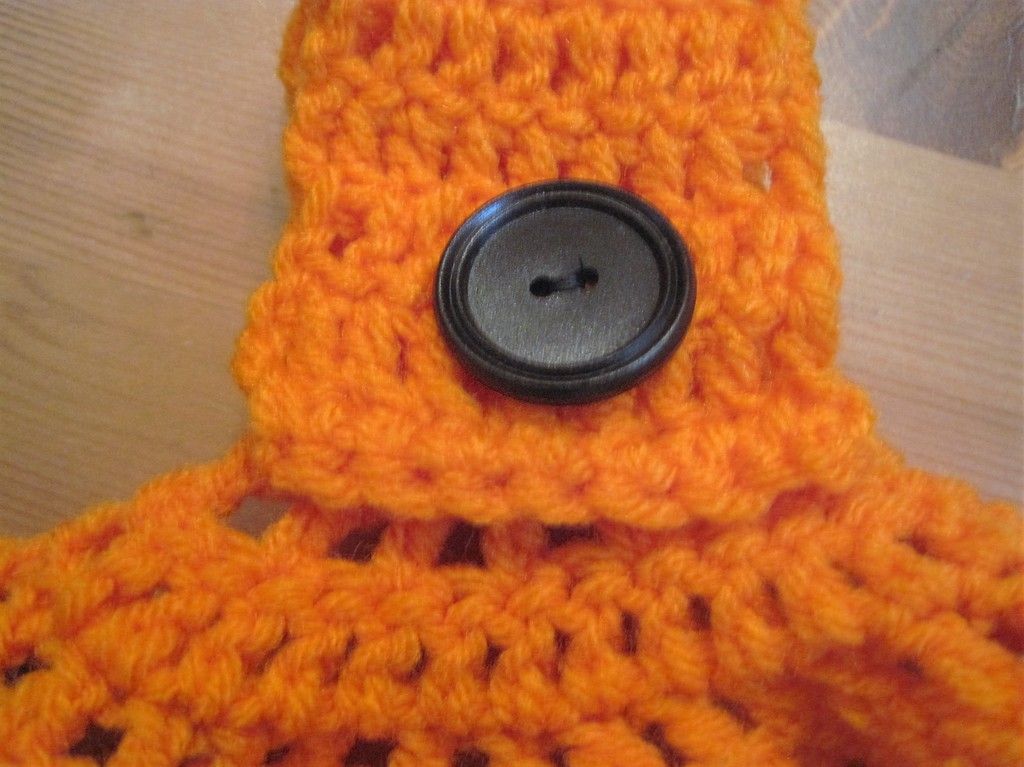

I well admit this is not a massive crafty undertaking, but it is no less satisfying.  As I seek to clean out my world, to consume less and enjoy more, crafts like this fit right in.  I can use things I already have to create useful decorative items.  They are also a handmade gift I feel good about giving, not just a nice trinket, but a thoughtful gift my loved ones can use daily. I hope you enjoy these as much as I do!
Kelly

Here is a little "treat" for Halloween....my original towel!

Monday, October 6, 2014

HTTC: Little Kid Ghost

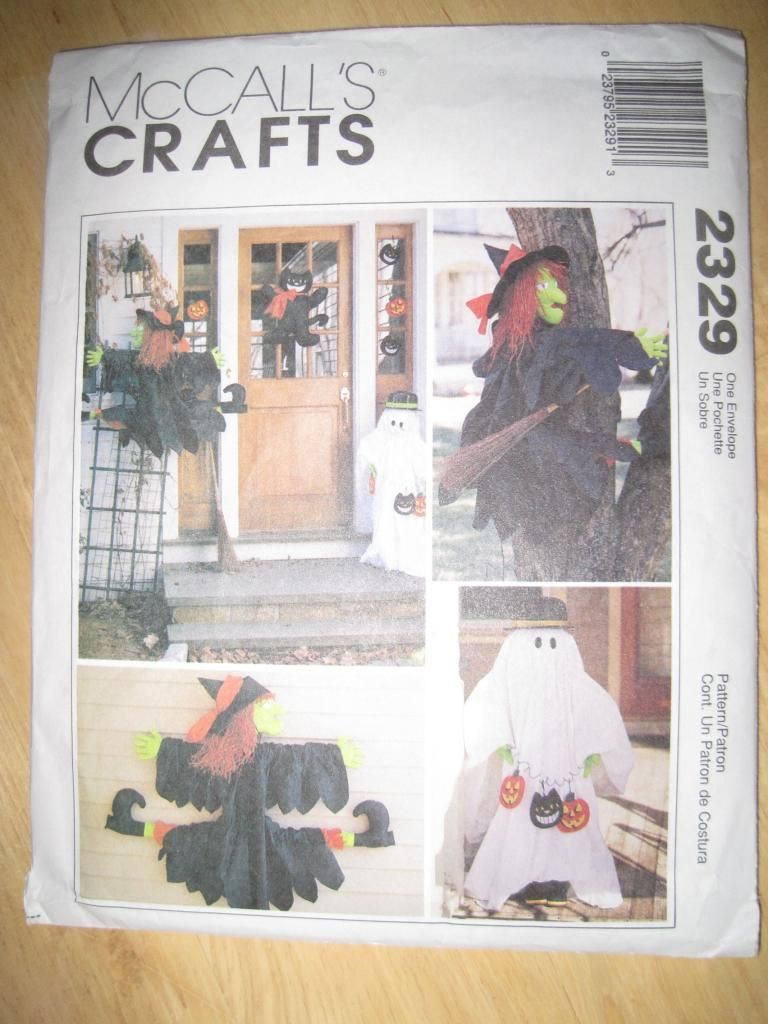
I learned a very important lesson while making this little guy; I may love the look of the draped fabric ghost, but I do not have the patience or the math skills to pull one off without pulling out my hair.  At first I tried to make a cute light up ghost with a tomato cage, a sheet, and some Christmas lights but that was not even close to looking anything like a ghost, more like a lit up tomato cage with a piece of garbage trapped on it fluttering in the wind!  I worked off of McCalls's Crafts pattern 2329 with a few changes.  Some of the things that were needed as per the pattern were ridiculously priced or would not add enough to the craft to be worth the cost so they got nixed.  You really don't need the pattern to make this guy all you need are a few tips and you can make one of your own with all the customization and upgrades you want!

Little Kid Ghost:

2&1/2 yards 120" white muslin
scrap of black felt
one wire hanger straitened out
masking tape
pair of shoes
stuffing
30"x 30" square of white fabric
2 36" 5/8 inch diameter wood dowels
scissors
glue gun
cording or twine

Start by cutting/ripping the 120" inch wide piece of muslin in half width wise so that you have two 60" wide pieces that are 2&1/2 yards long.  Cut/rip off two 2 inch thick by the 60 inch wide strips from each of your pieces of fabric.  You will have four strips total, set these aside. Place the two big pieces on top of each other, these will be the covering for your little guy.

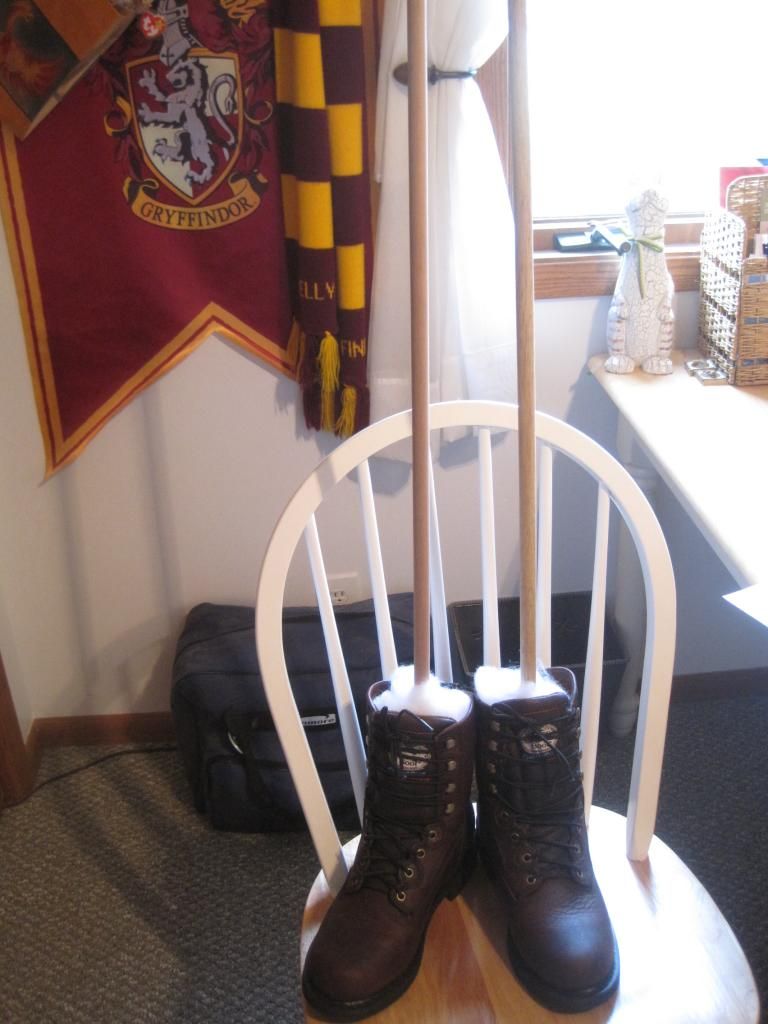
Next take your pair of shoes and stick your dowel rods in them.  Pack around the rods with fabric scraps or stuffing so that they stand up in the shoes.  Measure and mark four inches down from the top of the dowel sticking out of the shoes.

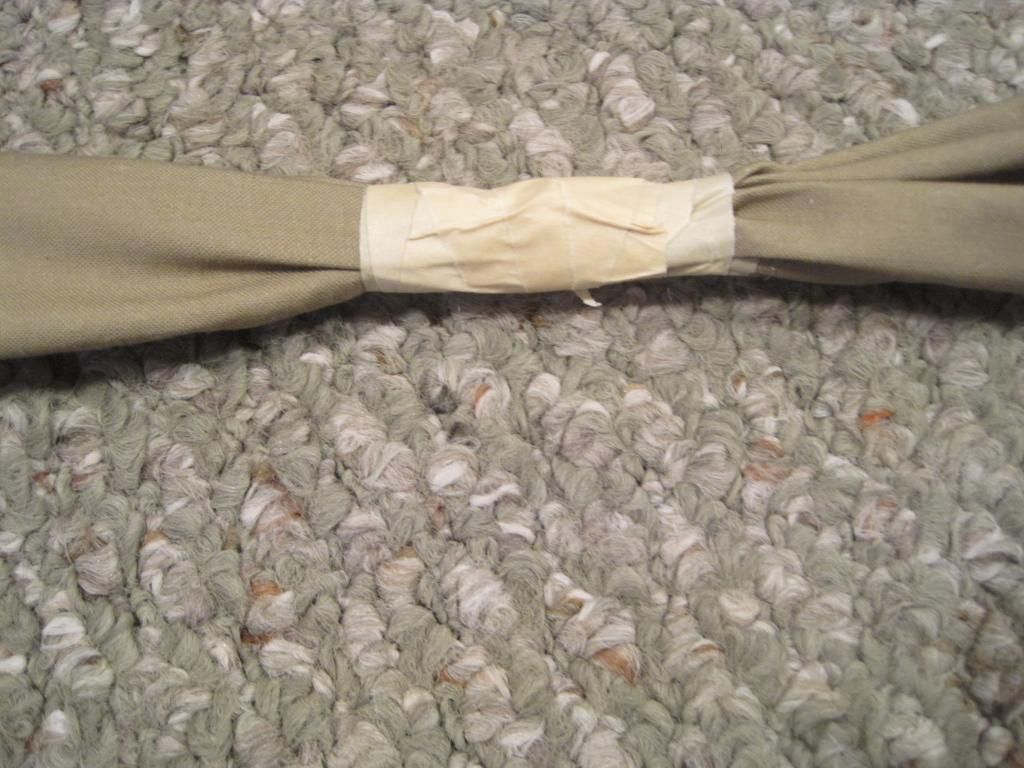
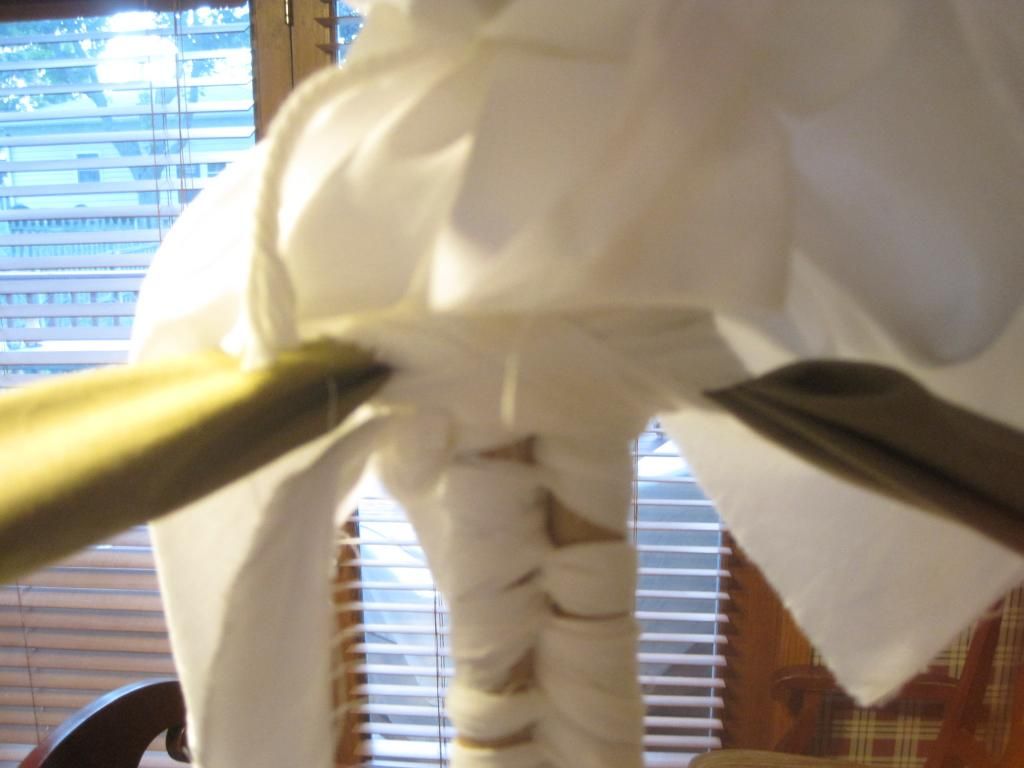
Using one of your 2" x 60" strips of muslin, starting from the marks on the dowels and working down, weave the strip in and out of the dowels securing them together.  Tie the ends together.
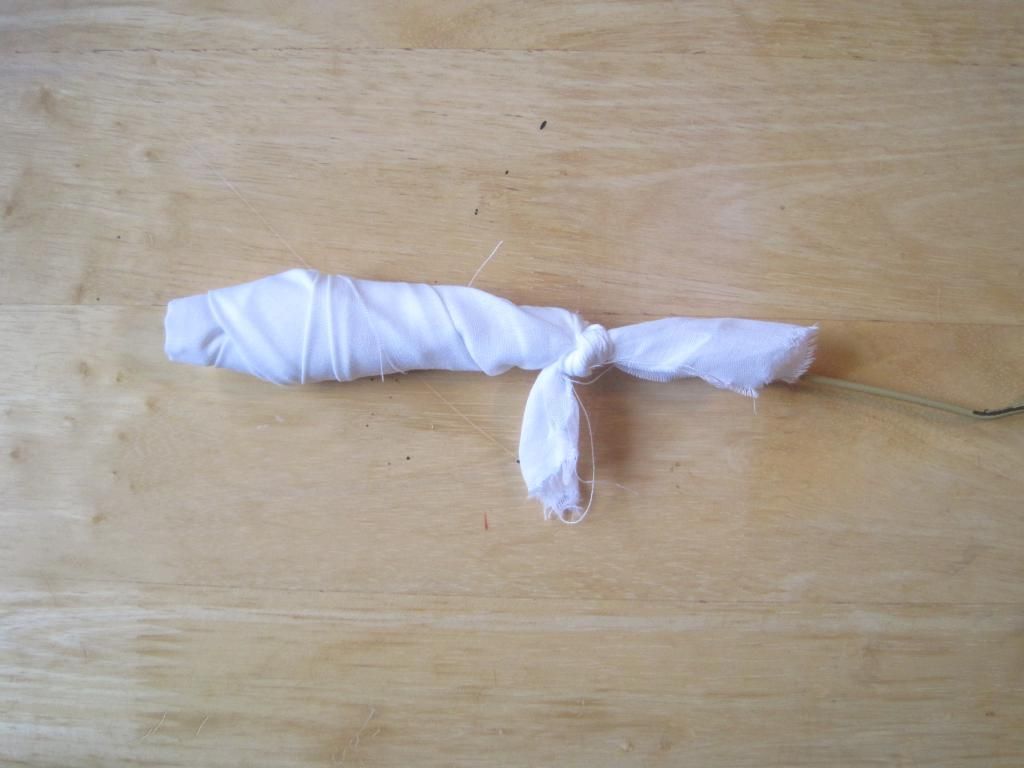
Bend over three inches of the end of the wire hanger.  Using one of the strips wrap the end securely and tie into knots. Repeat with the other end of the hanger and another strip.
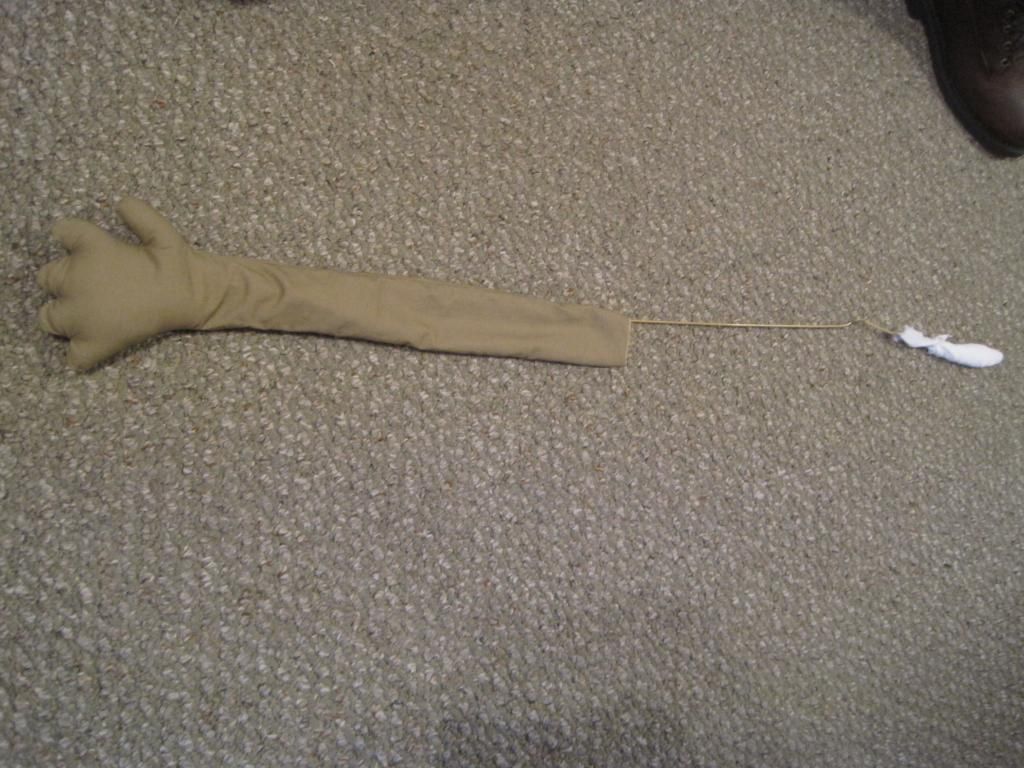
Cut out and sew hands in whatever pattern and fabric you like, making sure that they are long enough to cover a bit more than half of the wire hanger.  My hands kind of look like muppet hands.  Clip all curves and turn right side out.  Stuff to the wrist and slide the hanger in so that the covered metal end ends up in the stuffed area.

Repeat with the second hand and wrist.  Place both hands on the hanger, one end overlapping the other, and tape in the middle with the masking tape. 
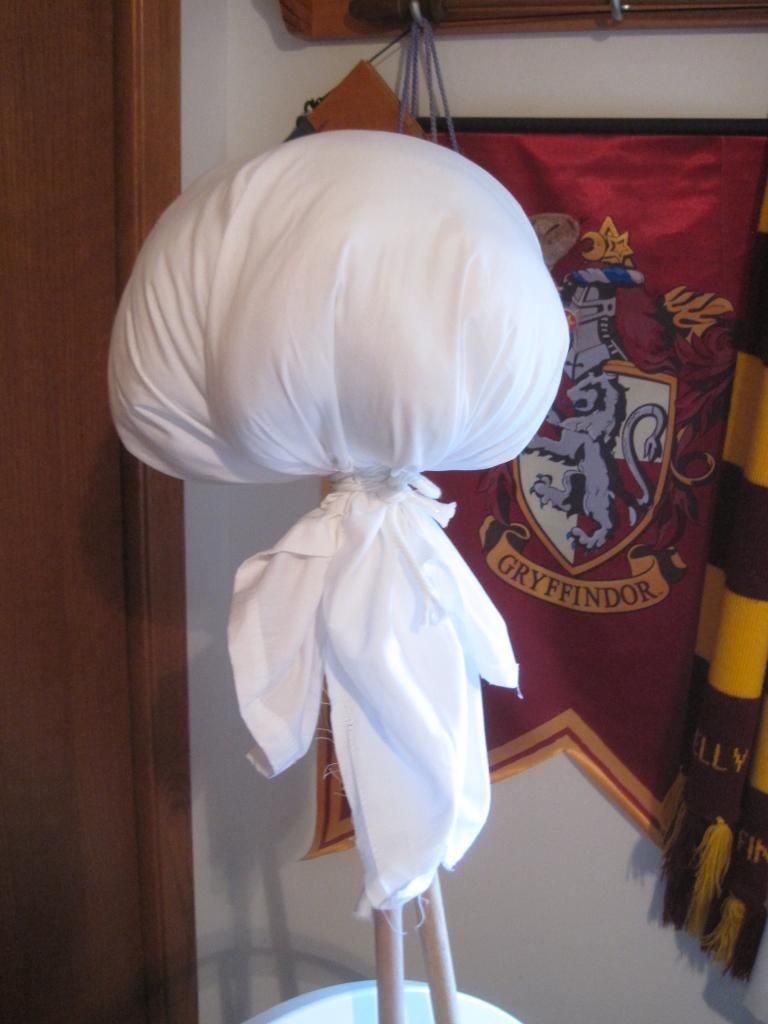
This is where I deviated from what McCall's wanted.  The pattern called for using an 8" styrofoam ball as the head, and if I had one I would have used it, but I didn't.  So I trek off to Joann's to get one only to find that they wanted $16.99 for it! Yeah, no.  So a 30" x 30" square of white fabric filled with stuffing and tied onto the dowel with white cording around the neck may not be a perfect round head but its free and I like it! 
Using the last strip secure the arms directly beneath the head on the dowels, tie the ends tightly.
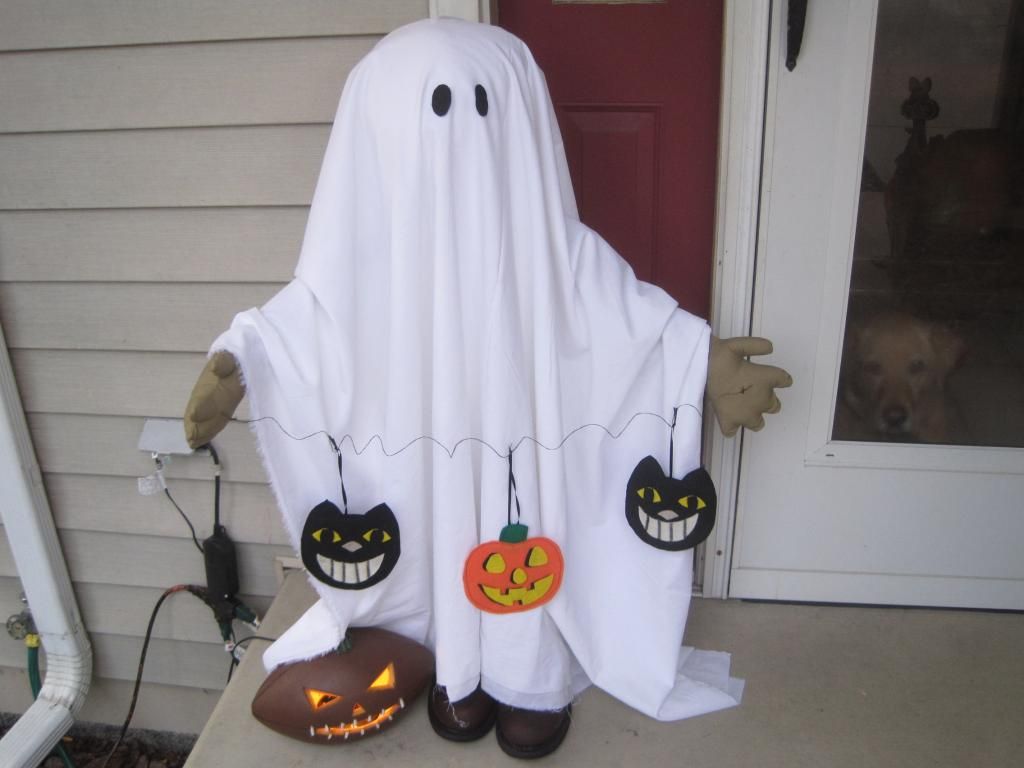
All that is left is to cover your you dowel with head and arms with the fabric, glue on two eyes cut from the felt, and decorate as you see fit.  I made the little garland from the pattern, but how cute would this look with a little trick-or-treat bag!  Check out Abby giving a disapproving photo bomb. As the fabric is draped on him and not stuck down he is not weather proof.  He will stay inside until Halloween and then he will go out to entertain the kids looking for candy. He can be taken apart at the end of the night to be packed away until next year!

I hope you make some great crafts for Halloween this year and thoroughly enjoy your candy haul.
Keep it spooky ,
Kelly

Tuesday, October 15, 2013

HTTC- Wooden Ghost

I am always looking to expand my outdoor Halloween decoration collection.  At the same time I am in love with wood crafts that use up nubs and bits of lumber that are hanging out around the garage or have been reclaimed out of dumpsters.  This craft gave me the best of both of these worlds!

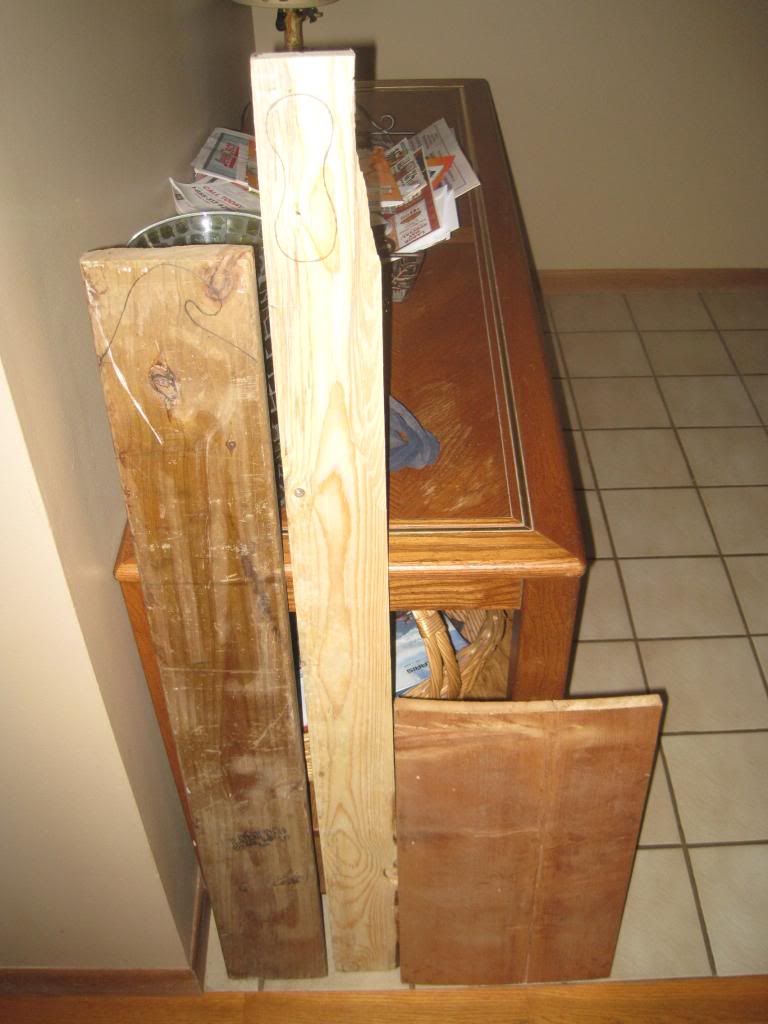
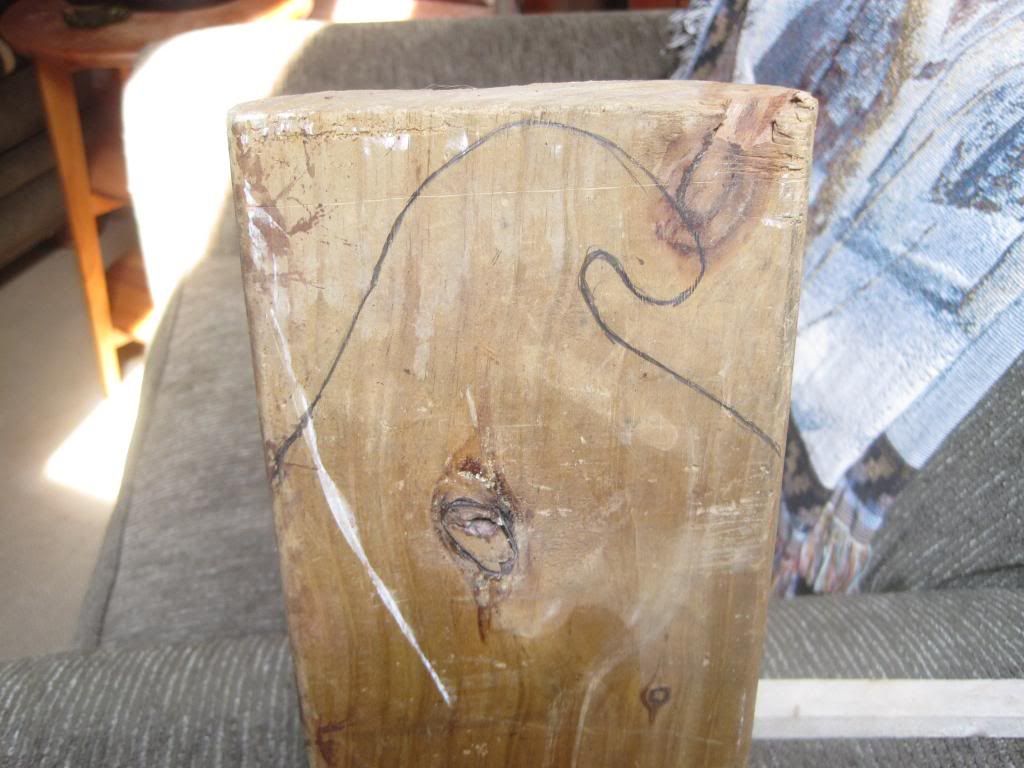
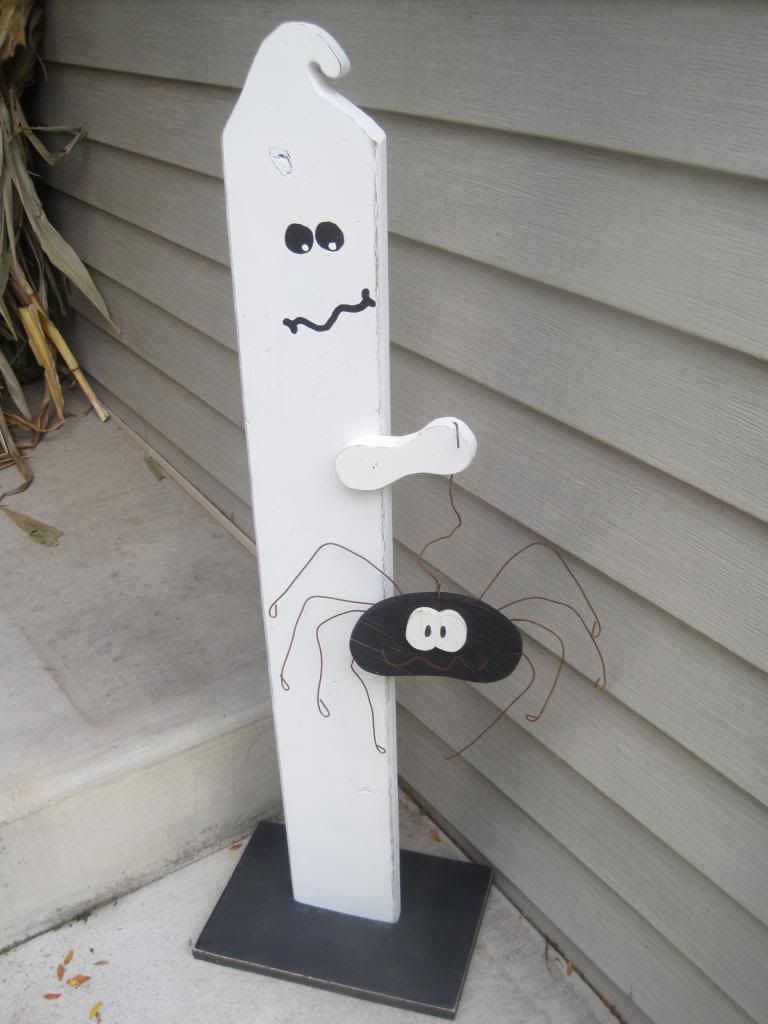
I started out by thumbing through my wood stash.  I found a nice aged piece of 1 x 6 for the body of my ghost.  I had a wooden spider that was already made that I knew I wanted to be a part of this craft but it took me a little bit of thinking to figure out how.  I had to convince myself that ghosts could have hands to hold cute little wooden spiders so I traced that onto the broken end of the 1 x 4.  The base was just a bit of wooden shelving cut to a size that looked good with the height of the ghost.
 
I traced the Dairy Queen Soft Serve top on to my ghost so that my husband could cut it out with the jigsaw.  I know some people don't like knots in wood when they are working with it.  If the item you are making could have a safety issue due to the knot then yeah, you should avoid them, but in my crafting I love the look a good knot brings!
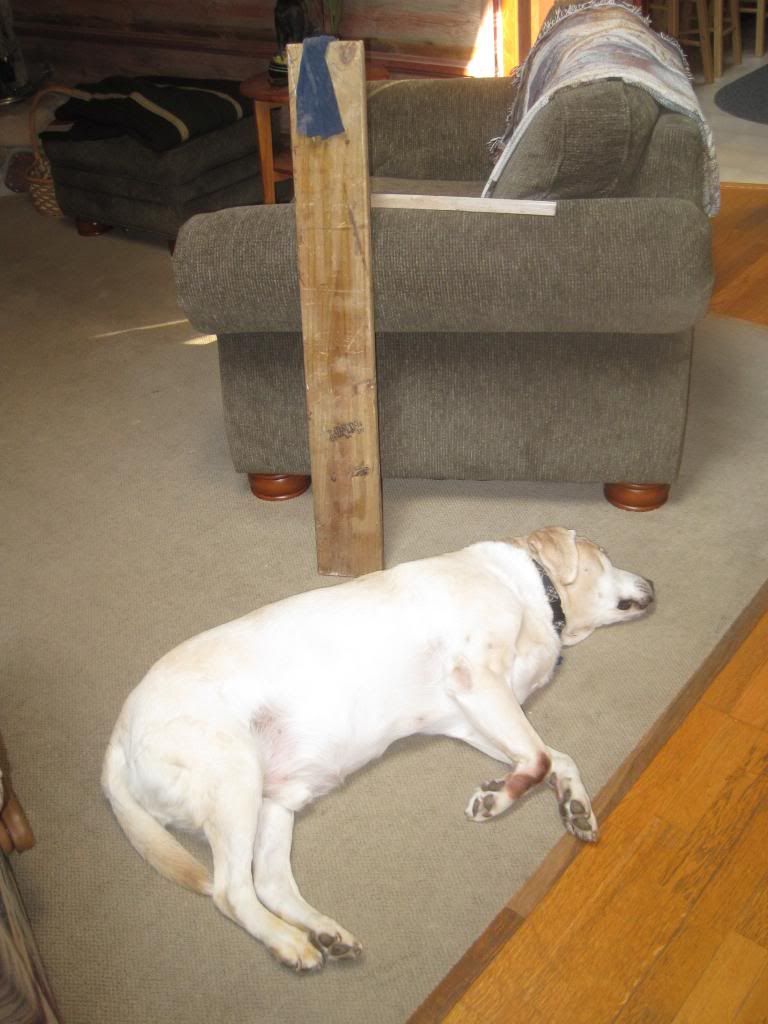
Wood crafting is exhausting when you are a dog.
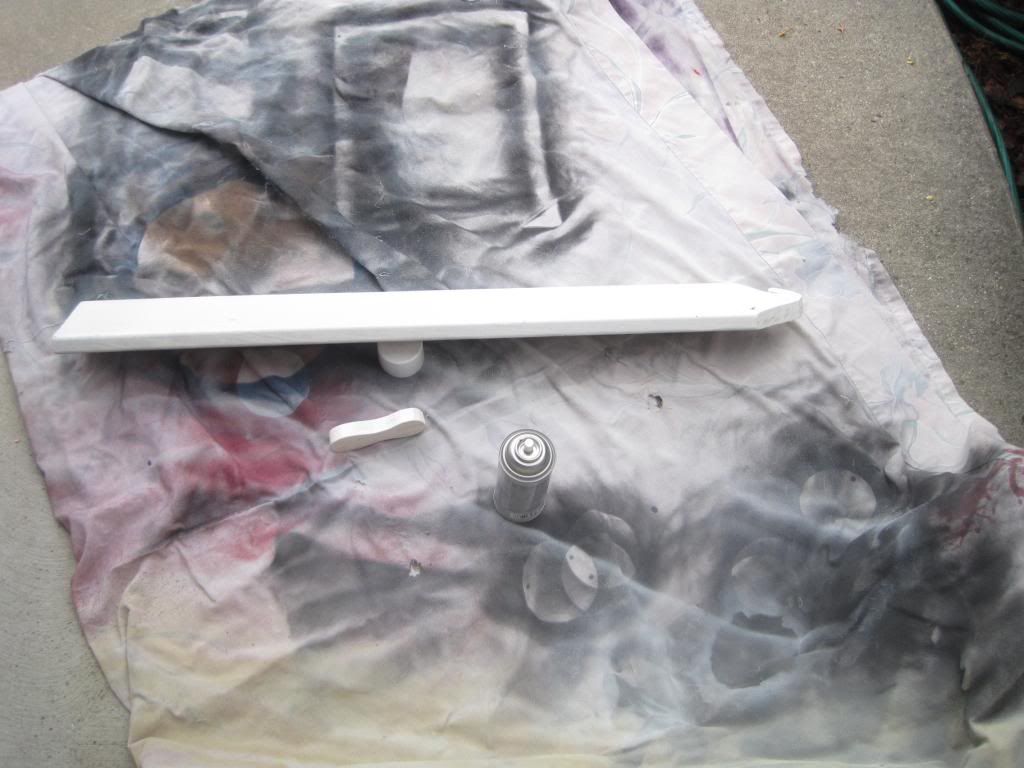
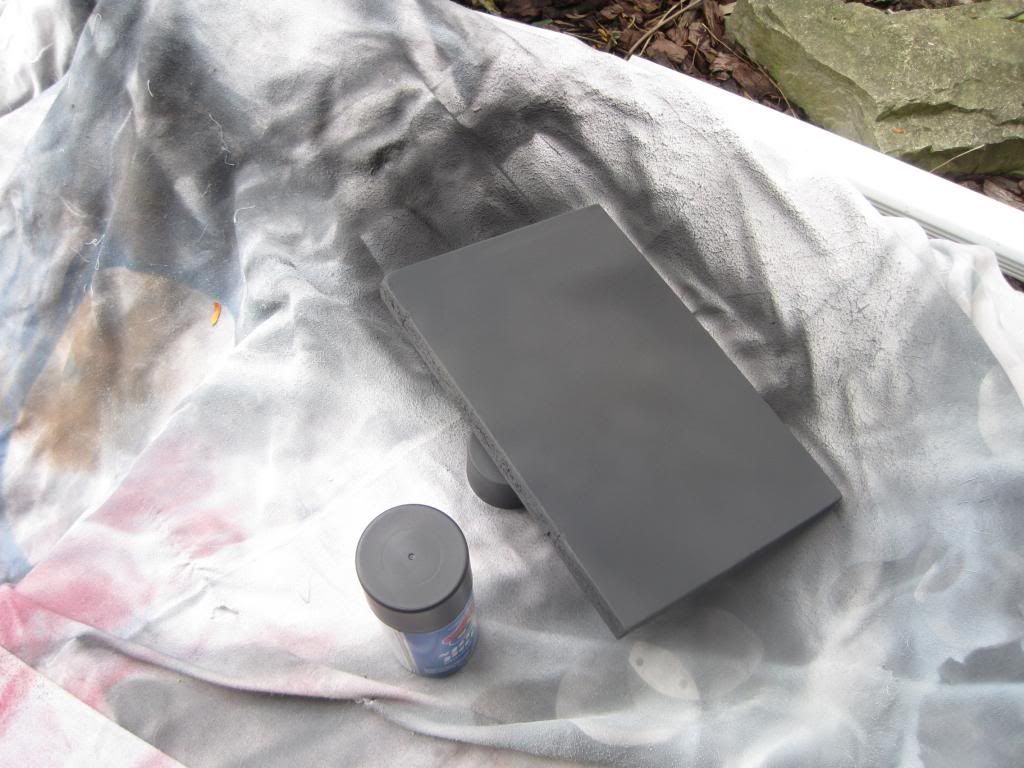
After we cut out the curly top and arm we got to move on to my favorite part: Spray Painting!!!  I used some good quality indoor/outdoor spray paint and pained the body and arm gloss white.
The base was spray painted a flat black.
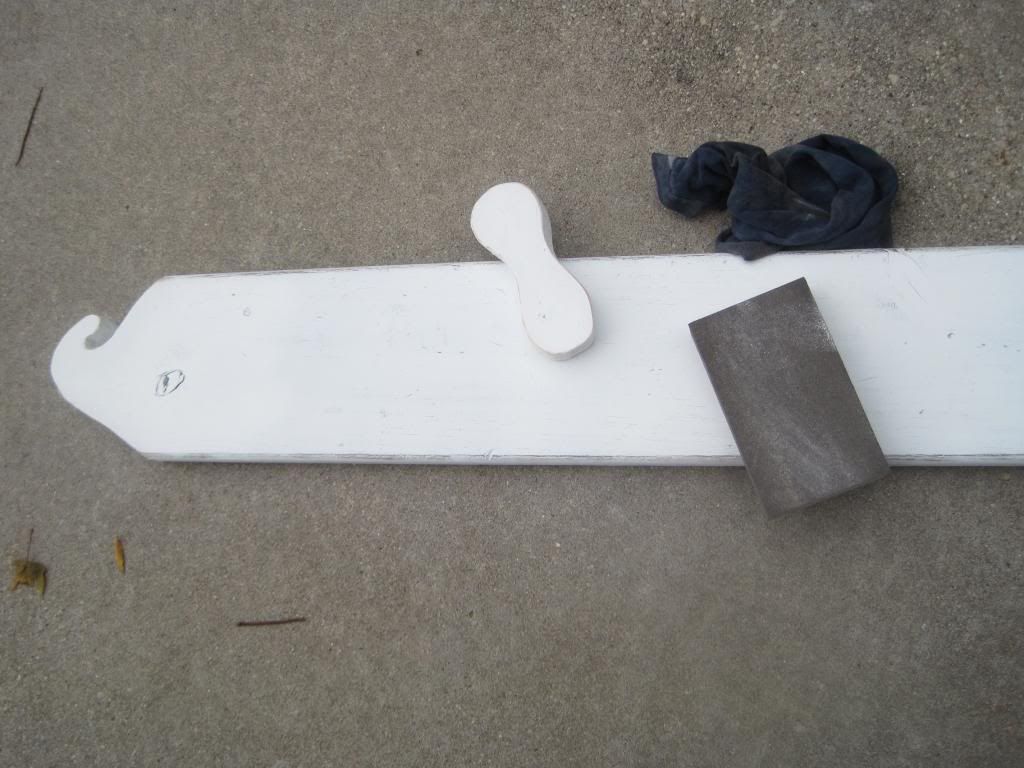
After a full 24 hours of drying I sanded up the pieces to take some of the newness off the bits.  I like to see a little wood peek though as well.  I set the arm where I wanted it and Gorilla glued it in place.  You must be careful with Gorilla glue, if it smooshes out on the sides it will bubble up and show yellow on your finished piece. 
We set the base and affixed it securely with three screws. 
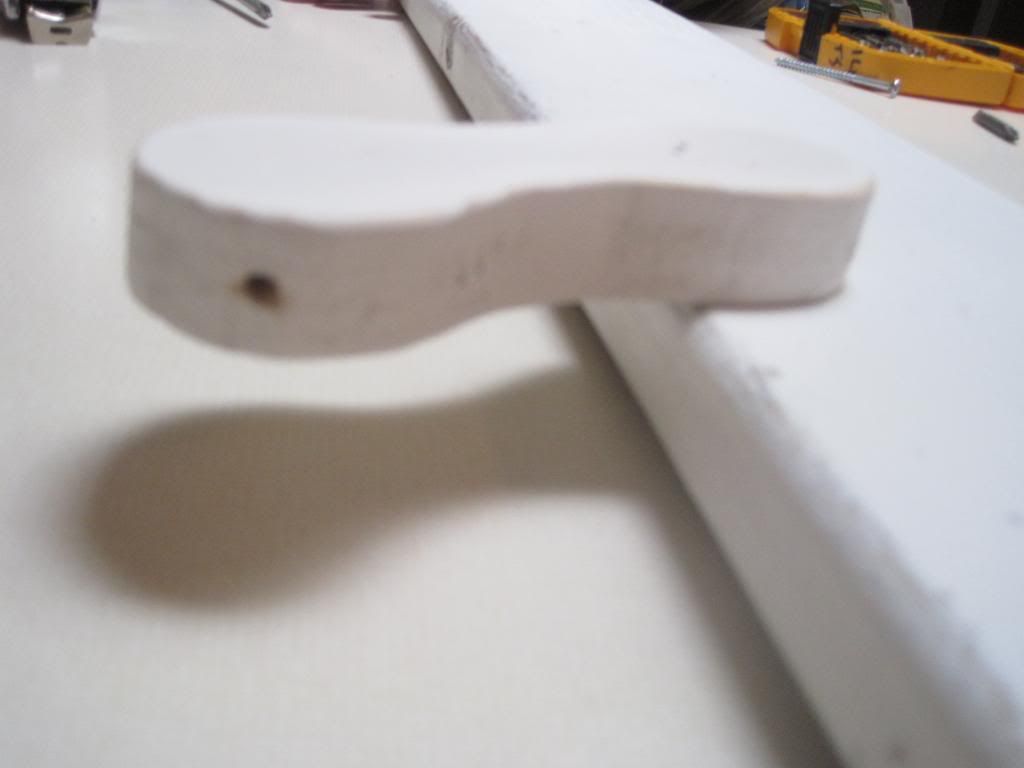
The spider I had to add to the ghost was on a wire already.  I wanted it to look like the ghost had picked him up as a pet and is both holding him away from his body and showing him off to trick-or-treaters at the same time.  My husband drilled a hole in the hand for the wire on the spider to go through.
Add the spider, paint a little face, and you are done.  I hope you will look at bit of lumber you have around or even see poking out of bins in new and fun ways.  If you look hard enough the piece will tell you what it wants to be and how you can help it get there.  These projects tend to be cheep, or even free, and leave you with a great sense of accomplishment for rescuing something that would have been sent to a landfill and turning it into a piece you can be proud of.  I hope your October is moving along in wonderful ways!

Keeping it ghosty,
Kelly, the origami ninja


Tuesday, January 29, 2013

Temari fun day

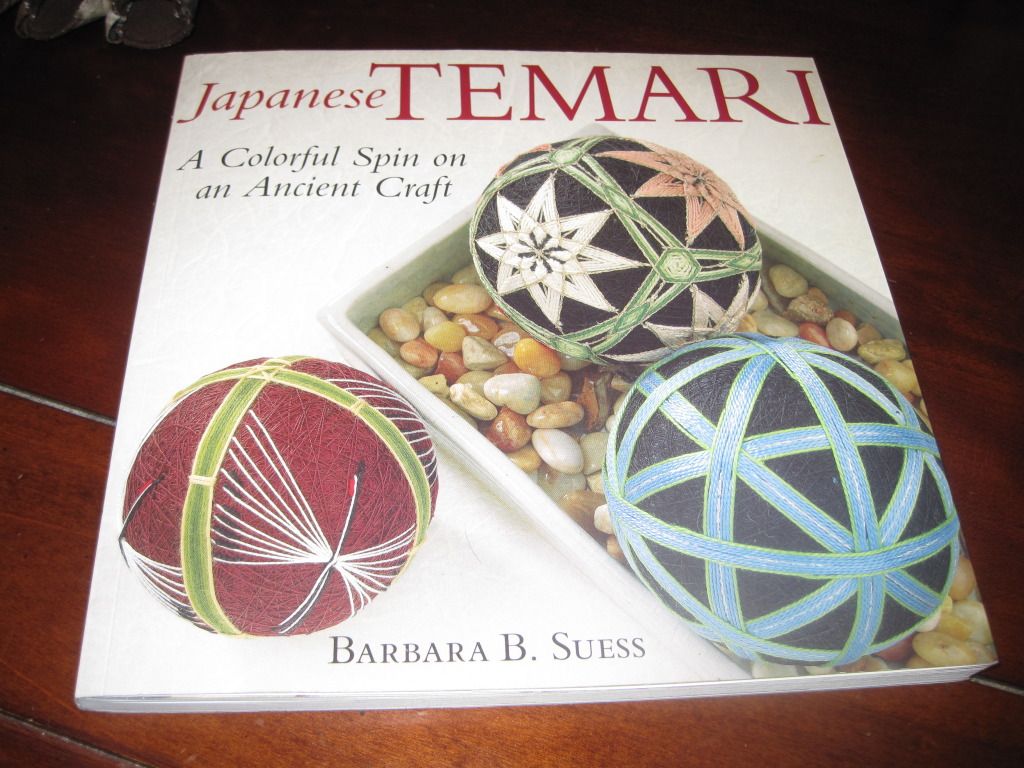
This post has been in the making now for over a year and Anita and I didn't even know it.  Let me start at the beginning and when I get to the end I'll stop, I promise.  In February of 2012 I took a cooking/baking class with my mom at the John C Campbell Folk School, which is very near her house in NC.  If you ever get a chance to take a class there you really should, this place is amazing, you can stay at the folk school in cute dorms and they have hundreds of classes.  They even feed you.  Anyhoo, their gift shop has a wonderful book section about all thing crafty and traditional.  The bread making and woodworking sections are to be envied! While thumbing through said room of literary requirement I came upon this book....
Now I had seen these round works of art made back when I was in college in Montana but I had no idea what they were or how to even start looking for them on the Internets, let alone the fact that they were a craft all the way from Japan.  So I peruse the book and decide that if I really want it I will come back and get it on my last day of class.  Well, that didn't work out so well as we got so busy I forgot to go back.  I spent the next nine months thinking about how I wish I had purchased that book and given the craft a try.  Fast forward to November and a trip to Disney World and then back to my mom's for a week with her.  I made sure that I went back to the Folk School to pick up that book.  If I had been thinking about it that long I definitely wanted to give that craft a go.  We go back to the gift shop and low and behold they have one copy left and it was even on sale, serendipity at its best I say.
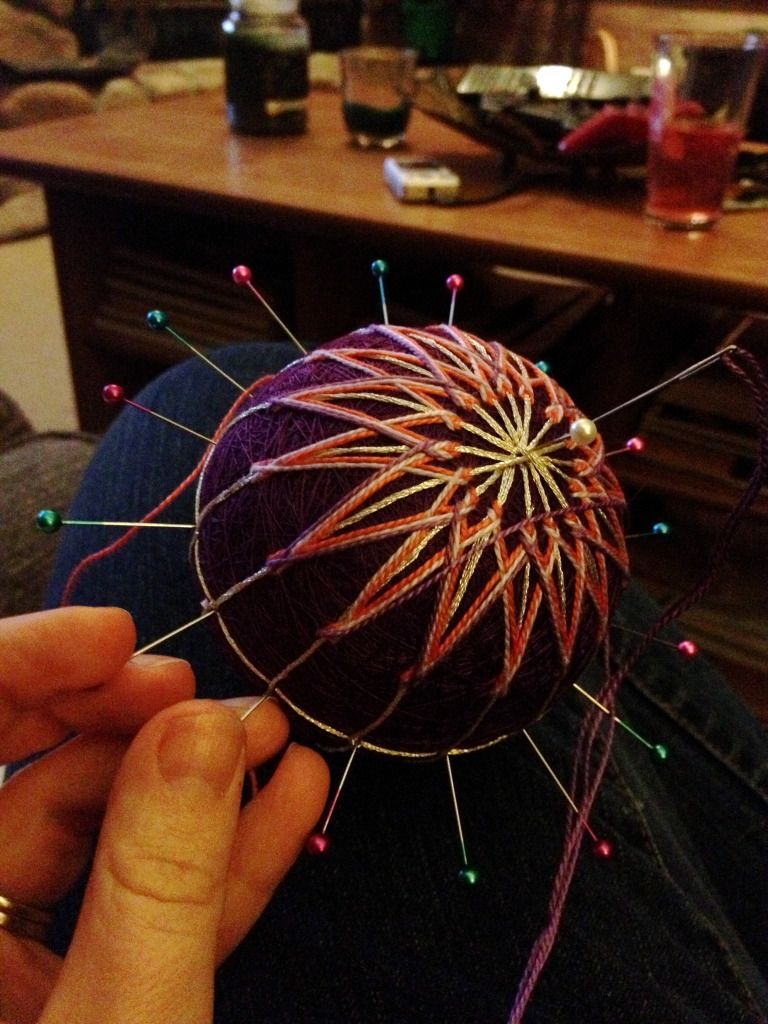
Jump forward a few more weeks and we are in January 2013.  I'm at work with Anita and she tells me she has this new craft she has been stalking on the Internets made out of these thread wrapped balls and it's called Temari.  I kid you not almost a year later the two of us independently come around to the same craft out of nowhere.  Well I tell her I just got a very nice book on the topic and we decide to make a date to try out this traditional craft.  I picked one of the very beginner Temari balls to start off with, but not Anita. No, never Anita. She finds the one that strikes her like a bolt of lightning upon first glance and vows to do it come hell or high water.  The one that jumped out at her was almost all the way at the back of the book in the "Ninja masters only" section.  But while I say all this about my lovely blog-buddy she always comes through with a phenomenal project in the end, so even though there is much to do about fussing during the crafting, she has a project to be proud of.
Anita's in all its wonderful purple glory.  She is a bit of a purple nerd, this is so up her alley it is silly.

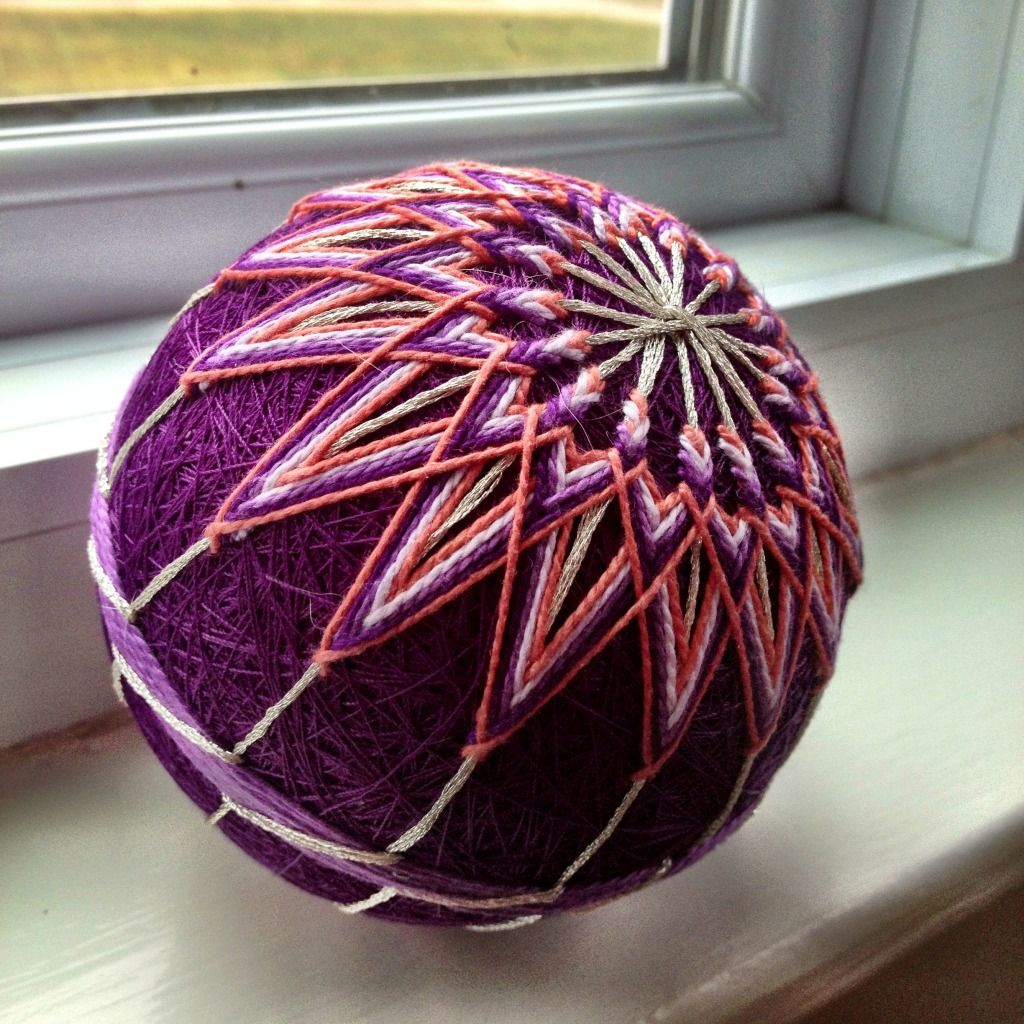
This is my Temari ball, much less adventurous, though that gold floss is a pain in the butt to work with.

While the craft is a bit time consuming with all the thread wrapping, it is very relaxing, sans the gold floss that is, and I will keep this as a favorite craft to turn to when I need to keep myself busy and happy.  Have you been trying a new craft, we would love to hear about it!

Keeping it thready,
Kelly, the origami ninja

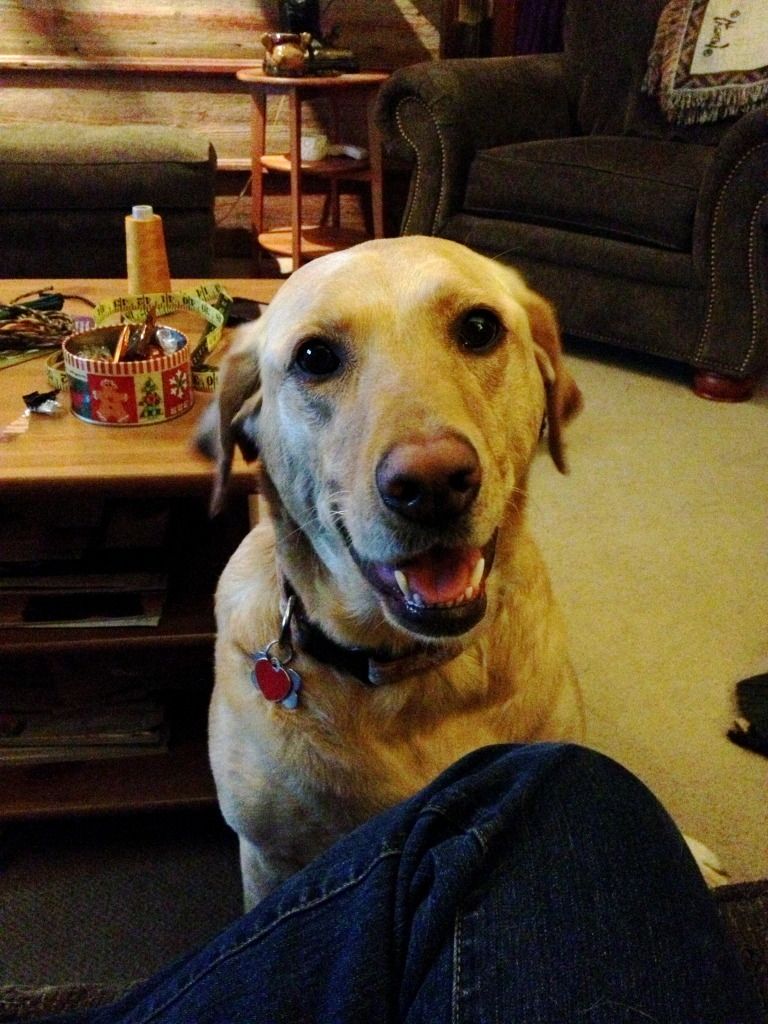
Abby though Anita needed help with the pinning, a tennis ball can work wonders on everything according to her.


Tuesday, October 30, 2012

Halloween Wreath

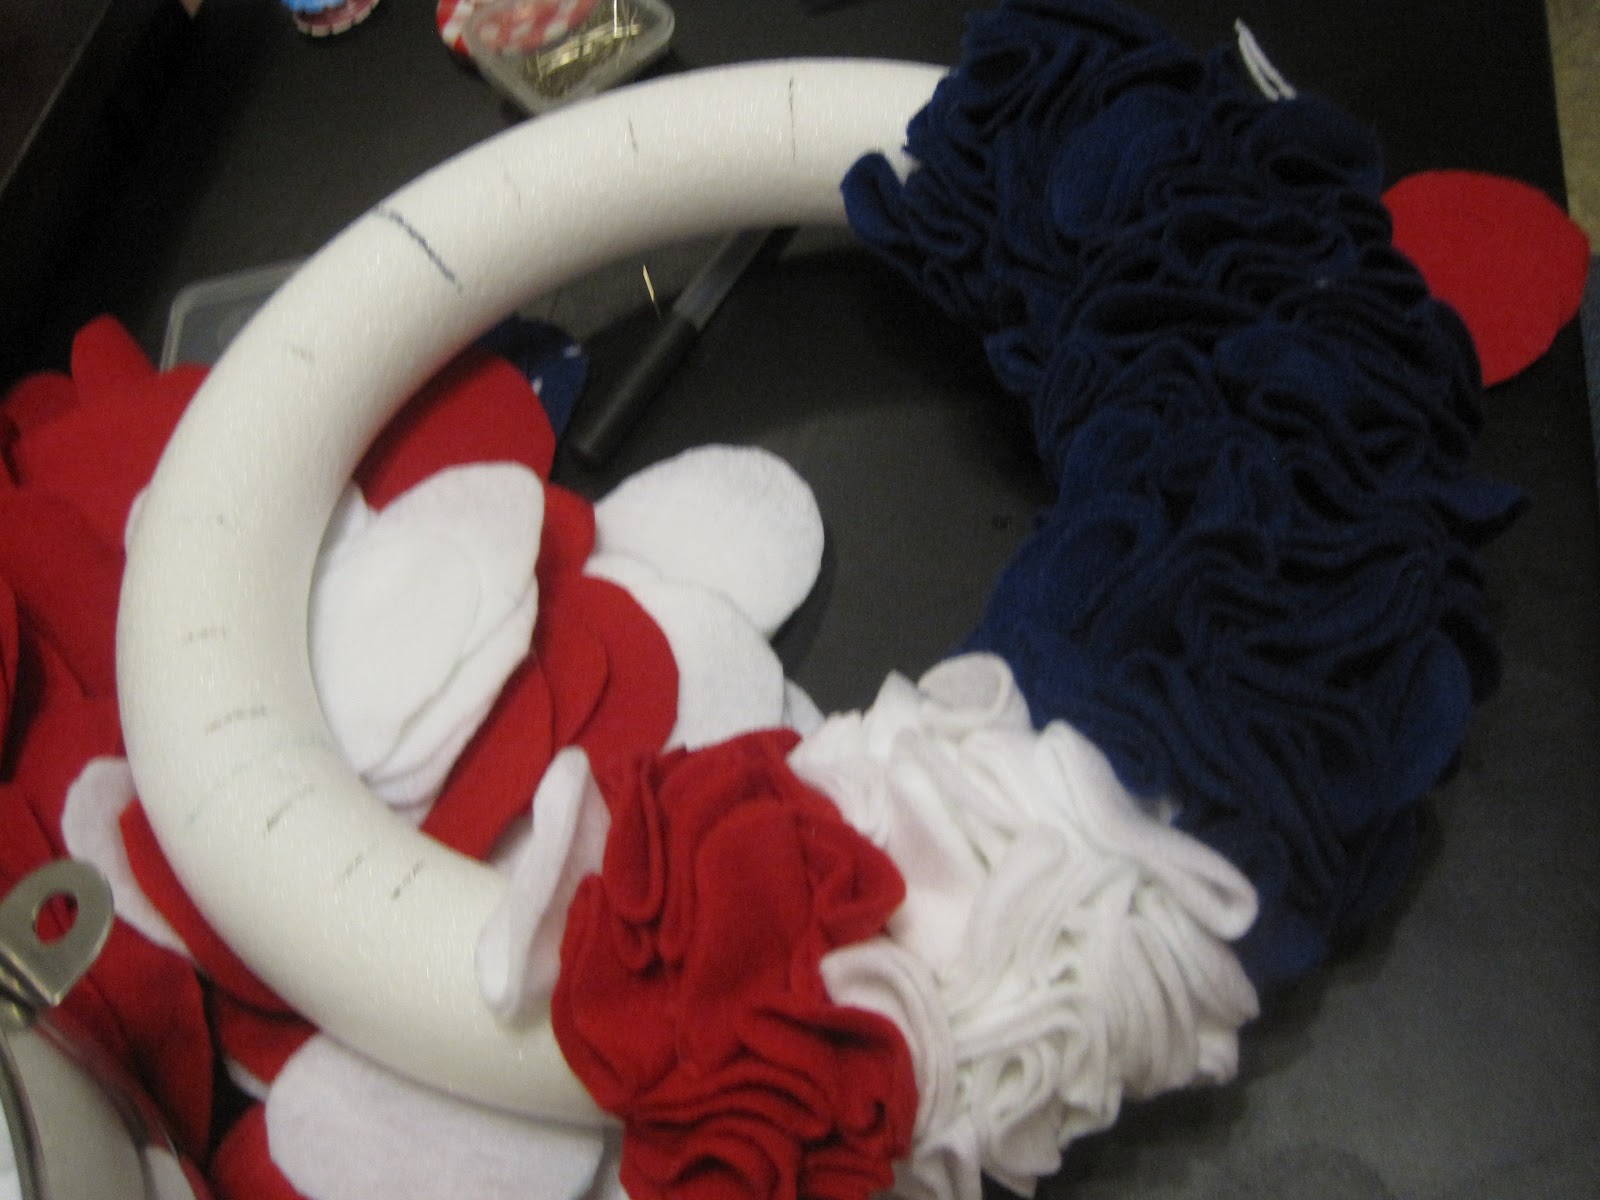
I have to sneak in this last Halloween craft before the big day tomorrow.  For July Craft Club we all got to explore our craft feelings and create a wreath that reflects our different personalities.  I took inspiration from a wreath made out of fabric and wire that required no sewing but lots of fun.  For my Halloween wreath I went with the same idea but added the twist of frugality.  A friend of mine is in a "de-cluttering phase"in her life so I took that to heart and applied that "use what you have" to my wreath.

The base of the wreath is a single circle off an old grapevine wreath.  I got the original grapevine wreath on the side of the road for free.  A neighbor had some items that they were giving away with a "free" sign in their yard.  This wreath had been loved since its creation in, I believe, the late eighties, including sporting some very faded fake birds.  The decorations may have been well past their prime but the actual grapevine wreath was ready to be born again with some inspiration and creativity.  I cut a continuous circle out of the wreath and wired the two ends together.

For the fabric I dug out all my orange, white, and black fabrics.  I had to buy some spooky holiday black fabrics to bulk up my selection for the wreath but everything was on sale so I got three new ones to use for less than three bucks total.  I cut each fabric strip one inch wide by six inches long.  I tied the strips around the grapevine wreath in the pattern 18 orange, 4 white, 18 black, 4 white, 18 orange, and so on.  The ribbon for the bow I had in my stash already from a Halloween project from two years ago.   I whipped out a quick puffy bow and wired it on and taa daa! A new Halloween wreath that cost me less that three dollars total and was completed in one Sunday evening.  I love these simple crafts that I can make with supplies I already have in my craftroom.  Now I have a Halloween wreath I can be proud of and more money in my bank account, tee hee it's a good thing.


The next project uses felt from past crafting exploits to make some gifts for Christmas.  A few bits of brightly colored felt and some glue and you have a cute craft to be given with some homebaked love.  Banana bread and trivits are my go to gift this year for a time strapped co-worker and parents of friends that are like family.  I love TRIVITS!!!!


Happy Halloween to everyone: may your crafts look their best and your candy be plentiful.

Boo,
Kelly, the origami ninja 


Tuesday, October 23, 2012

My Halloween craft insipration

All of the posts on the blog and around the intertubes has got my creative brain a thinkin.  I wanted to add to my decorations for this ultimate fun-time holiday, but money is tight in that arena so I took to the nets to see what I could find.  My first choice was based on the sweater pumpkins from the link party a few weeks ago. 
I had a few saved up sweaters from Goodwill that were burning a hole in my to-do box and this was calling their name.  I wanted to take them apart for the yarn but that was so not going to happen, either I can't take apart sweaters correctly or they talk about me and how to thwart my crafting exploits.  I think it's the latter.  So they sat in the box for three years until I saw the sweater pumpkins post at the link party and I knew what had to be done.  PUMPKINS!

I had one fuzzy forest green sweater and one fuzzy orange sweater.  The fuzzy orange one was the one I tried to deconstruct so one of the arms was annihilated.  Since the arms are what is used to make these adorable pumpkins I thought I was going to miss out but my craft muse smiled on me, she is so nice to me sometimes, and that fuzzy sweater gave me a short fat cowl to make into a cute little squat pumpkin.  I added some fun fabric stems and a bit of cotton string for my pumpkin necks and Houston we have decorations. I have these guys on my mantle, on my little decoration table in the hall, and on my kitchen table.  So cute!
 
I hope everybody is looking forward to tricks-or-treats coming up next week, I know I am!!!!
Let us know what you are up to with your crafting genes.
 
Kelly, the jack-o-lantern ninja


Wednesday, June 27, 2012

June Craft Club....... circles of patriotism

Wow!!! Anita's last post about the orchids was so pictorally wonderful.  All the color and texture  was fantastic to look at and enjoy.  I love how complex the plants look but the beauty they express seems so simplistic it calms the soul.  Nicley done Anita.  So to follow in her footsteps I plan on adding lots of pictures to my post too.  While mine are not as natural they are colorful and fun!


For this months Craft Club we got ready for the upcoming celebration of Red, White, Blue with some great wreaths.  The truly cool part of this whole event, other than the BBQ at the end, is that each of us picked a different wreath to make so we had no overlap.  I like the different styles we have, it makes Craft Club more fun!


I am not quite sure Mr. B was all that excited to be involved in this project.
We had lots of yarn used, felt cut, and fabric sliced into a great collection of circular homage to our great country. 


Each of these cute wreaths really matches our personallity to a tee.  We have fun and flirty, country Americana, classy and chic, and eye poppingly adorable.


Now lets get to the good part of the finished works.  We even had everybody complete their craft that night, very unusual. Way to go ladies!


Laura's yarn wrapped life saver with those super cute stars!


Katy's luxurious rosettes, very chic.


 Kelly's farm girl fabric knots.


 Anita's rolicking rockets of color.


Like I mentioned earlier, after all the crafting we got hungry so we had grilled chicken, corn, salad, homemade bread, and cupcakes for dinner.  Anita and Laura even made real lemonade while Katy and I grilled, ok Katy grilled I chatted.  Very tasty indeed!

I hope you are having all kinds of American inspiration this month.  The Fourth of July is almost upon us so make sure to bring out your patriotism and show it to all.

Keeping it USA,
Kelly, the origami ninja


Tuesday, February 28, 2012

Bookshelf makeover: Part 1

Well, here is a picture of my next "to do list" craft: my bookshelf.   I have a nice new craft room this year and this plain old bookshelf needed some funning up to be able to be allowed to reside in said  sparkly new craft room.  I pondered the nakedness of the shelves for a bit and realized that they were a blank canvas for all of those extra mailing label stickers I have accumulating in the office.  Enter the sticker in all its colorful glory.
Note the pile of papers in the upper right hand corner, that my friends, are the stickers calling out to be affixed to the bookshelf.  You can also enjoy all of my husbands re-loading equipment in the picture as well.  The bunny cage is on the floor in front of the bookshelf because all of the books are in boxes in the spot where his cage goes.  It's a vicious cycle that all leads back to covering that bookshelf with stickers and giving it a good shellacking.

I started covering and cutting and will update you next week on how far I got this week, wish me luck.
This is Oreo and Nutter Butter letting you know that they approve of this craft message and that they hope that you are crafting your way through winter! They also wanted carrots, guinea pigs are by no means complicated in their wants.

Keeping it sticky,
Kelly, the origami ninja


Tuesday, February 21, 2012

Guinea Pigs are for Loving

Last week I got to put up a new craft so now it is back to the craft grindstone and posting frenzy.  This weeks completed work is another item that was finished a while ago but had not yet made it to the blog for some love.  The National Anti-Vivisection Society has a contest called Art for Animals that I entered for the first time last year.  This was my entry for the 2011 contest and I even got an honorable mention.  In all fairness I lost to a HUGE art piece of a walrus, it was sweet.  They also have a kids contest too! Go over to the web page and check out this years contest to enter.

The little quilt is about the size of a large place mat.  I just made up the pattern to use up some fabrics that I had that I thought looked good together.  My two adorably loud guinea pigs were the perfect models for the smoochers and I learned basic embroidery to add the finishing touches to the hearts and piggies. 

Aren't they too cute?  After the Art Show I donated the quilt to The Critter Corral guinea pig rescue to help raise them some money.  I hope it helped them get some piggies some good homes.

I am enjoying watching my to do list slowly disappear and I hope yours is doing the same.  Let us know how you are doing on your projects and what is keeping you going this winter, we would love to know!

Keeping is moving,
Kelly, the origami ninja


Tuesday, February 7, 2012

Finished craft of the week.....

I am so proud to finally be able to bring this finished project to you, fellow crafters.  I have been laboring through this for a while now and I am very happy with how it turned out.  You see, Anita taught us about embroidery awhile back at a Craft Club, she showed us how we didn't have to rely on fancy pre-printed patterns.  With a steady hand and some carbon paper you can create any embroidery you could ever imagine, and it's FREE!
So this wonderful dog was in an embroidery book but he wasn't quite right for the friends I wanted to give this to.  With a few tweaks and a fluffy tail we had instant Golden Retriever.  My friends a have a cutie named Sake.  I worried and puzzled and fretted over this piece for so long I had it built up into this massive project that I would never be able to conquer, you would think I was painting the whole house not applying a few stitches.  But low and behold, once I got started I was back on the embroidery bus and moving through it like the Flash.
The worst part of it was trying to keep the lettering in a straight line while I was stitching.  After a few TV documentaries and a viewing of The Princess Diaries I had this great personal gift for two friends who have brought me so much happiness.  I am loving the works that are getting checked off my to do list, keeps me motivated for the next one. Speaking of which, it's time for a new craft as I have been so diligently working on these oldies but goodies, but that is for another post.
I hope you all had a wonderful Super Bowl Sunday, as you can see it really took a lot out of the labs at our house. 

Keep on crafting everybody, 2012 is going to be a great year!
Keeping it lab-radorable,
Kelly