Well we started getting Christmas cards in the mail (and some in person) the past two days. I love getting stuff in the mail! Dan and I were opening a bunch last night when I realized we had nowhere to put them. Enter my creative husband "Why don't you just put a string on the wall and we can clip them onto it." Hmmmm I'll do you one better. Enter the Snowflake Card Hanger!
Stuff you need:
White felt - enough for two 5" diameter circles and two 4" squares
Silver fabric (I used a poly satin) - two 5" diameter circles
Fabric Ribbon *1/4' width* - 6 yards total (cut into three 2 yard strands)
Glue gun w/ glue sticks
Fabric marker
Straight pins (just a couple)
Mini spring clothespins (as many as you have cards to hang)
Sewing machine (you can also hand stitch if you don't have one, this is a minimal sewing project)
Paper and pen - to make your template
1. Take your three strands of ribbon and match all the ends up. Now fold those ends by 4" and wrap them into a loose knot about an inch from the fold.
2. With your glue gun, put a spot of glue on the inside of your loose knot. (The glue will keep your knot from coming undone.) Now tighten down you knot, but be careful not to burn yourself on any oozing glue. Trim the tails of the ribbon 1/2" from your knot.
3. Loosely braid your ribbon together so there wont be any strands sticking out in case one is a little loose. Repeat step 1 and 2 to make another loop at your other end.
4. Now we're going to make your snowflakes for each end. Follow the pictures below to make your template with paper first.
 |
| Cut the portion that isn't shaded. |
 |
| Here's what you get when you unfold your cut triangle. |
6. Cut out your snowflake. I used a seam ripper to get a hole started on the inner detail of my snowflakes.
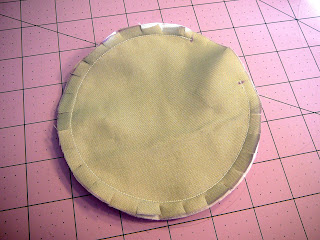
7. Now you're going to sew the two background circles for your hanger ends. Pin one of your felt circles and one of your satin circles right sides together. Sew around the edge but leave about a 2" space open to turn it inside out.
8. Snip little tabs along your seam allowance about every 1/4 to 1/2". This will make your circle nice and round when you turn it inside out. Don't forget to do it in the opening too.
9. Turn your circle inside out and get it ready for top stitching by turning under your open edge. Top stitch around the whole circle. Repeat steps 7 through 9 for your other set of circles.
10. Flip one of your circles over so that the felt side is up and mark the center with a small dot. Place one end of your ribbon on the circle with the dot just behind your knot. Stitch in place. (I made 3 or 4 passes to lock it in.) Repeat for the other circle and end of ribbon.
11. Take one of your finished circles with satin side up and hot glue down your felt snowflake. This is no exact science but you do want to make sure you cover up your stitches with the center of the flake. Repeat for other end.
Tada! You're done. Now you just hang it with a couple of push pins/nails/hooks in the desired spot and attach your cards with the spring clothespins.
P.S. This craft is dog tested and Sadie approved, as usual.
Merry Christmas!
Craft on!
Anita


Merry Christmas, I am your newest follower :) I have a giveaway going on, if you get a chance enter... I am trying to boost the entries!! We Don't Have It All Together
ReplyDeleteLove the dog feeling festive note!
ReplyDeleteHello!
Found you on a blog hop and am your newest follower - Would love for you to check out my blog and follow back if you like it.
Check out my "retail therapy" giveaways and enter a few, there are some great products to win.
I also have a fantastic weekly blog hop.
http://retailtherapylounge.blogspot.com
Carol
Very good tutorial !
ReplyDeleteCome say hi and follow me back !
Happy blog hop !
XO
Frenchy
http://lechateaudesfleurs.blogspot.com
Hi there. I am your newest follower from the blog hop! LOvely blog:) You can find me at www.bouffeebambini.blogspot.com
ReplyDelete