Showing posts with label felt. Show all posts

Monday, September 26, 2016

Farm Quiet Book Page 6 - Big Red Barn


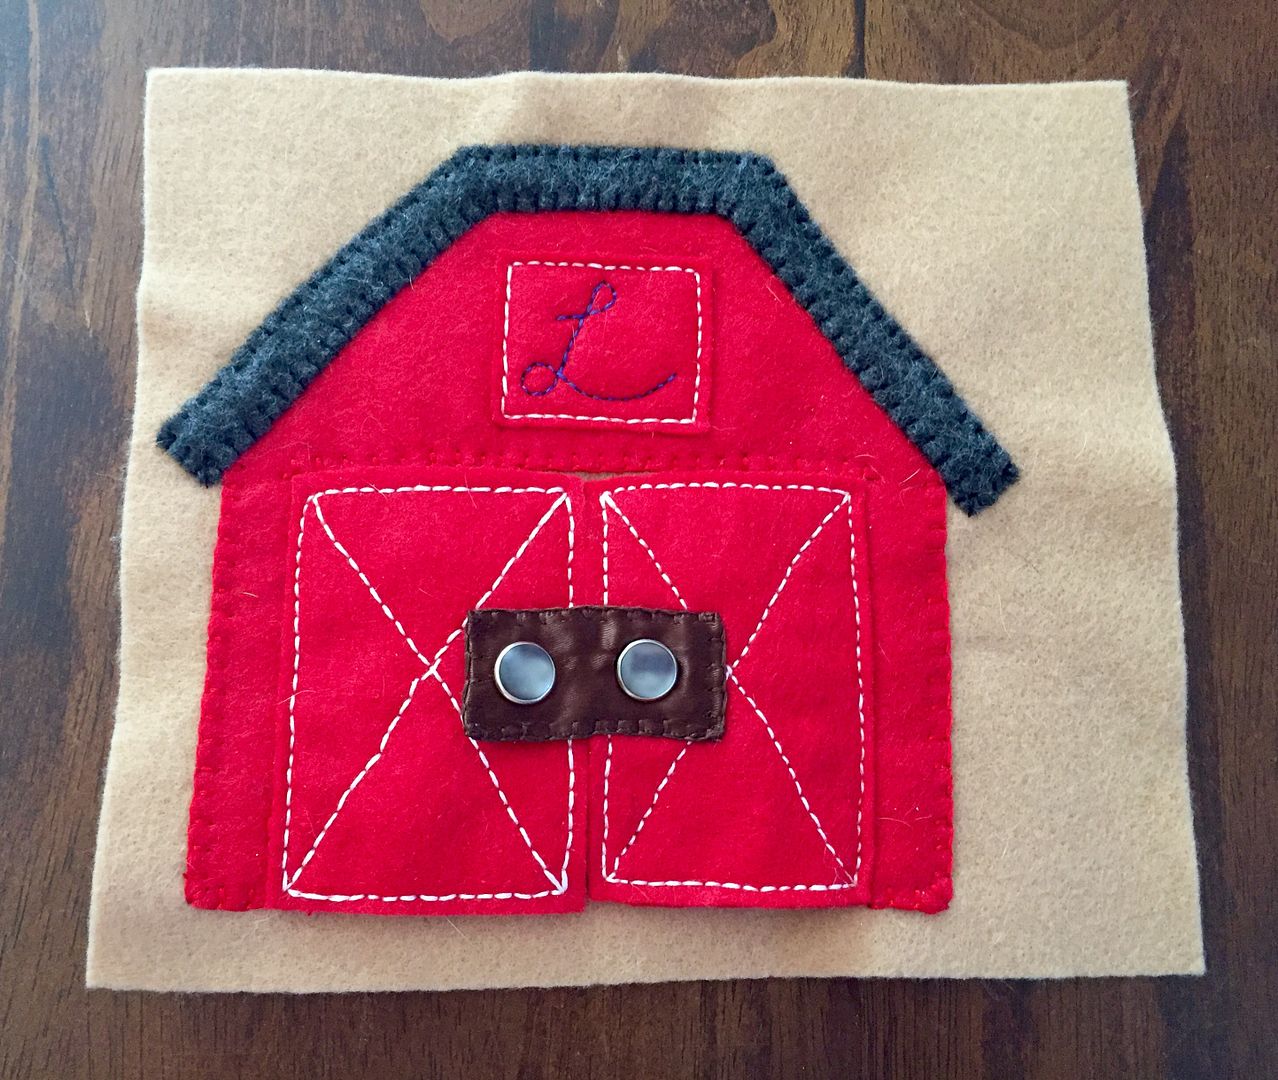
Next up on the farm tour is where all the animals like to sleep, especially cows. Who doesn't love a red barn?  No one, that's who.


Did you notice the little L on the hay loft door?  It's my son's initial, love the little details.


I wanted to do another page with flaps and what better way then a couple of big barn doors. I added pearl snaps, which was easier than I thought, to add another tactile element to the page.


The snaps grab onto the felt, 2 layers, really well. The brown latch is just ribbon folded over with a piece of canvas in the middle for support.  The snap on the right side is just decorative but it helps to hold the ribbon onto that door. Here's hoping it will hold up to little fingers man handling it for a long time.

Last but not least I added in a Holstein, complete with udder, and this barn page was complete. Another page checked off the list.


 Stay tuned for the next page. Only a couple left and then I move onto assembly.

Craft on!
Anita
Saturday, August 27, 2016

Farm Quiet Book Page 5 - Busy Bees

Yes that is dog hair.  Its pretty much embedded into everything I make.
I loved the flowers so much from the pigs page that I needed to add them somewhere else.  Where better than to show how bees are raised.  I always remember seeing these white boxes on the way to my grandmother's farm growing up.


I added in what a hive looks like in nature just for variety too.


This page didn't end up being super interactive but I love all the details.  The bees are only attached by their faces, wings and stripes.  Their cute little eyes are French knots. 


I already love next week's page so stay tuned for more farming fun.  Only 5 pages left!


Craft on!
Anita
Saturday, August 20, 2016

Farm Quiet Book Page 4 - Dirty Little Pigs

Up next on my felt farm book tour is the pig pen.  I wanted to figure out a way to put a pig into a mud puddle without getting dirty so I made a pocket. 


This guy has a super long pink ribbon tail that is securely stitched into the bottom of the puddle. 


His piggy buddy hangs out by the delicious looking flower patch growing nearby.  The faces are stitched on to avoid any choking hazard and this time I added a little curly tail too.


The flowers are also stitched but just the centers so the petals stick out for dimension. 
Comments?  Suggestions for improvement?


Craft on!
Anita
Saturday, July 30, 2016

Farm Quiet Book Page 3 - A Horse of Ribbons


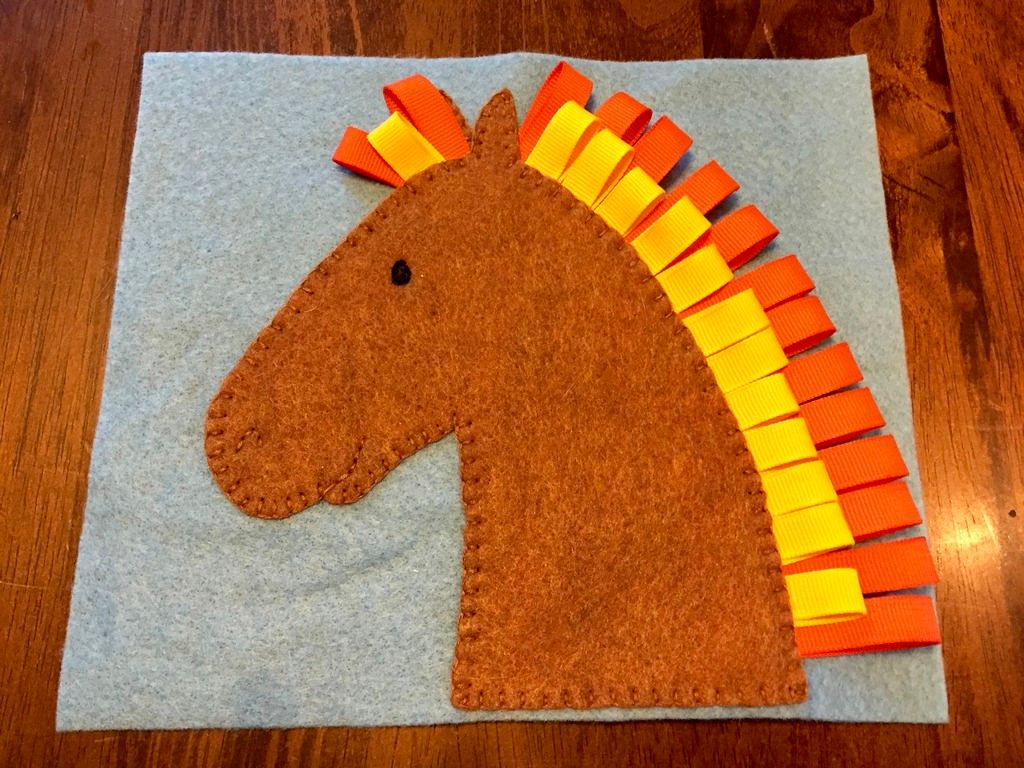
Next up on our quiet book is my favorite farm animal - the Horse.  Side note -  I actually went to school to study horses and worked in the field for a period of time after college until I decided I didn't want to be broke for my whole life and that horses would be a hobby in my life's future instead of a career.

This guy was surprisingly a lot faster than the chicks I posted last week.  First I drafted a little paper pattern for his head and ears and then we set off to make the mane.  I knew I wanted to make something fun to grab and opted for ribbon since I figure it will launder better than yarn in the long run.  I drew a line along the back of where his neck would be as a guide first. Then using my sewing machine I attached each of the folded over pieces of orange ribbon along the neck line.  No crazy measuring here, just stuck piece after piece under the foot as I went along.  When I got done with the orange I repeated the step with yellow for more color.  Each of the pieces of ribbon were 4" long.  I also added a couple pieces on his forehead since horses have mane that comes down between their ears too.

You can see the machine stitching in white thread on this picture of the back.

Next was to blanket stitch around his little ear in the back and then the main body.  I added a little nostril and smile to his face too.

Last but not least was his eye which I satin stitched on just like the chicks from last week's page.

Done!  Love this guy.  Stay tuned for next week's page.  I've got 7 more planned.

Craft on!
Anita
Saturday, July 23, 2016

Farm Quiet Book Page 2 - Peek a Boo Chicks


What came first, the chick or the egg?  Who says we have to choose.  Why not make a page about both?  This page is all about the way chicks break out of their shell.

I started out with an egg shape and stitched down some crack lines first before blanket stitching it to the page.

Next was a broken egg so that my Little One can lift up the flap to see who's inside.

Last but not least a happy little chick flapping his wings about.  I attached the wings only where they would come off the chicks body so they flap like real ones.

All the faces are satin stitched.  I'm not going to use glue in this book in the hopes of it lasting a long time so stitching was the only way to go.  I did add a little orange triangle under the beak stitching to make it a little more raised than the eyes.

Have to say I'm loving this quiet book more and more with each page.  Stay tuned for the next farm topic in felt.

Craft on!
Anita

Tuesday, July 12, 2016

Farm Quiet Book Page 1 - The Little Red Tractor

My little one is all of a sudden almost 6 months old.  I haven't yet finished a project for him and figure it's time to start.  With all the time I have been spending breastfeeding there has been a good amount of Pinterest surfing while stuck in a chair feeding him.  That means a lot of new boards and pins have been discovered.  One of my favorite new topics is quiet books.  I love the idea of making one just for him with things we love so Im going to start with a farming book.

I'll be posting each page as I finish and show you how I stitch them all together in the end for a finish product.  Here's the first finished page.....


I come from a farming family and my grandfather always had IH/Farmall tractors so rather than the John Deere green we went with red.  The tires are attached with white buttons so when he gets a little older he can practice taking them on and off.  I love how the blanket stitch around the edge looks like tread.  Inspiration came from this QB page.


Stay tuned for our next page.

Craft on!
Anita
Saturday, October 10, 2015

HTTC - Glowing Ghost Ornaments


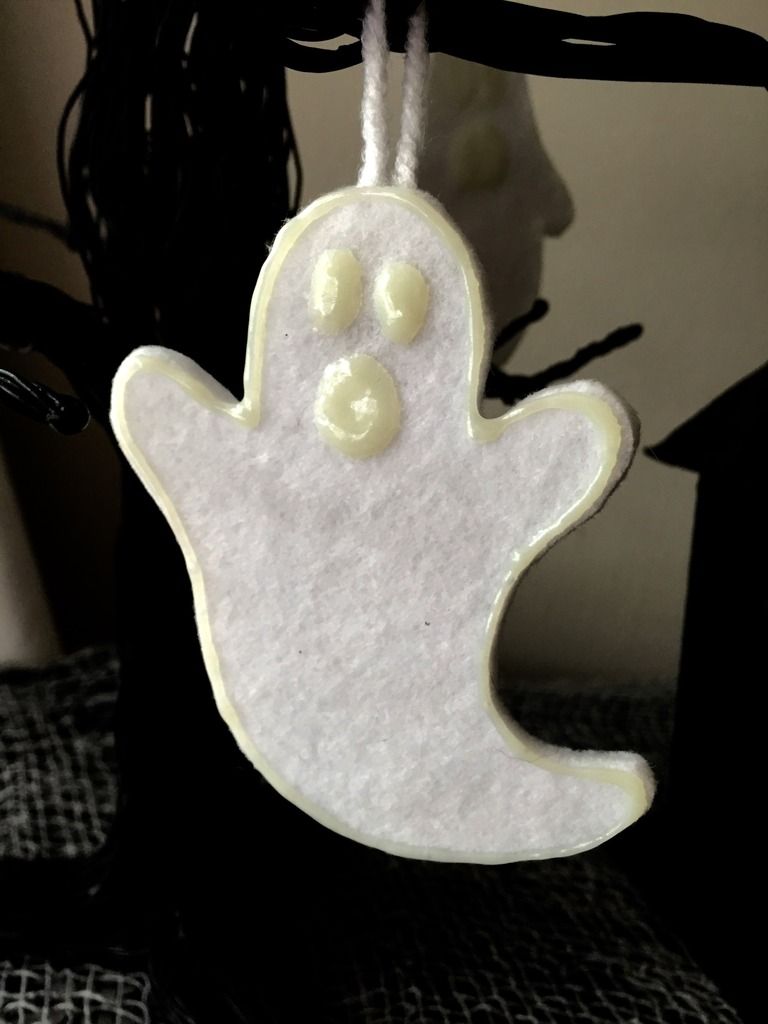
So I've had these awesome black wire trees in my Halloween decor arsenal for some time now.  They originally came with orange glass containers to hang candles from their branches but they all broke long ago.  I've been thinking about what to hang from their limbs and what was missing from my display were some spooky ghosts.  How do we make them extra spooky?  Make them glow in the dark!

Supplies
Ghost template
White Felt
Scrap white yarn - only about 3" for each ghost
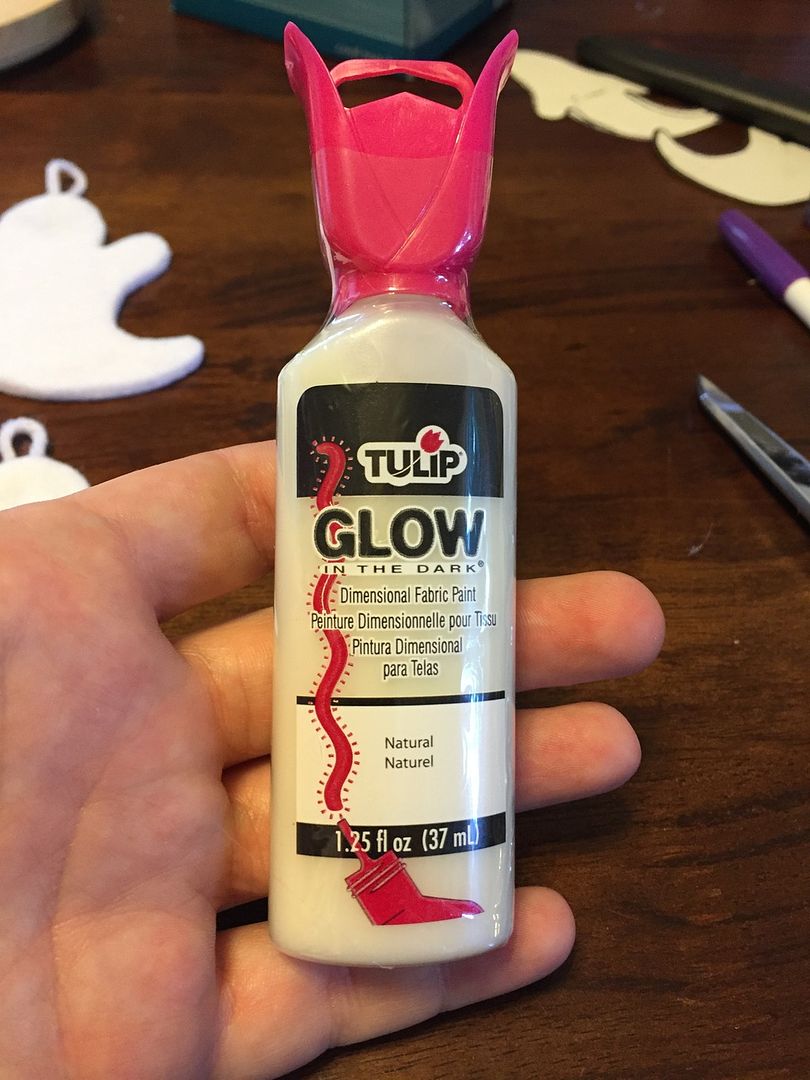
Glow in the Dark puffy paint - I used the Tulip brand.
Glue gun with sticks
Scissors

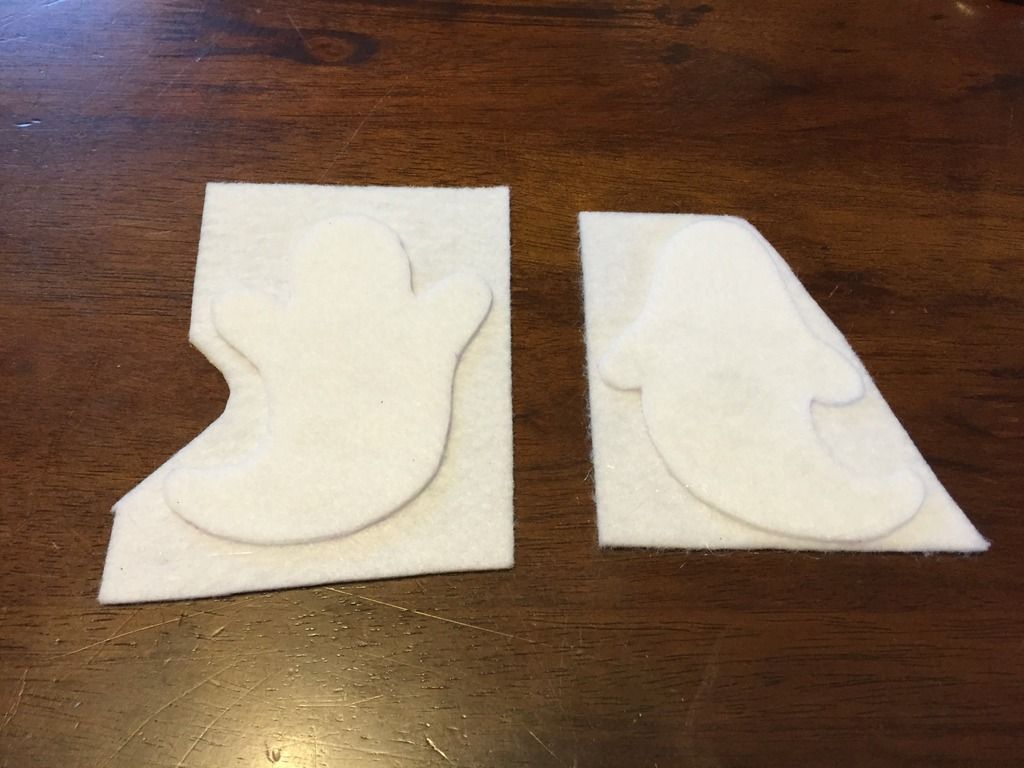
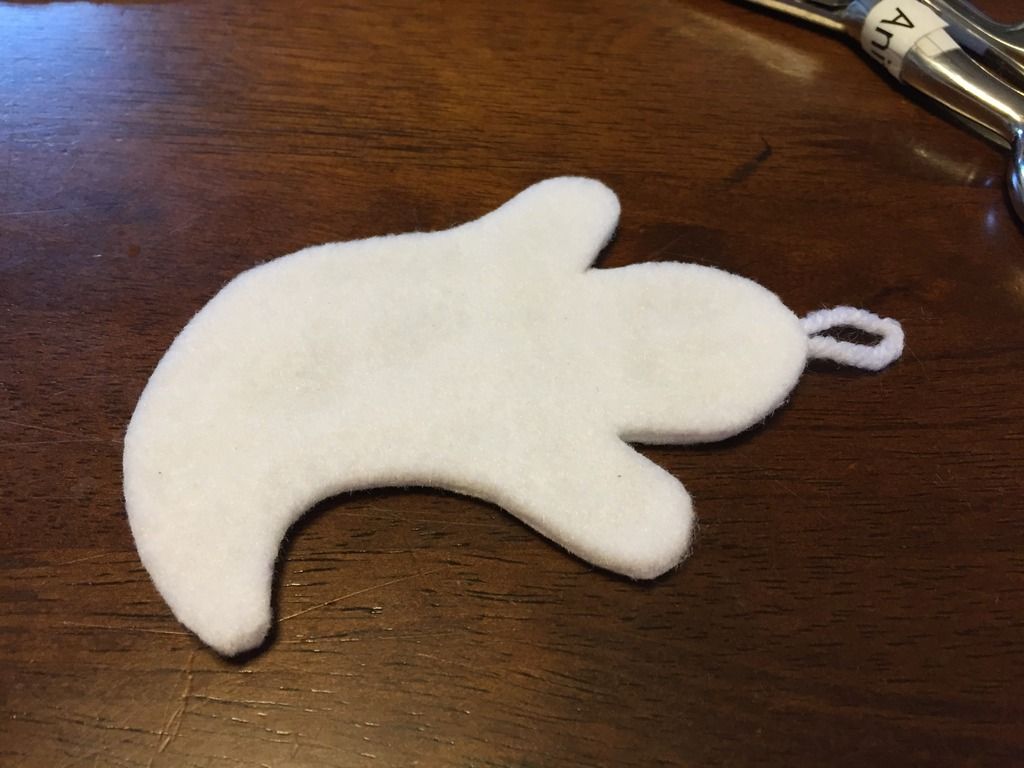
1. First trace your desired number of ghosts onto a piece of white felt and cut them out.

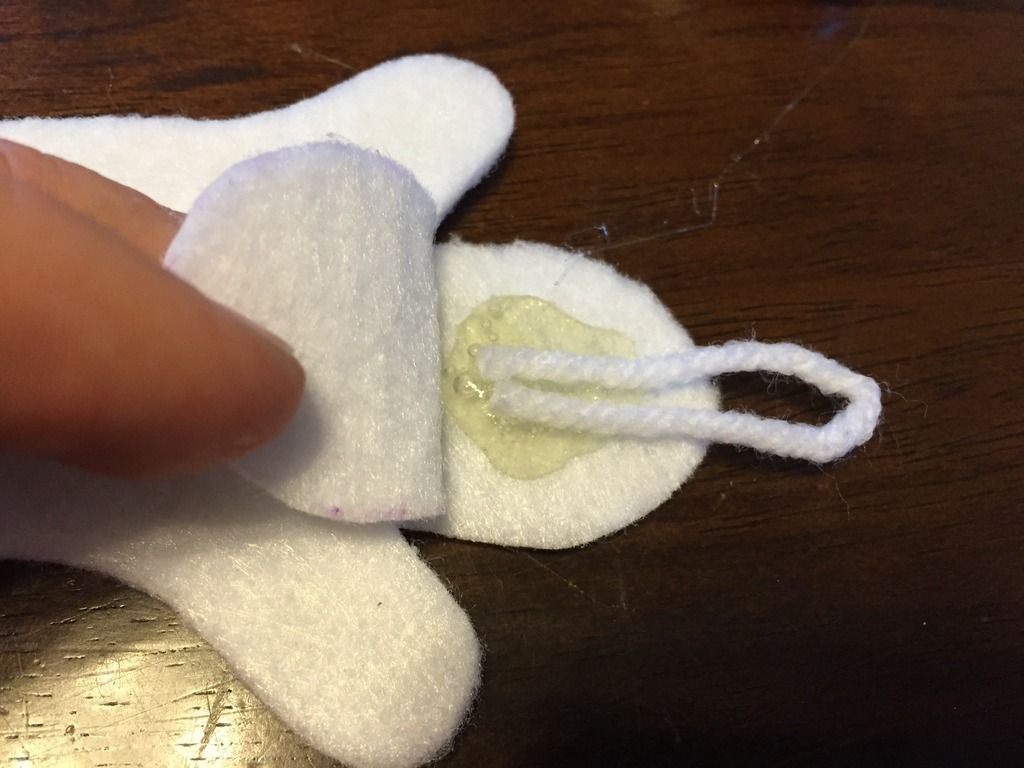
2.  Now glue those ghosts down to a second piece of white felt leaving the head glue free.  Don't Glue the Head Yet!

3.  Peal back the ghosts head sandwich and place a dollop of hot glue there.  Take a piece of your white yarn and double it over, sticking the ends in your glue dollop.

Squish the head closed.

4.  Now you will break out your puffy paint.

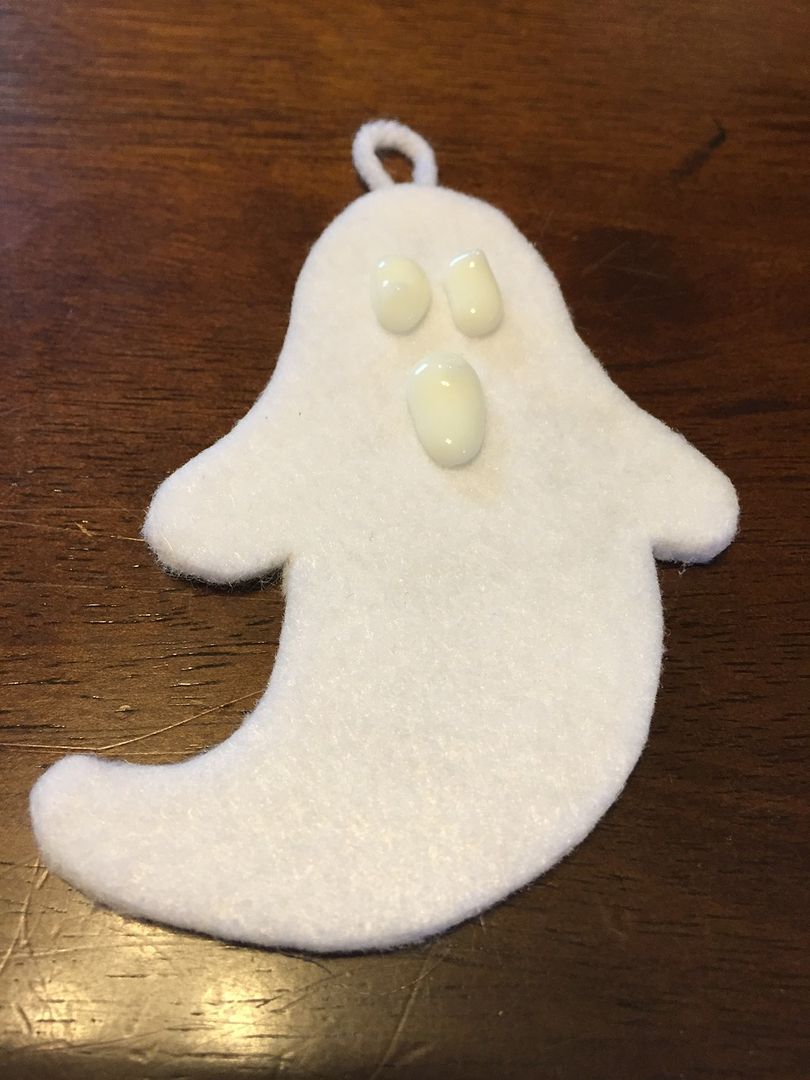
First add the face.

Then outline the ghost's whole body.

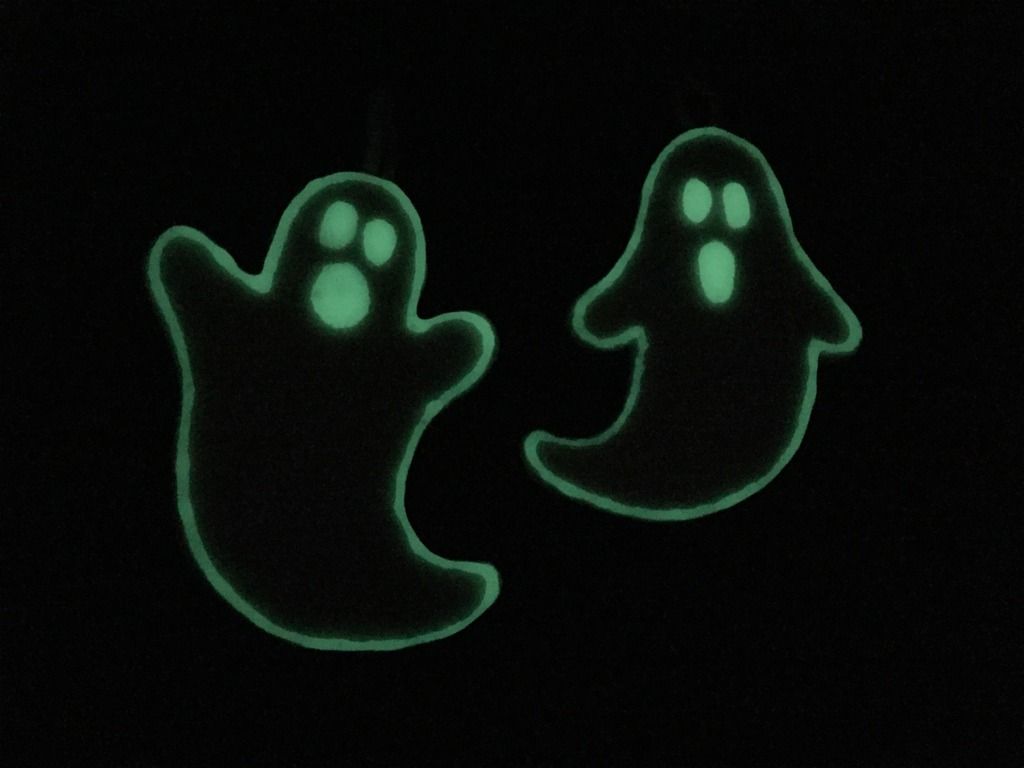
You will want to let these dry completely before hanging them.  The bottle recommended 4 hours but that might change with your temperature and humidity.  Check out how cool the glow paint looks in the dark.

DONE!
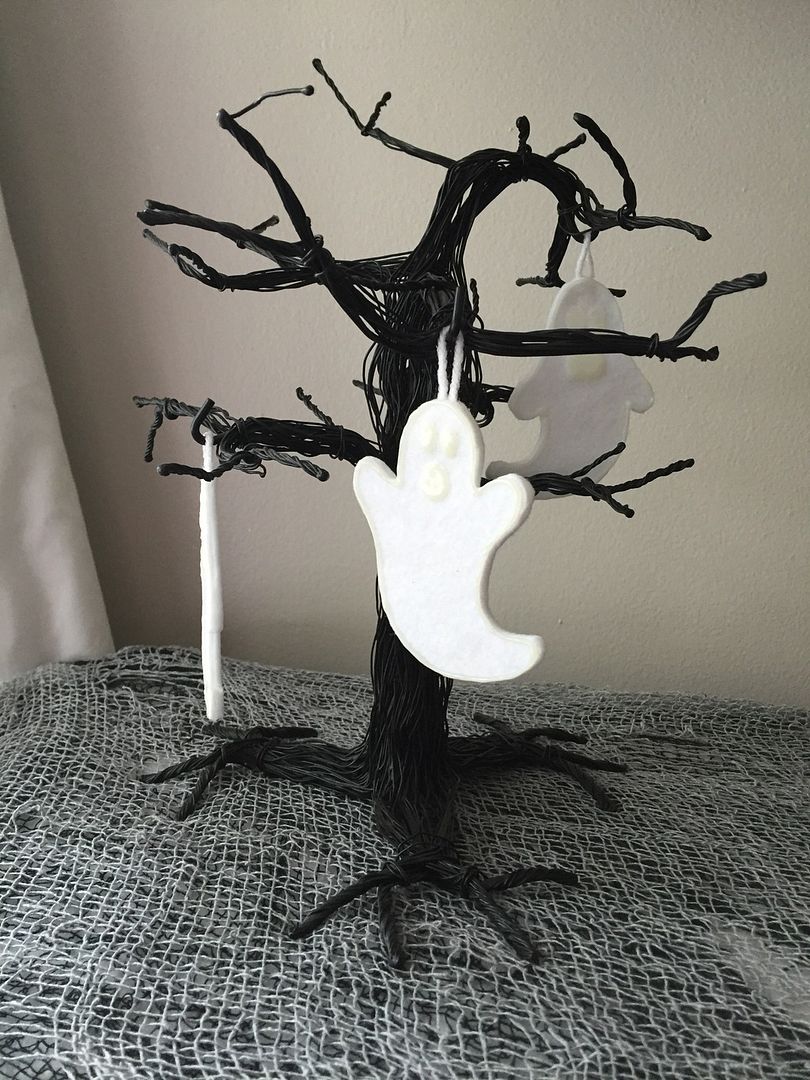
Here's how they look on the trees.  Spooky!
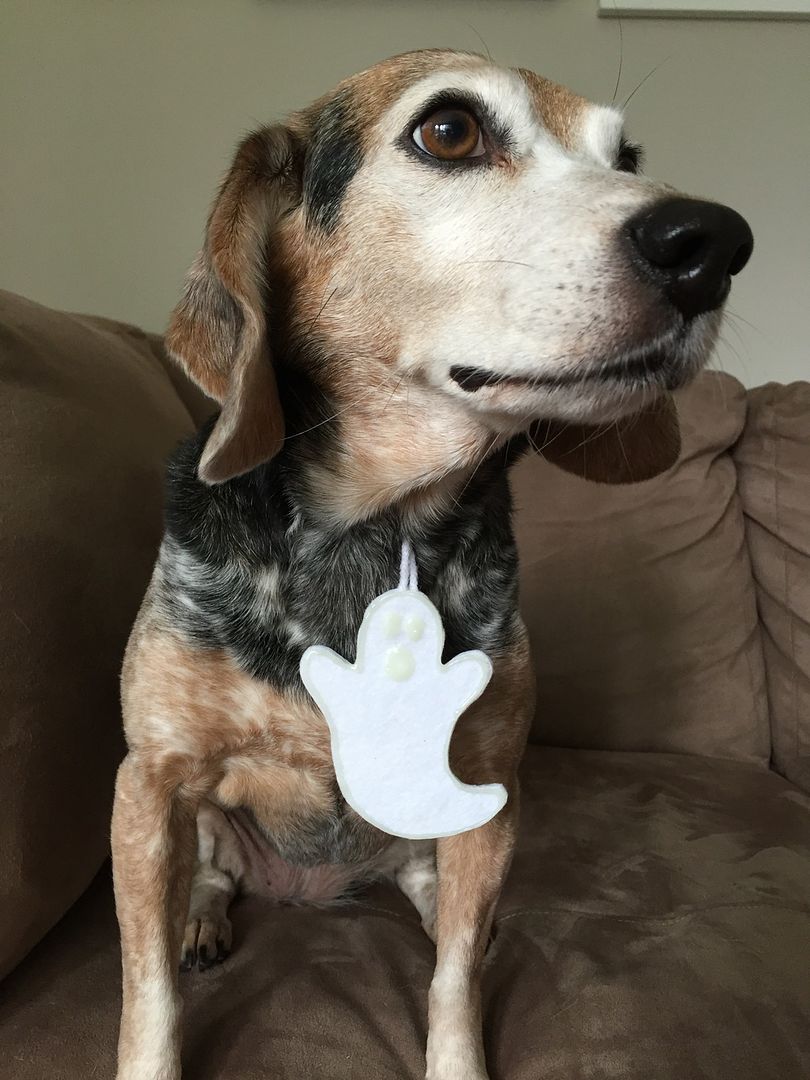
Gidget thought they also make a great statement necklace.

Haunt on!
Anita
Saturday, December 3, 2011

Felt Cone Santa


After making my feather Christmas trees I had one cone left that unfortunately I broke and was planning to throw away.  Waste not want not, right?  I glued the broken piece back on and decided I needed a Santa to go with my trees.  Here's how to make your own.

Supplies:
Styrofoam cone
Felt - red, white, black (I had some sparkly red felt and love how it came out.)
Scrap of off white fabric
1 White Pom Pom
Puffy fabric paint - red and white(I used the glitter kind.)
Black craft paint and paintbrush
Glue gun with sticks
A couple sewing pins
Scissors

1.  First you're going to cover the bottom of the cone with some of your red felt like below.  Ignore the green paint.  Remember this was supposed to be a tree.  You'll be covering the entire surface of the cone so the underside doesn't matter.

2.  Now you're going to have to decide where you want your Santa's face to be.  Take out your off white fabric scrap and glue it to your cone where you want the face to be.  Just make sure your fabric piece is bigger than the area needed for the face.  We will cover the edges with felt.

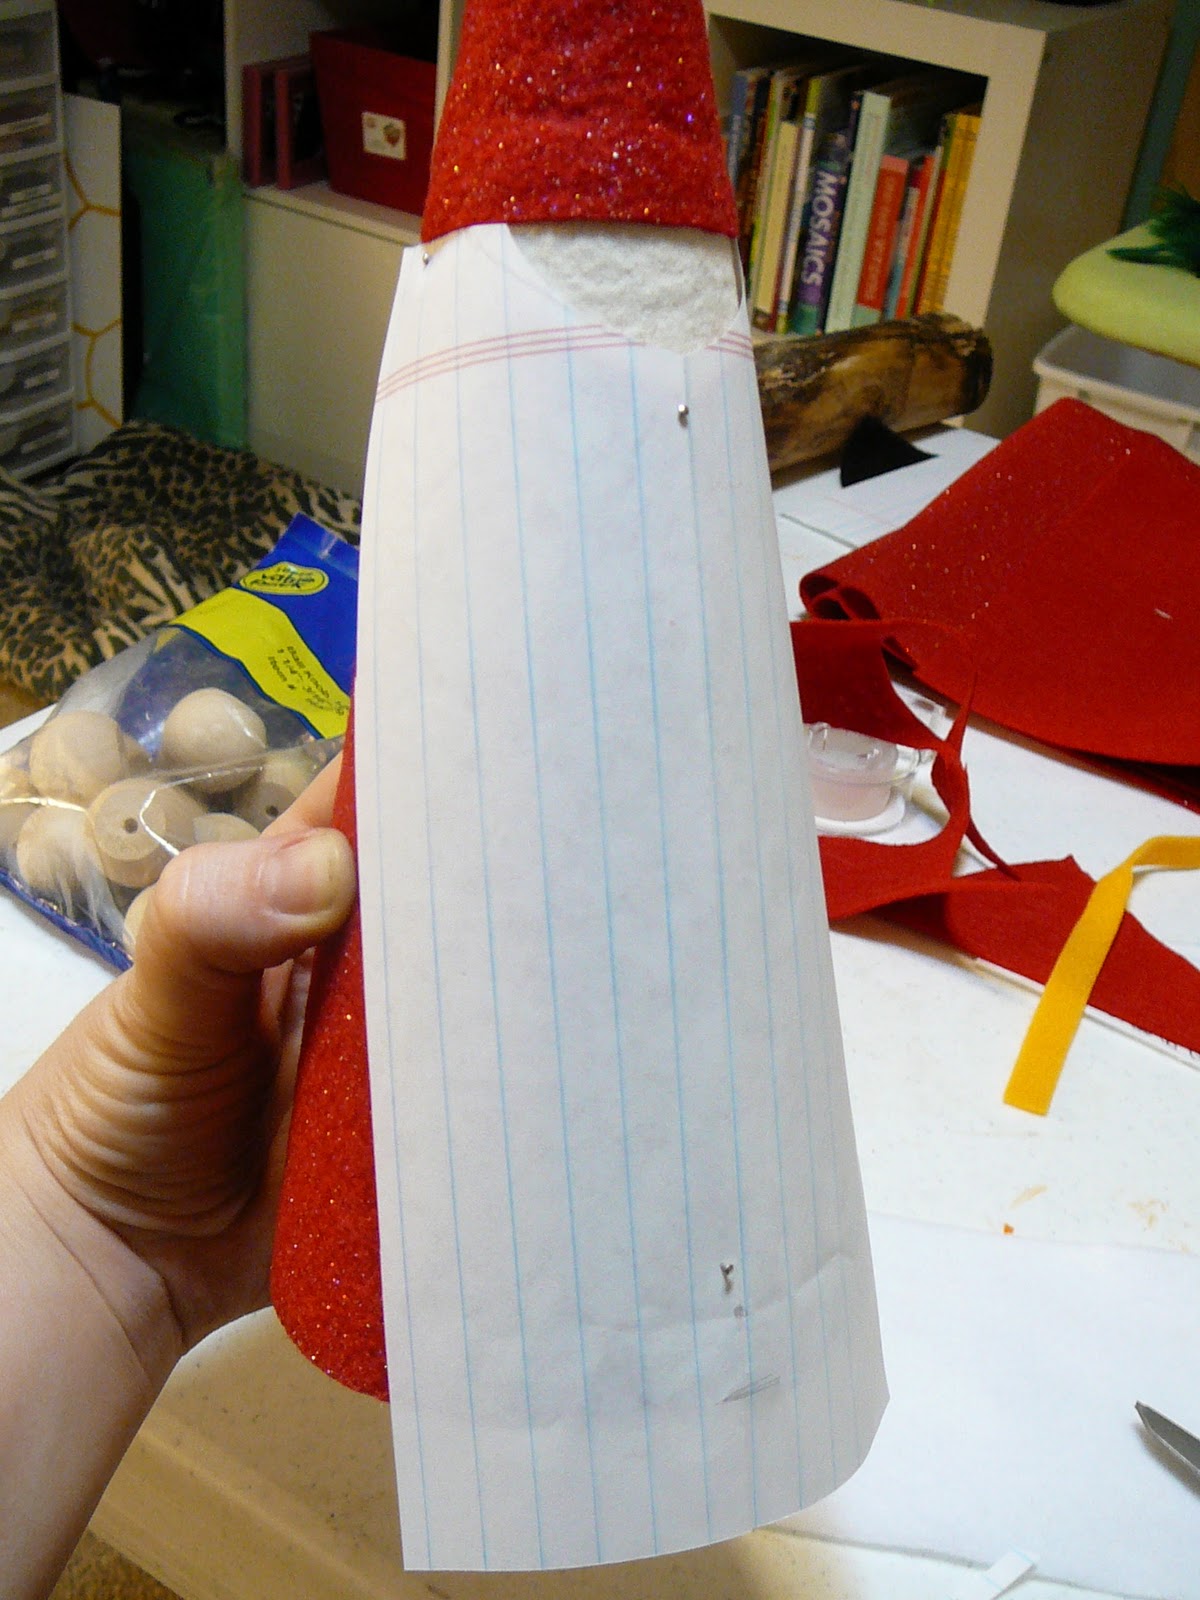
3.  Next step is to make the first of three paper templates you're going to use.  This one is for Santa's coat.  Wrap a piece of paper around the base of the cone and pin it in place.  Now trace the outline of your Santa's coat how you want it to look.  Transfer that to some of your red felt, leaving some extra room around the edges and cut it out.  It should look something like this.

4.  Pin Santa's coat into place and trim it to fit.  Don't leave any overlap on the seam.  We will cover it with his beard so make sure you line the seam up to run down the front of your Santa centered on the fabric you've placed for the face.
When you're happy with the fit glue the coat down to the cone.

5.  Repeat your template process but this time for a hat.  Remember to leave space between your hat and coat for Santa's face.  This time you do want an overlap on the seam when gluing together your hat.

Once you've glued on your hat bend over the tip and glue it in place.  Now glue your white pompom onto the top.


6.  Now make your last template for Santa's beard.  Pin your paper in place and trace the outline for your beard making sure to reach from the bottom of your hat to the base of the cone so it will cover the coat's seam.  
Transfer to white felt but don't glue it down just yet.  See the space left in the back of the head?  Just cut a piece of white felt for Santa's hair to cover the gap.  

Now you can go ahead and glue down the beard using it to cover Santa's coat seam and overlap the edge of the hair piece.  I pinned mine in place to help with keeping it centered while I was gluing.

7.  Take your black felt and cut a strip to make a belt. Glue it down from the back and trim it to fit to the sides of your Santa's beard.

8.  Now we need to add the trim to Santa's outfit.  Cut two strips of white felt, one for the hat trim and one for the base of the coat.  I made mine about 1/2 inch in width.  Glue in place with the hat trim seam in the rear and the coat trim seam at the front on either side of the tip of the beard.


Here's what your Santa should look like so far.

Our last bit of felt work is to add Santa's mustache.  I made mine pointy to match the angles of the cone.


9.  Ok, enough with the felt already.  Break out that paint you've got waiting.  Using the back of your paintbrush apply two black dots for Santa's eyes.

Now using the red puffy paint make a nice round red nose in the middle of your mustache.  Last step is to add the fun swirl pattern to Santa's beard.  I drew mine onto the beard template to get an idea of how I wanted it laid out.

Transfer that pattern using your white/glitter puffy paint onto your Santa's beard.

Now just let it all dry and you're done.  How cute is he?!  


All that's left to do is to find him a nice home.


Hope you love yours as much as I do mine.  Stay tuned for more to come in this Christmas display.  I'm thinking Santa needs some company.

Wassail on!
Anita