Showing posts with label craft room makeover. Show all posts

Tuesday, March 31, 2015

Just a little catch up

I have not exactly been tackling any major crafts in my life right now but I have done some little ones that make me proud and keep the creativity moving.  I fixed up a thrift store find to dress up my work place for Easter, I found a great way to store my spray paints, and I made a fun pillowcase to match some new sheets I got as a gift for our comic book room.

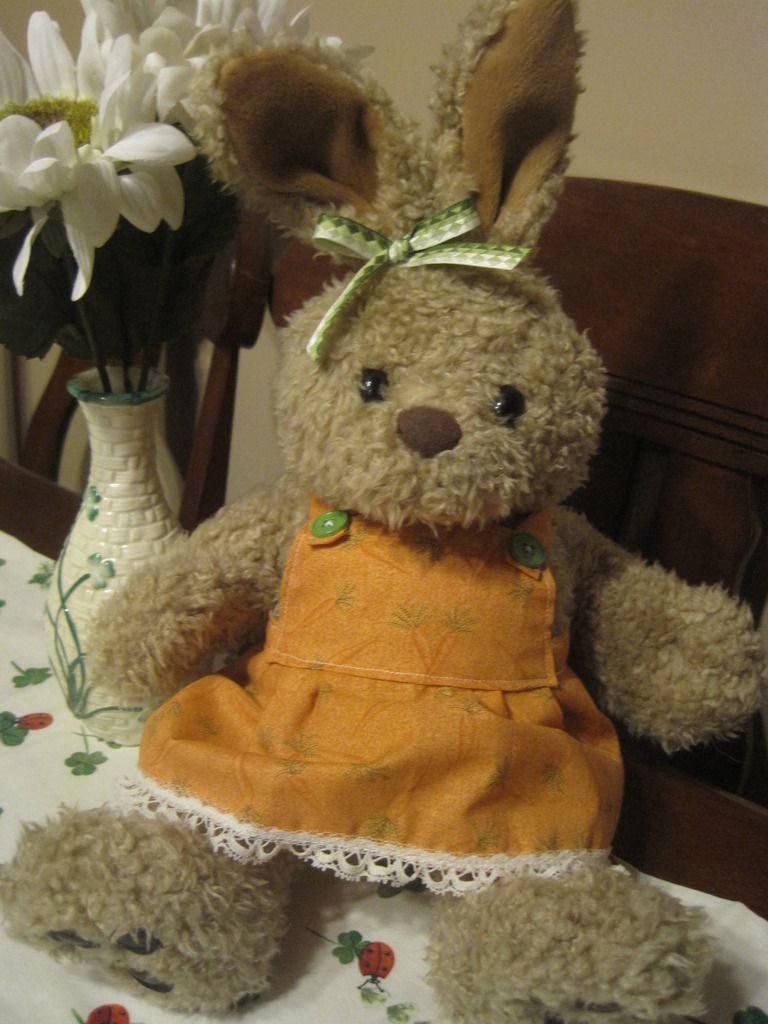
I found this cute little bunny at a thrift store in Rockford.  She is from the people at Build a Bear and was wearing a dress way too large for her at the time I found her.  I have been updating our holiday decorations at work and I thought she would be perfect for Easter.  I made up a new dress for her and gave her a a little bow in a green check pattern.

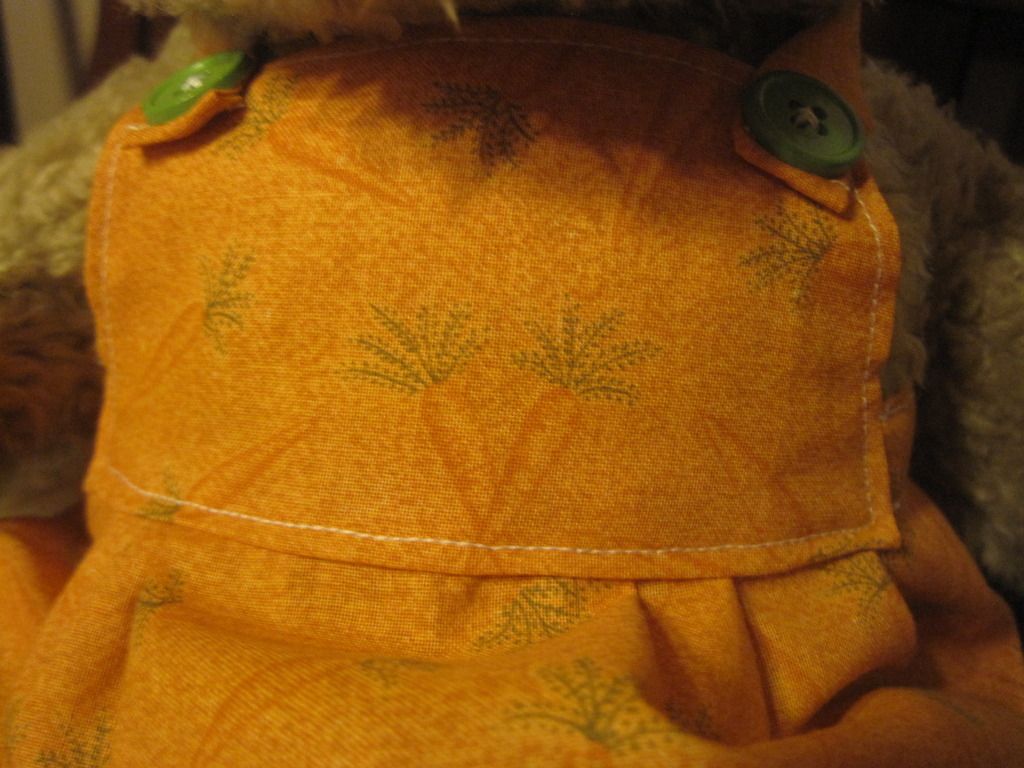
My favorite little touch is that the fabric I made her dress out of has little carrots all over it.  They are subtle but cute, with the added bonus that it was in my stash already.

  I found this shoe caddie and thought it would make an excellent spray paint can holder.  I have a thing for spray paint crafts and have thus acquired many different colors.  They were overflowing the shelf in the garage and had threatened to mutiny if I left them out in the cold for another winter.  Now they are safe and warm on the back of the craft room door and my husband can have his space in the garage back.

My awesome husband gave me My Little Pony sheets for our guest bed in the comic book room for Valentine's Day this year.  I needed a MLP cover for the over-sized pillow as the set only came with two standard sized pillowcases.  We were out on a one day vacation to Lake Geneva and found a great sale on MLP fabric.  I nabbed enough for a pillowcase, as well as the matching accent colors, and had it made the next day.  The Star Wars sheets are on the bed right now, but I can't wait to show off my new MLP creation soon!

While not complex, these simple crafts are quick and keep me feeling satisfied until a big job comes along.  I am very excited for Spring to hurry up and come to Illinois as I have a big project outside to tackle and I am desperate to get started.  I can't wait to show you the before and afters!

Have a wonderful day!
Kelly 

Saturday, January 11, 2014

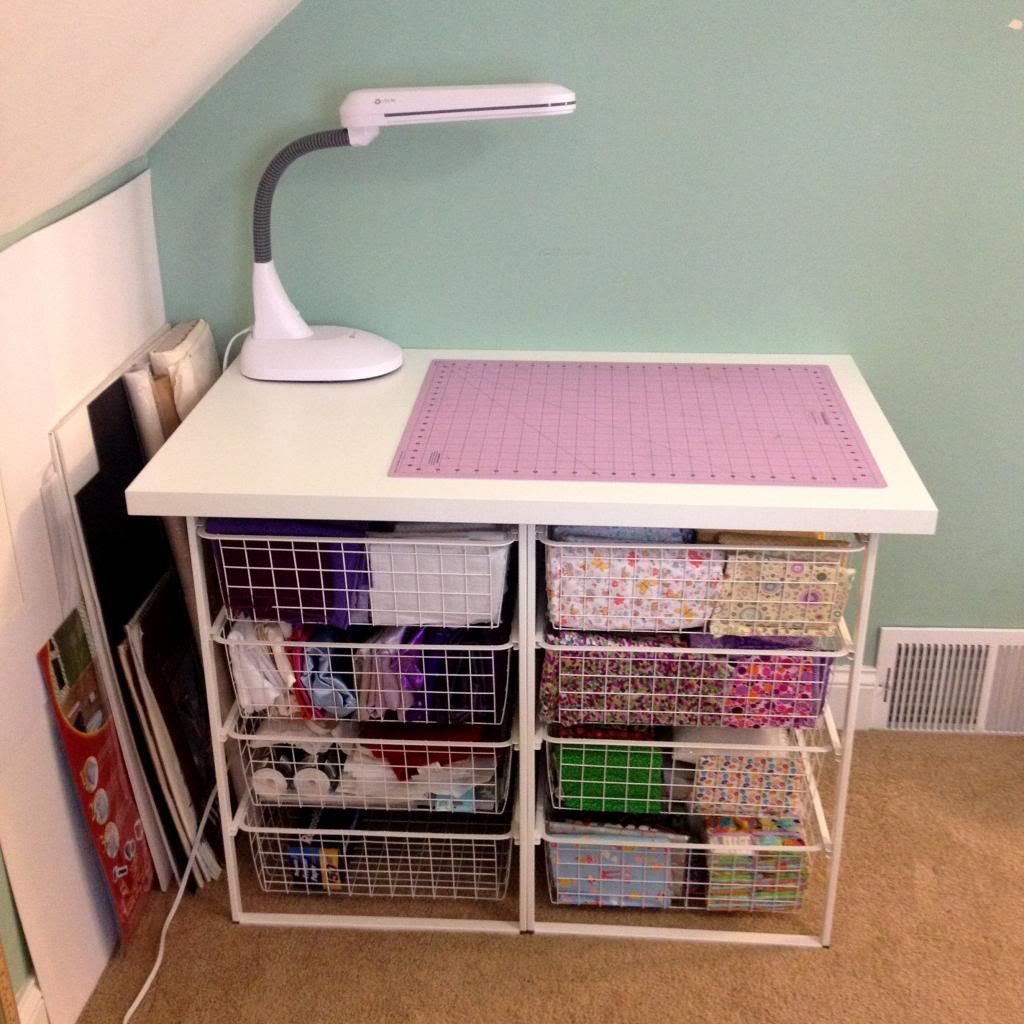
DIY Cheap & Easy Fabric Storage Station


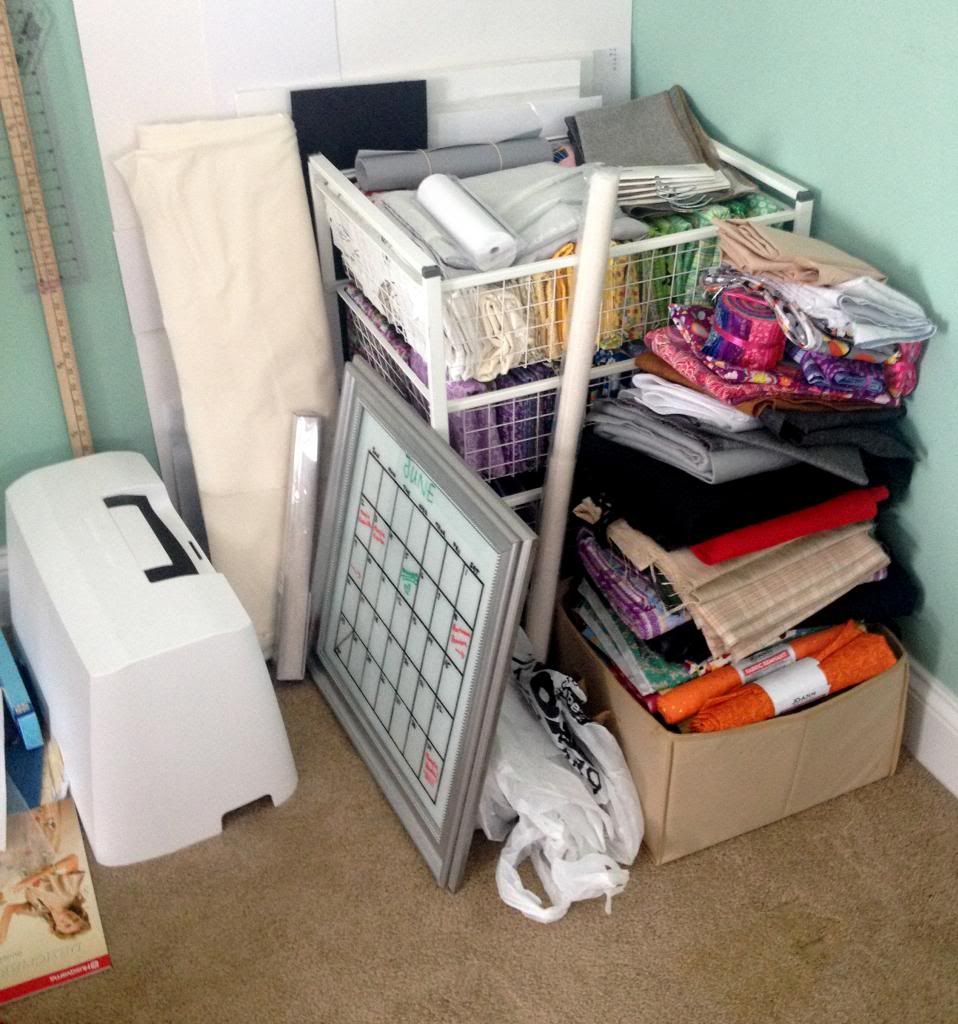
I knew I was in trouble last week when my fabric stash started looking like this.
Yes I even had batting/interfacing and other fabric stuffed into rubbermaid totes next to my sewing table.  I just didn't have anywhere else for them to live, until now that is.

I've been a fabric horder for a long time and I have a sickening weakness for the remnant section of any fabric store.  I don't think it has completely gotten out of control yet but I was well on my way with that wonderful mess/pile forming.  It was conquer the pile or get swallowed by it so here's what I came up with.  The best part is that this only cost me $30, not counting the drill and hammer I used to put it all together.  I got the shelving units on sale for $10 a piece.  They normally only sell for $20 each so it would be more like $50 for you to make this full price.  Still a steal for a fully functional piece of furniture.  Here's what you'll need.

Supplies
Antonius wire basket shelving unit from IKEA - $19.99 ea
1 small Linnmon table top from IKEA - $4.49 (I picked white but they also have black.)
8 Metal conduit straps, 1/2" w/ 2 holes - $.99 for a bag of three 
16 screws (I used wood screws but I've also seen drywall screws recommended for MDF.)
16 small metal washers 
3 white zip ties
a couple pipe cleaners to help with assembly
drill with bit to fit your screws
hammer

1.  Assemble both the Antonius shelving units according to IKEA's instructions.  Leave the baskets out for the time being.

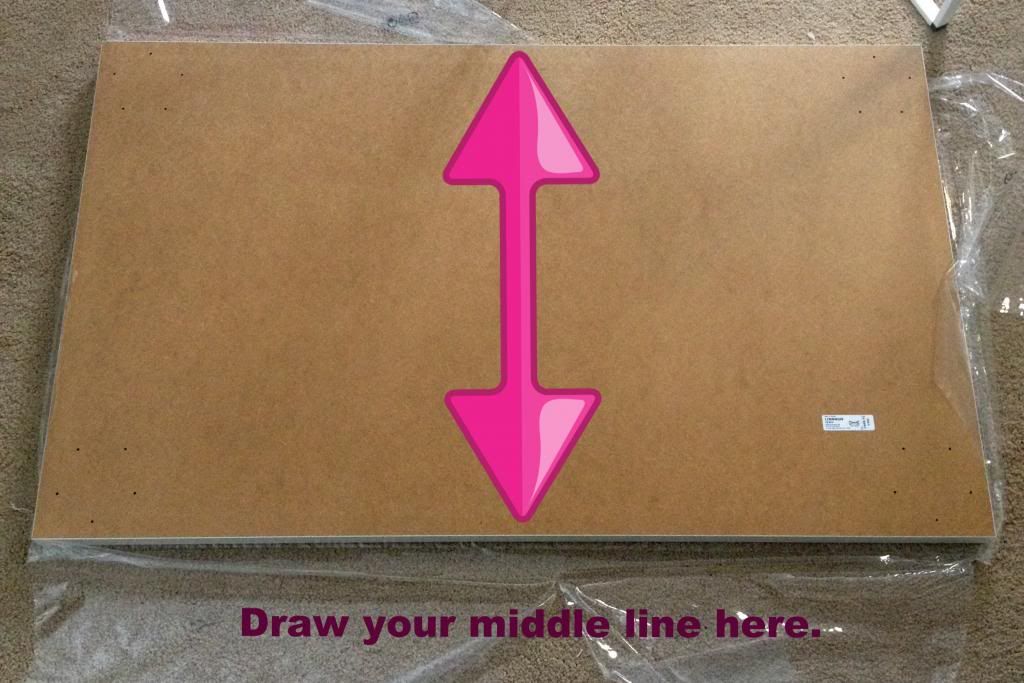
2.  Now unwrap your Linnmon table top and place it wrong side up.   Find the center and draw a line down the vertical middle of the long side.

3.  Place your shelving unit frames side by side on top of the table top. ( I used the pipe cleaners to snug them together for the time being.)  Line up where they meat on that center line you drew in the last step. 

4.  Now we need to attach the frames to the table top.  Here's where those metal conduit straps come into play.  Before you can use them you need to flatten them out a little so the opening isn't so rounded. This will help them hug the shelving unit frame better.  I just placed them one at a time on the underside of the table top and used a hammer hitting them on the curved opening until they start to look like this. 
Don't worry about how the ends are upturned.  You can just use the hammer to gently tap them down.

5.  Now place the adjusted strap across one of the shelving unit frame pieces and screw it in on one side with a washer between the screw and the strap.  Don't over do it with trying to get the screw in too tight.  MDF isn't as strong as wood so if you put too much force on it the screw will strip the hole and it will become wobbly.  Just go until it is sunk all the way and feels snug.  Screw in the other side the same way and repeat for the other 7 straps.
 

Here's how I laid them out on the under side of my table.  I used 4 on each frame with two in the front and two in the back.  

6.  One last thing I did before turning the unit over was to zip tie the vertical pieces together where they meet in the middle but only at the back so you can't see them.  I did three ties, one at the very bottom of the shelving units and two more moving up toward the table top.  

7.  Now turn it over and slide in your baskets.  TADA!

Of course it took me longer to organize my fabric than it did to assemble this entire storage station but I loved every minute of it.  I get so excited about purging and organizing.  It's totally rejuvenated my crafty spirit for the new year.

I use the station as a cutting table, complete with one of the Ott lights my wonderful hubby bought me for christmas.  It's also my new favorite place to charge my computer.  I don't need to tell you how much the dogs love to model new things so here's a pic just to emphasize it.

Gidget loves the craft room by the way.  I think it's the soft carpet and that there are tons of places to take naps.

Have you ever done an IKEA furniture hack?  Let me know all about it in the comments!

Tuesday, February 28, 2012

Bookshelf makeover: Part 1

Well, here is a picture of my next "to do list" craft: my bookshelf.   I have a nice new craft room this year and this plain old bookshelf needed some funning up to be able to be allowed to reside in said  sparkly new craft room.  I pondered the nakedness of the shelves for a bit and realized that they were a blank canvas for all of those extra mailing label stickers I have accumulating in the office.  Enter the sticker in all its colorful glory.
Note the pile of papers in the upper right hand corner, that my friends, are the stickers calling out to be affixed to the bookshelf.  You can also enjoy all of my husbands re-loading equipment in the picture as well.  The bunny cage is on the floor in front of the bookshelf because all of the books are in boxes in the spot where his cage goes.  It's a vicious cycle that all leads back to covering that bookshelf with stickers and giving it a good shellacking.

I started covering and cutting and will update you next week on how far I got this week, wish me luck.
This is Oreo and Nutter Butter letting you know that they approve of this craft message and that they hope that you are crafting your way through winter! They also wanted carrots, guinea pigs are by no means complicated in their wants.

Keeping it sticky,
Kelly, the origami ninja


Saturday, January 28, 2012

Deep in the craftin hole.....

Welcome to the mess that is my craft room.


It being a new year I have a strong urge to organize like many other crafters.  I went ahead and took inventory of the works in progress I've started, periodically work on, or just simply forgot about and the magic number is 23!  Yeah thats about 22 too many.  I've put together a list of these WIPs(works in progress) and will be doing periodic updates as I check them off.  Here's what I'm up against.
Sewing
  • Tree Skirt
  • Log Cabin Quilt
  • Stamped Fabric Quilt
  • Sewing Machine Cover
  • Casserole Carrier
  • Seat Cushion
  • WIP Basket Liner
Embroidery
  • Horse Cross Stitch
  • Whale Cross Stitch
  • Horse Quilt Squares
  • Dogs for Wall Hangings
Painting
  • Wooden Bone Ornament
  • Wooden Penguin Ornament
  • Ceramic Tree Bowl
  • Paper Mache Reindeer
Knitting/Crochet
  • Socks
  • Bandana
  • Purple Scarf
  • Blue Scarf
Misc
  • Stuffed Owl Feet and Perch
  • Shamrock Centerpiece
  • Easter Egg Wreath
  • Iron-on Boo Shirt
I didn't realize how deep in the whole I was so my plan is that I have to complete at least two before I can start a new project.  I have alot of things I want to tackle before the weather starts getting better cuz I'm sure I'll be stuck out in the garden all summer and spring just like last year.  We also have some renovation plans for the interior and exterior of the house this year so I won't have much time to dig myself out of this crafting hole.  The first of the renovations is actually going to be in the craft room, all of the improvements aimed at organization and efficiency.  Basically the time to get started is now!  Good to know the dogs aren't bothered by the mess though.

Stay tuned.

Craft on!
Anita

Wednesday, May 25, 2011

Lost in a Sea of Buttons


Ever looked at your craft room and just felt a little nauseous?  Consistent order and organization have never been my strong suits.  I try to keep an orderly crafting space since I have so much stuff in that room but its never been a place I'm proud to show off from a design standpoint.  I feel very strongly about the idea that your craft space itself should inspire you, not stress you out.  I think part of the reason I have a hard time keeping on top of my little messes is that the space isn't that inspiring so I'm not that motivated to keep it pretty.  (That and the weather is finally nice enough to work outside.)

My goal is to do some simple projects to brighten up the space and make it more welcoming for creative adventures.  Organization is super important because I'm the type of crafter that if I can't find something in the first couple minutes I just run out to the store to pick it up, only to return home and find exactly what I was looking for in the first place.  Another priority is to make the room more puppy friendly, meaning not a bunch of stuff that could be mistaken as chew toys close to or at floor level.


So I decided to start going through the boxes that were lying around on the floor.  Two of them were full of buttons that I had bought on an online auction at shopgoodwill.com.  They're almost all mismatched or partial cards of buttons that I'm sure goodwill had no idea what to do with.  Suffice it to say I'm going to be doing a couple button projects pretty soon.  I went ahead and organized them by color and they're gonna be stored in used glass jars.

Another thing on my list was to send off the fabric bundles for each of my swap buddies that have been lying around gathering dust.


The swap was through swapbot and I'm excited to say that I got a swap partner from South Africa, never sent anything there.  I sent each of the girls four 9 inch squares in different fabrics, clipped together with a dalmatian and wrapped in purple ribbon.  I also included a couple of cards of buttons from my organization that I thought the girls might like.  Ive already received one of my swap packets and am anxiously waiting the other three.  Stay tuned for more craft room organization projects and makeover progress.

Craft on!
Anita