Showing posts with label craft. Show all posts

Tuesday, November 24, 2015

Let the wonder begin....

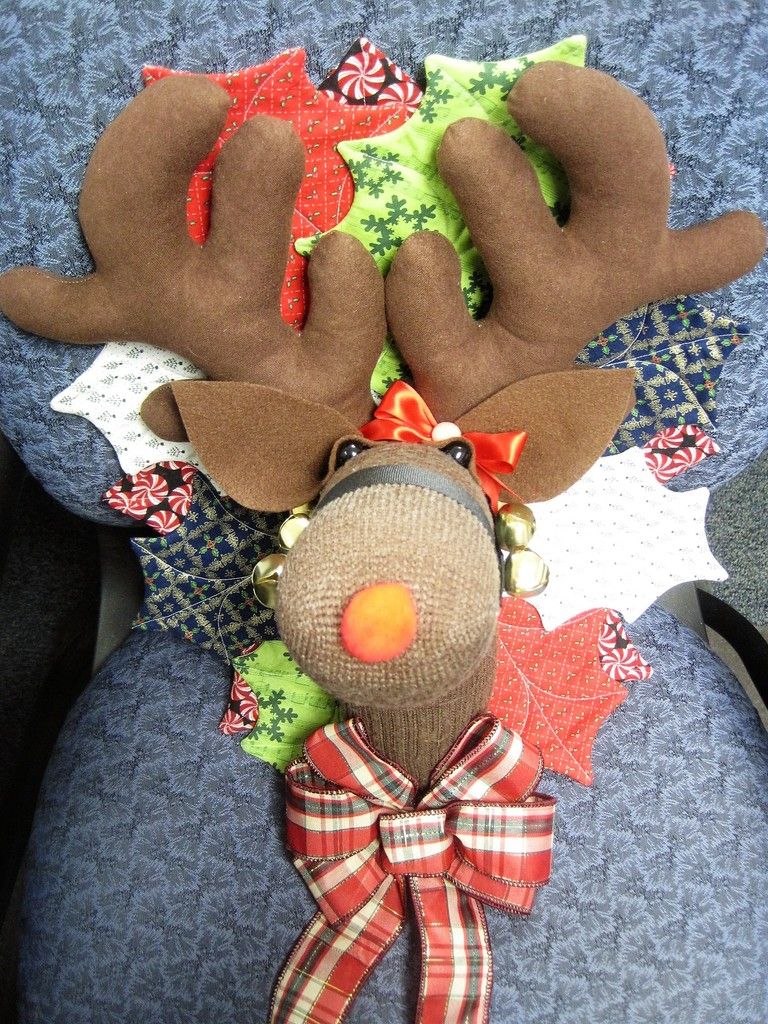
The homemade holiday gift giving has already begun in my household and it makes me so happy.  I had a friend of mine ask for a classic sock reindeer for her birthday present this year.  Her birthday is at the end of November and she wanted the reindeer to put up for Christmas so it was a better call as a birthday gift than an actual Christmas gift.
I have made four of these guys so far.  I found the pattern at a thrift store in Montana and I carried it around with me for for over a decade before I finally made it.  I started out with one for me and loved it so much I made one to share with my work office, then a friend in the office wanted one and offered to pay for one so I made her one for Christmas last year as a gift instead.  Another office friend loved hers so much she wanted one too! And so it goes.....  I know of at least one more I will make this year alone.

The pattern is amazingly fun and the instructions are easy to follow.  I was able to master sewing a curve after all the sewing of the leaves.  You can find copies of this exact pattern for sale on Etsy or maybe eBay.  The company that manufactured the original pattern in the 1980's has a website, and though I did not see that specific pattern for sale they had many really cute animal themed craft patterns!  I would recommend any Cotton Ginny  pattern, the end result is fantastic!   

I will be putting up more Christmas gifts as I finish them, I have a great Dr. Who cross stitch that I am almost done with and I am insanely proud of it!  I also have some quick dinner recipes to share to keep you warm and well fed during these busy weeks.

May your days be Merry and Bright!
Kelly

Tuesday, June 17, 2014

Getting ready for football season, the upcycling way!

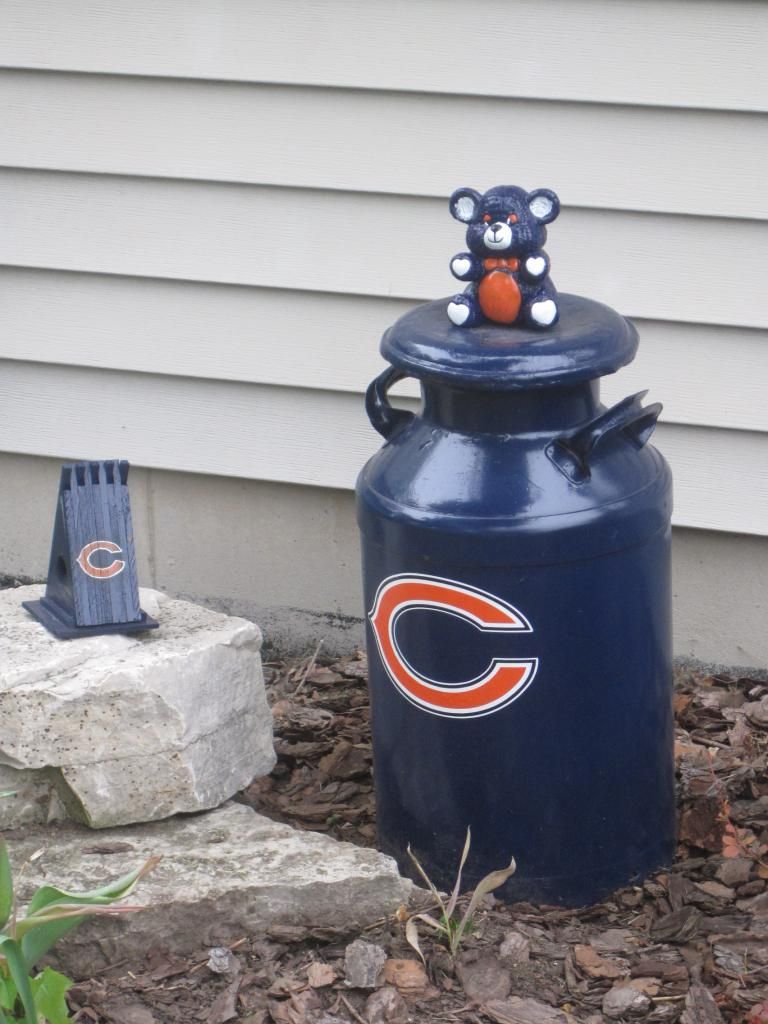
I am an admitted, all be it I can be rather quiet about it depending on who is around, garbage picker.  I am not digging down to the bottom of cans but a cool item on top or sitting on the ground waiting for pickup is fair game to be brought home and re-imagined as something fun.  I am always on the look out for something that fits into the "one mans trash is another mans treasure" realm that I can pick up and make my own.  After this awful winter the spring brought a massive wave of yard cleaning and improvement.  This has proven a boon to my collecting, thus adding some fun football team support in my front yard for very little money.  I picked up three great items this spring and along with a few I already had have been painting them up in Chicago Bears blue and orange.  I have spray paint cans ready and tackle the items with gusto.  See, I live very near the Illinois/Wisconsin border and you have to put out your support for all to witness.  Packers green and yellow or Bears blue and orange, however you go you have to put it out there, there can be no question who you root for when folks drive by.


The milk jug I picked up and painted with my favorite spray paint and topped off with a web bought sticker.  The bird house was one we had made a year or two ago on a Craft Club adventure, gussied up to match the milk jug, and balanced on a landscape rock that used to hold a koi fish statue.  Last but cutest is the little bear I got from a neighbor that was leaving the area, hand painted to add just the right amount tacky to the grouping.  


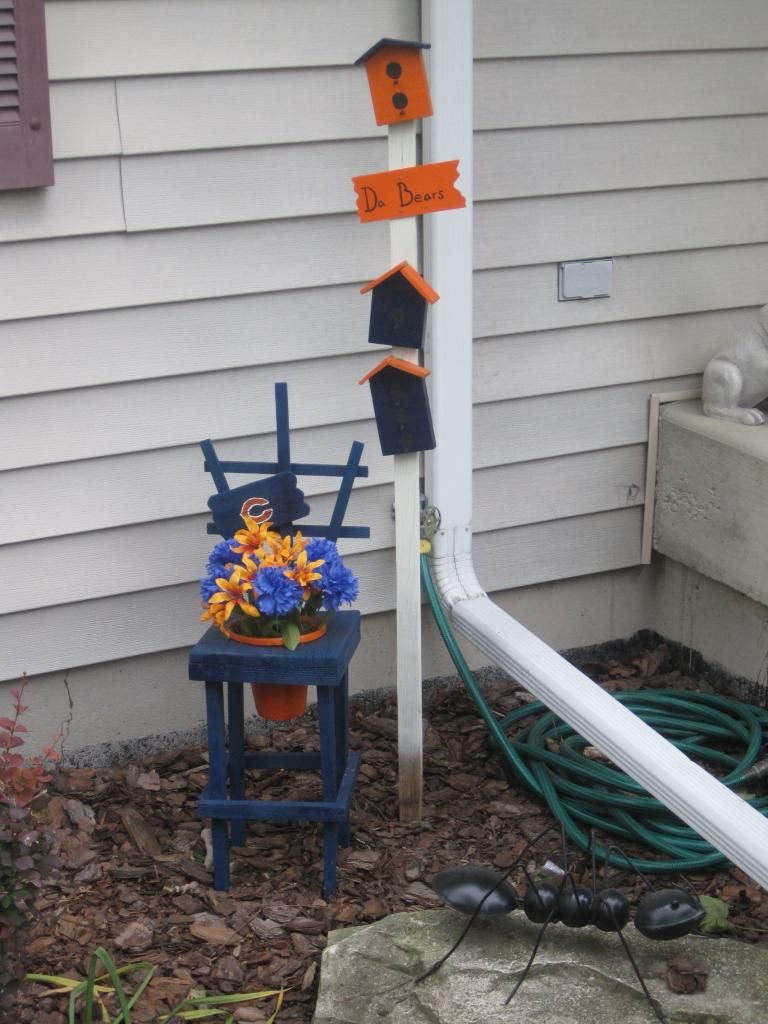
The birdhouse sign was picked out of a can during the great freeze in January, I hauled that thing all the way around the dog walk in the wind and cold.  I added a little sign I bought and pounded in in the ground near my door.  The little chair was out by the curb with small weather worn bugs all over it.  We popped off the bugs and sanded down the sign before painting 'er up.  Some fresh blue and orange flowers and we have a brand new take on an old yard decoration.  These up-cycled yard items make me so happy to look at every time I come home from work.  I love to see items in a new way and I hope you do to!

I hope your summer is great!
Kelly

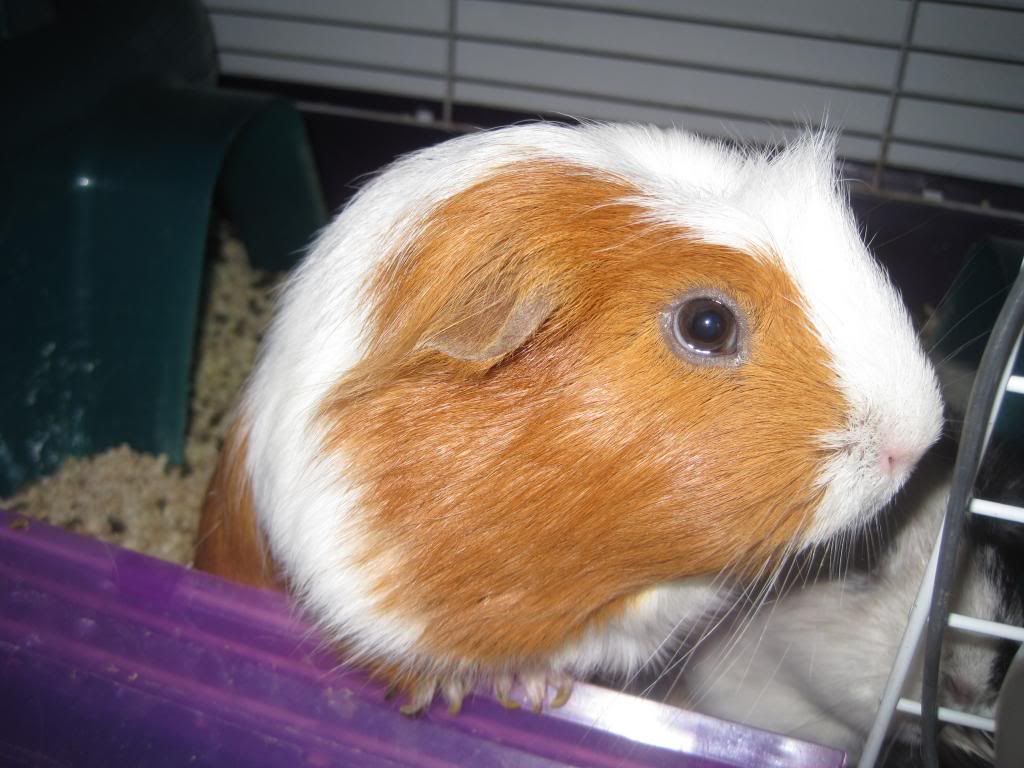
Just a little guinea pig nose to make you smile!  


Tuesday, June 4, 2013

Some nerdy crafting to get the Summer started

For me this is the start of convention season: Anime Central, Heros Con, and Chicago Comic Con.   I am excited to have been able to incorporate so many crafty things in my costuming this year.  I have two costumes that I have put together and I am very proud of both! I wanted to have a Captain Hector Barbossa from Pirates of the Caribbean too but that had to get pushed back a year so I will smother you with all that piratey goodness next year.  Additionally, I got to attend the Anime Prom at Anime Central so I even got to use some crafting putting that outfit together.  The prom out fit is the one I want to chat about now.

It all started with the aforementioned Barbossa.  I had planned to wear him to the prom because the rules, yep there are prom rules, state that you have to wear formal type clothing: suits, tuxes, gowns etc.  I figured that his long jacket, vest and cute little breeches would work well in that setting, he also has a suave hat.  I am a good seamstress, but not Barbossa good, so I was going to have the costume made.  The wonderful woman who was going to make it had something come up so we couldn't get it all put together before the con season started.  It's not a problem though as we will just work on it for next season.  So I have a ticket to this formal dance and nothing to wear, ok brain what can we pull off.

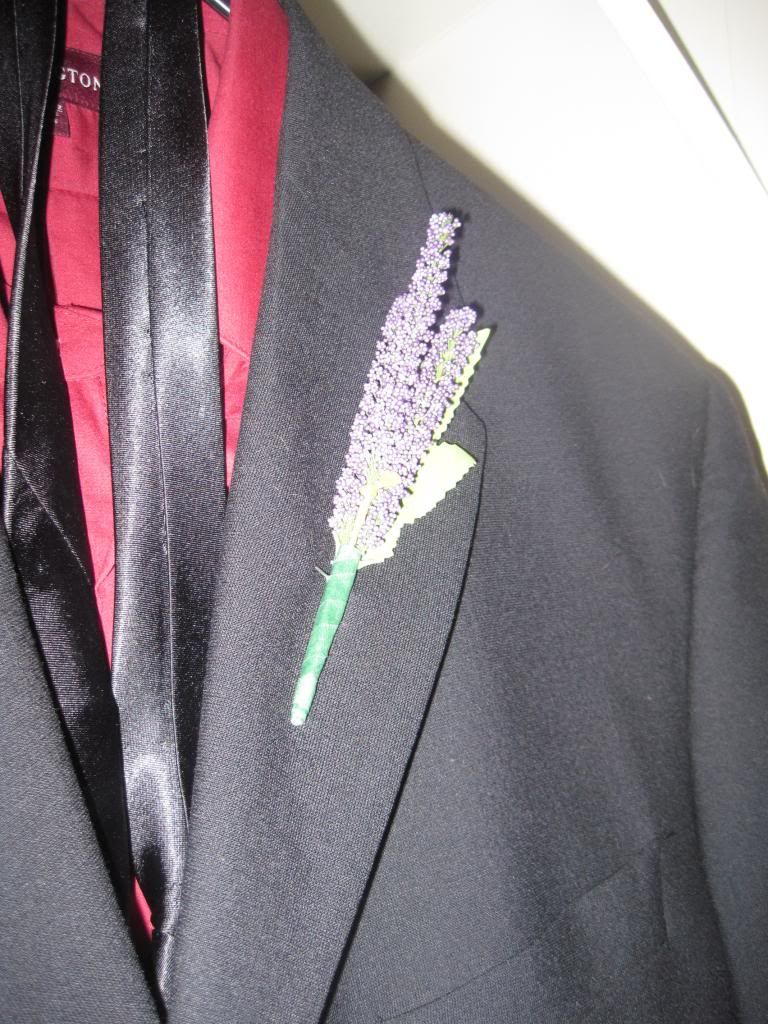
I realized that the ninja I was going as for the rest of the convention, more on him in a later post, could attend a prom just like every one else.  My very smart husband came up with the idea that we could get a suit for very little money at the Sears outlet near our house, I even got the dark read shirt I wanted! Go sears outlet.  I needed to make the suit a little more "him" so I whipped up this cute deserty, he hails from the land of sand, boutonniere from some fake flowers.  I thought it looked very desert grass. 

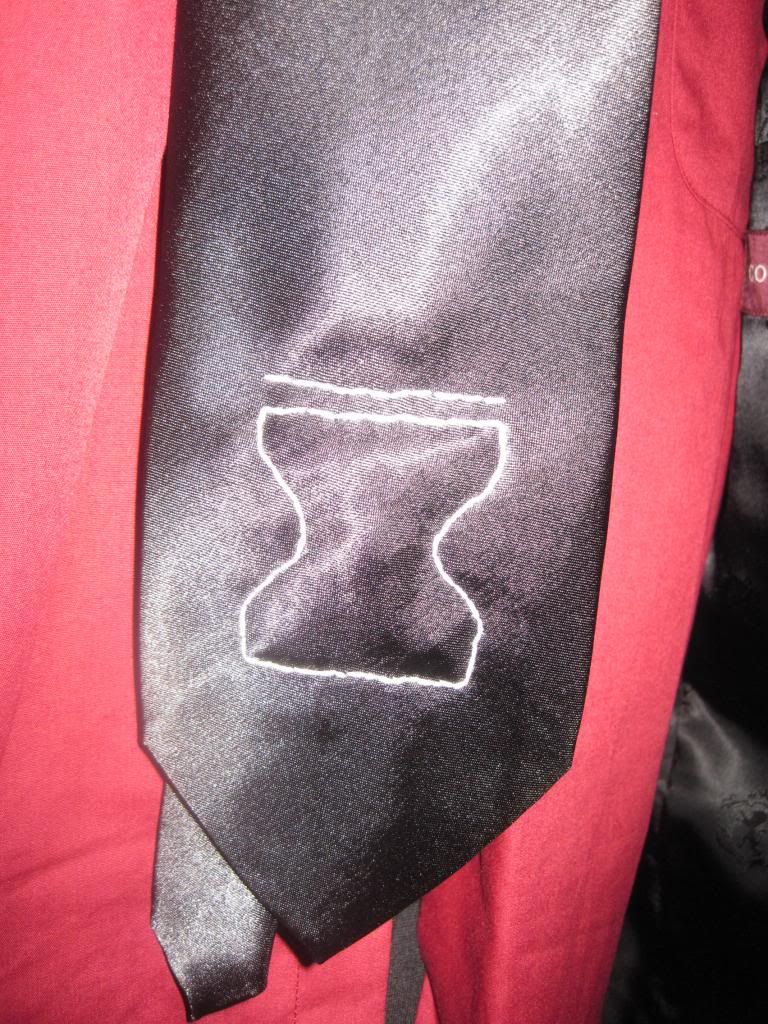
I amped up the tie with his ninja village symbol embroidered, that's right I used ninja and embroidered in the same sentence, on to it.  I really think it brought the whole sand village ninja prom outfit together. What do you think?

I love him in every way so this whole experience made me very happy!
I hope your "seasons" are going into full swing soon!
Keeping it ninja,
Kelly

Saturday, March 23, 2013

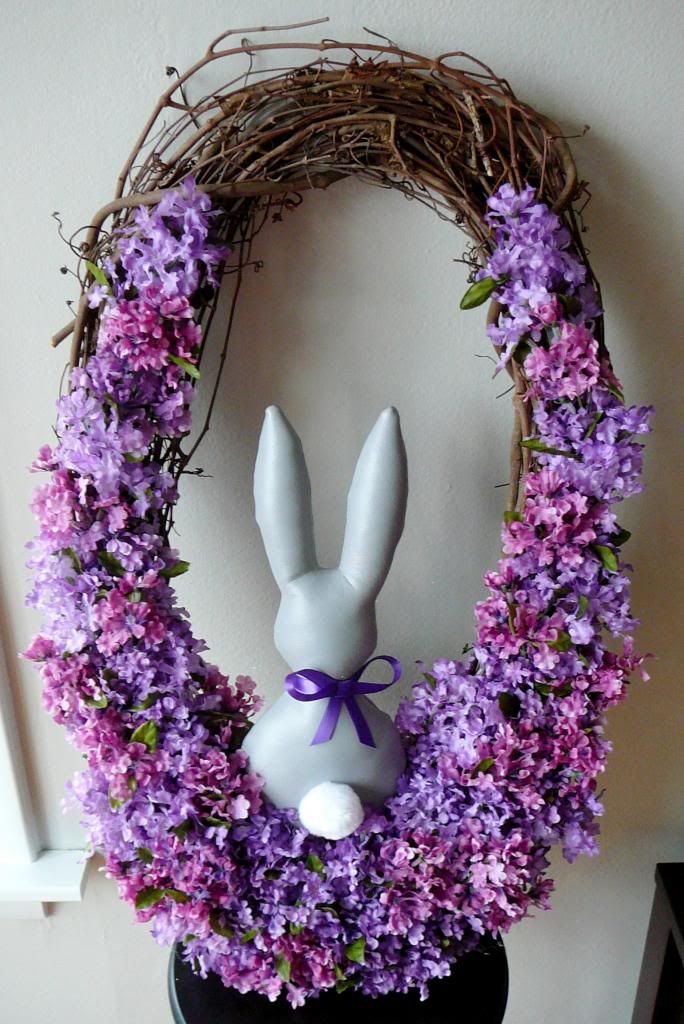
Spring Bunny Wreath Tutorial

I've had this idea in my head for over a year and didn't get to it for last Easter.  
It's also a great wreath to leave up all spring long. 

Supplies
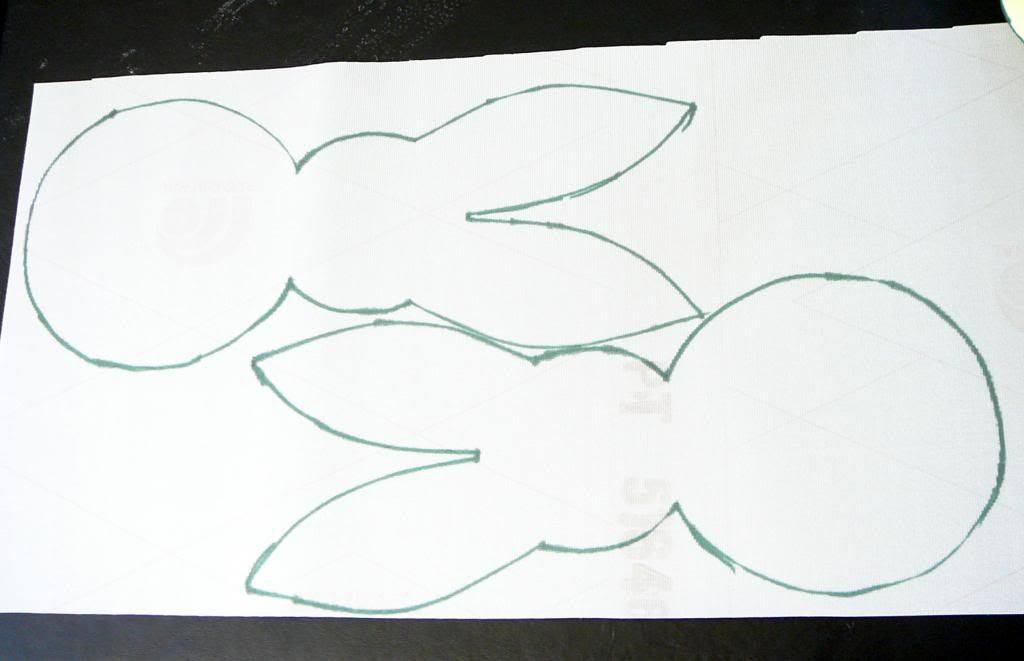
Bunny template
Oval grapevine wreath
1 wooden dowel
3 stems fake lilacs
Grey vinyl (1/3 yard is plenty)
Polyester stuffing
18" Purple ribbon
White pom pom
Glue gun with plenty of sticks

1.  Print out the bunny template and trace/cut out two from your vinyl.  The fabric that I used was labeled marine vinyl.  I opted for it since its going to be outside exposed to all the spring rain.

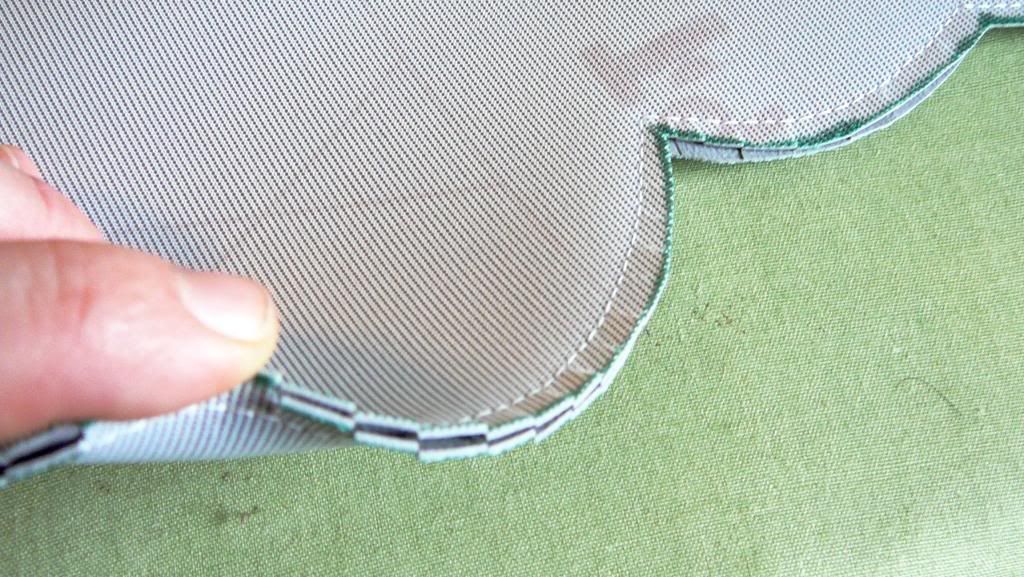
2.  Place your two bunnies right sides together and stitch around the perimeter leaving the bottom open to turn and stuff them.  But first, around all your curved seams make sure to make little snips up to the stitches.  Don't clip your seam.  This step is essential to making sure your bunny looks like a bunny. 

3.   Now we need to turn your bunny right side out.  Be forewarned this is a bit of a pain in the butt so make sure to take your time.  If you try to force it you will rip your vinyl or the stitches.  A bone folder is a very helpful tool for this step. 

4.  Now stuff your bunny with the polyester stuffing and hand stitch the bottom closed.  Don't worry about making your closure pretty cuz you won't be able to see it anyway.

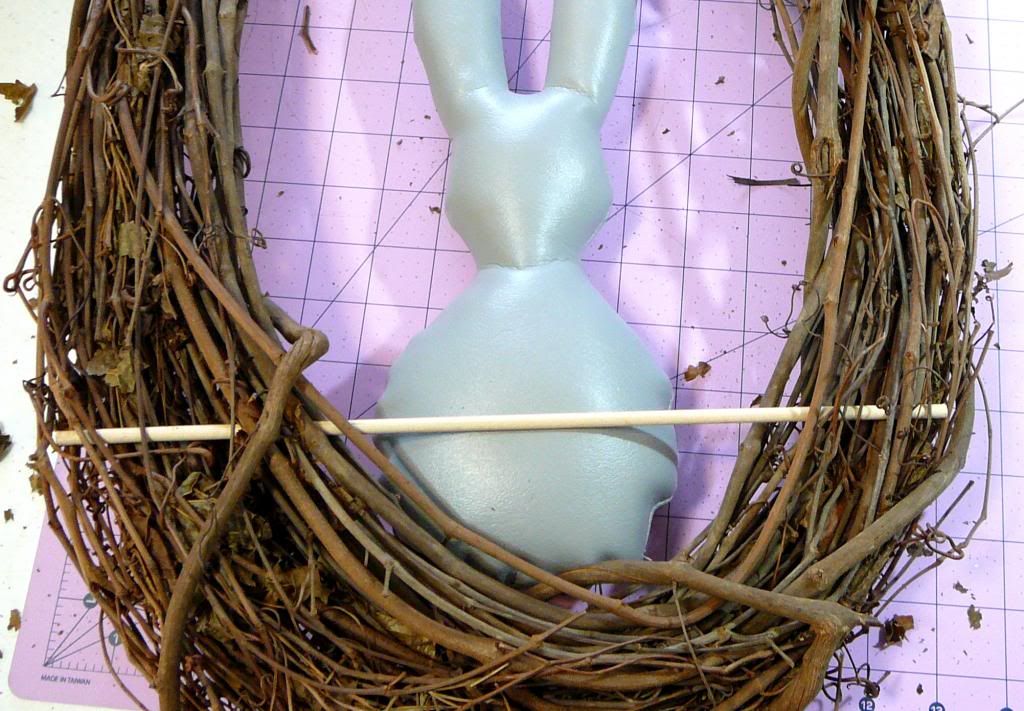
5.  Next we need to mount your bunny into the wreath.  First take your dowel and wedge it into the wreath towards the bottom and the back.  This will be a support for the back of your bunny.  Test fit your bunny in the wreath to make sure you like where you put your dowel and then glue it into place.  Now glue your bunny to the wreath and dowel.  Don't be shy with the glue. 

6. Now flip your wreath over and follow the pictures below to add a bow and tail to your bunny. 

 5.  Now for the last step, and my favorite, we are going to add the flowers.  First you will need to trim the flower clusters off the stems.  There is a wire inside the flower stem so make sure you use something that can cut through it.  I used almost all three stems of flowers to fill mine in.
 Now beginning from the top down start gluing clusters of flowers down to the base.  I tapered mine at the top and made the flowers fuller at the base.  Also make sure to use the flowers to cover up any part of the dowel that is still showing through.  

Mr. Biscuit liked the finished product so much he asked me to take his picture with it. 

Craft on!
Anita

PS I've entered the bunny wreath into CSI's weekly crafty challenge.  Go check out all the other spring wreaths for more fun & colorful inspiration!
Visit thecsiproject.com

Tuesday, March 19, 2013

Cross Stitch Peegs!

So this post is going to start out with a little love for my co-blogger Anita.  I have many crafts that need doing, so many in fact that I oft get overwhelmed by them.  I get to a point that I have no idea in what order to do them in, so much so that I actually do none instead.  I wish I could assign them an importance ranking like at a job so that I knew the pjs for the husband come before the string wrapped eggs for Easter. 

I think to myself Anita seems to have all her crafts in line like baby duckies behind their momma maybe I should ask her.  I admit she does have a lot of crafts up there in that nugget of hers, but she can whip one out and get it done in any situation, boy scout style! Sinking ship, no problem, Anita has a craft for that.  So I asked her how she gets this all planned out with no stress. No kidding she had the most simple answer ever: is it family/dog/tv time, then your craft is one you can work on with just your hands, alone/day off/or can't take another minute of daytime tv time, you pick a more long term craft and settle down for the fun.  Why? Why has this taken me so long to figure out? I know a smart thing when I hear it, so as I set off down the path of tv and husband time, which included NASCAR and a very shirtless Bond movie, I pulled out a cross stitch craft I had started in, I kid you not, 2001.

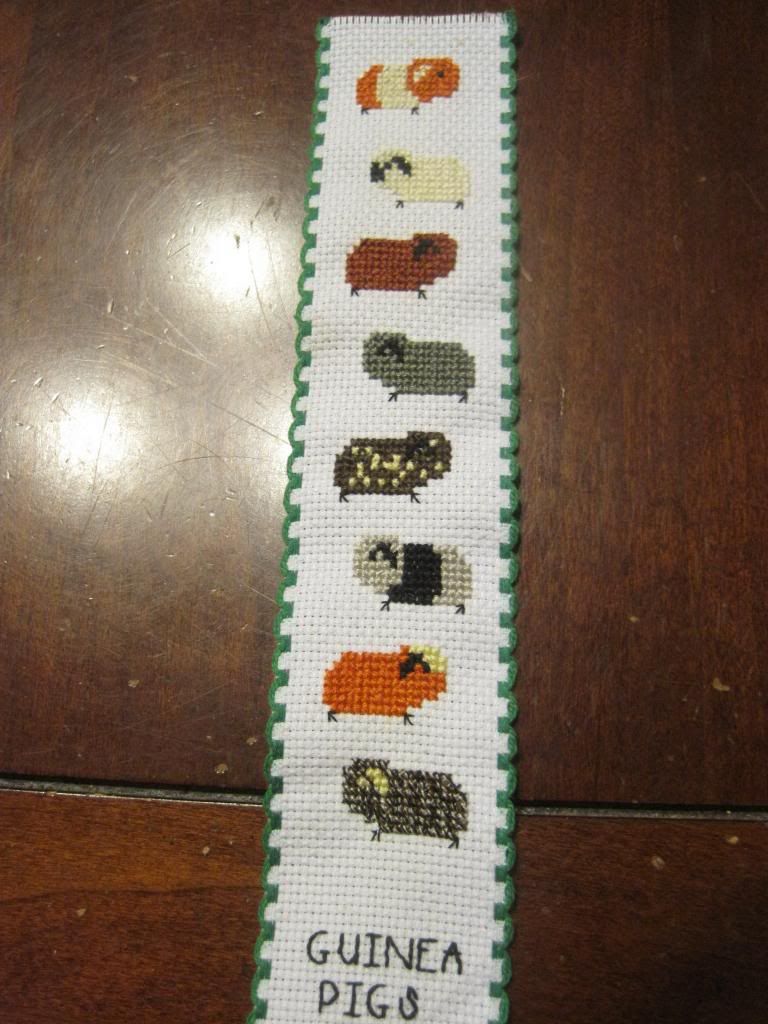
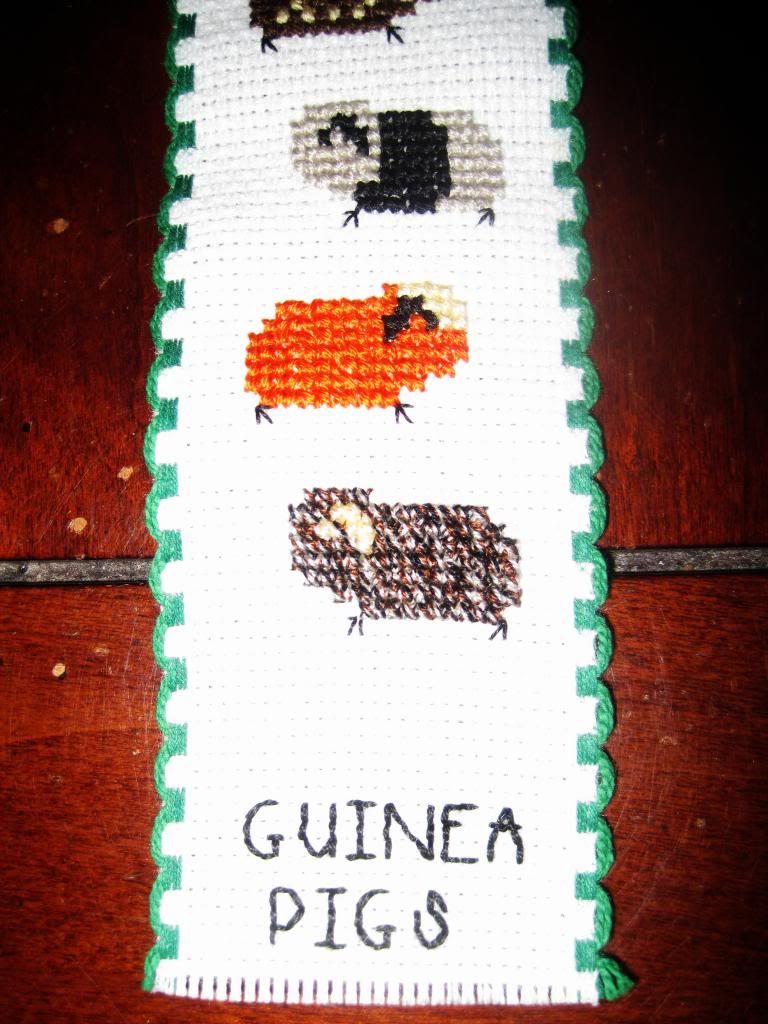
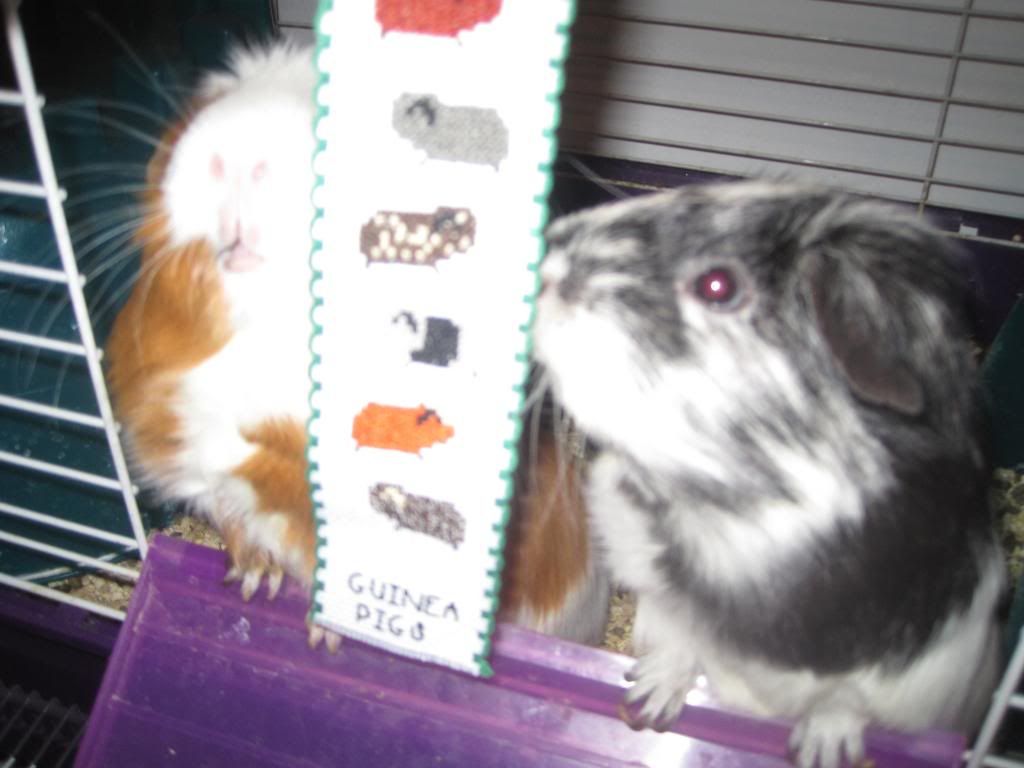
I recently cleaned out my craft binders, also known as the keepers of all my "some day" craft ideas, and found a partially finished guinea pig cross stitch bookmark I had started forever ago.  With Anita's words ringing in my ears I set to work.  I may have underestimated the time required to complete each piggie on the canvas, "oh yeah I bet I can do one piggy in 20 minutes", um no, but I have completed it with pride and on time for blogging.  This bookmark is going to be donated to the Critter Corral guinea pig rescue to help raise some funds for them and the awesome work they do.  It is time to send out our donation and I think this little something extra will fit quite nicely in the envelope. We have adopted several guineas from them and love their rescue dearly. 

A big thank you to my friend Anita who shined light on a very smart bit of crafting wisdom and showed me the way.........to the sewing machine.

Keeping it moving,
Kelly, the origami ninja

P.S. Wednesday night my man gets to play Red Dead Redemption on the PS3 so sewing craft it is!

Tuesday, March 5, 2013

February Craft Club

Let us take a quick moment to check the weather outside, yep still cold and snowy, we now return you to your regularly scheduled blog entry....

February, while we do get a nice break in the middle with the warmth of Valentine's Day, is a very chilly month.  It's a good time to turn to hot stick to your ribs food and crafting that warms the soul.  Our craft was a simple one for this issue of the Craft Club: pet beds.  Hugs for Homeless Animals is a great little web page that provides all types of information about helping homeless animals.  They have a Lost and Found Pet section, help with Anti-Cruelty campaigning, provide direction to different types of animal services, and post pets needing their forever homes.  As Anita and I have seven adopted animals between the two of us this is a cause that fits into our daily lives.  So when February Craft Club came around this was a great way to warm our inner being with some charitable creativity.

H4HA has a whole section dedicated to helping comfort those animals waiting in shelters, it's called the Snuggles Project.  A Snuggle is a handmade bed that is given to a homeless pet by a caring soul that wants to make their time at the shelter easier.  The Snuggle can be sewed, as we did, crocheted, or knit.  This bit of comfort stays with the animal, even traveling with them when they are adopted into their forever home.  Not all of us are able to physically help out at shelters, but still want to do more than donate money or supplies, and this is a great way to do it. 
The website has shelters in over 36 countries and all 50 states, and there are even links to locations where you can donate the Snuggle to help wildlife too.  A snuggle can be made in three different sizes to help fit a standardized cage depending on the animal in need.  Cat beds have a finished size of 14 x 14, 24 x 24 is for large cats and small dogs, while 36 x 36 is for medium to large dogs.  The Snuggles Project web page has all the information you need on how to construct the Snuggles, a ton of great patterns for inspiration, and the forms needed to donate as the web page moderators keep track of all the Snuggles donated.  There are links to shelters that participate in the program, and if your shelter isn't on the participant list they help you get them included!  You can form groups to make beds or work with a organization such as scouts or church groups to have Snuggle-create-a-thons.  This project is great to help boys and girls learn how to knit, crochet, or sew.  They can complete a project in short time and feel great about helping a needy animal in the process.
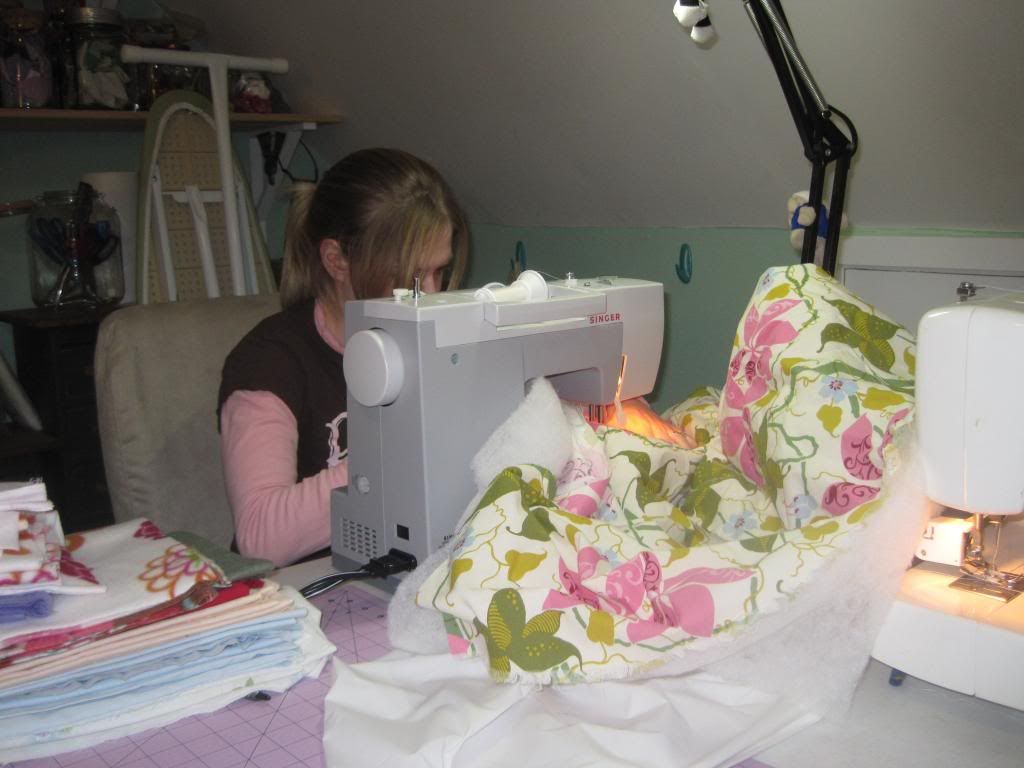
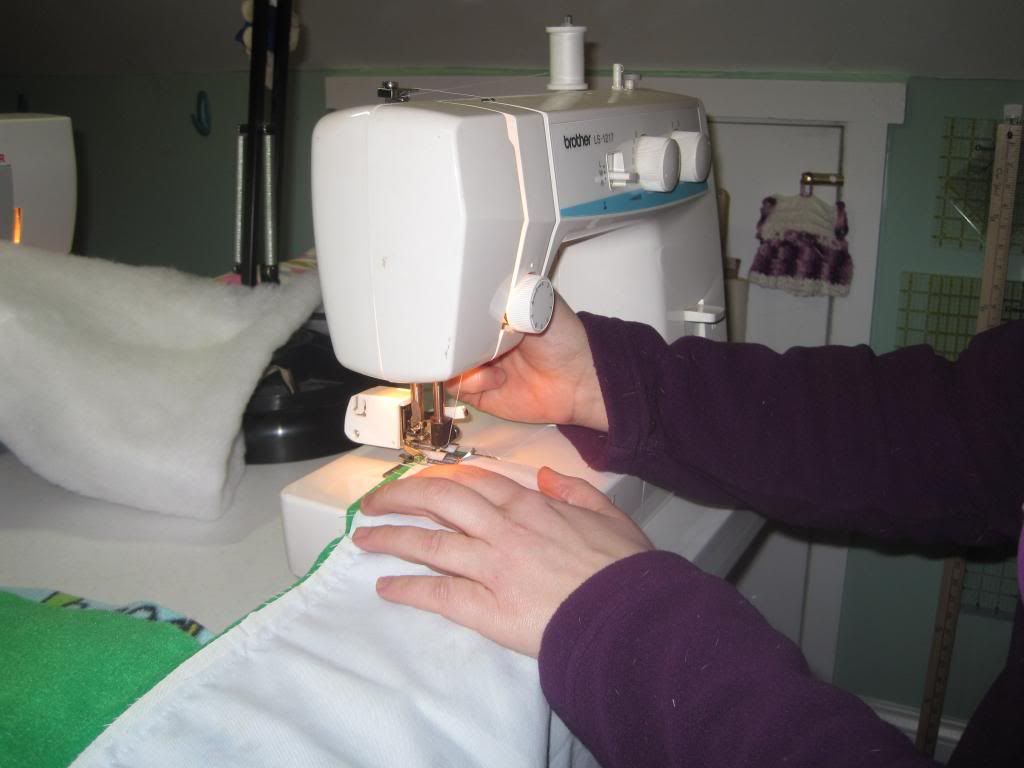
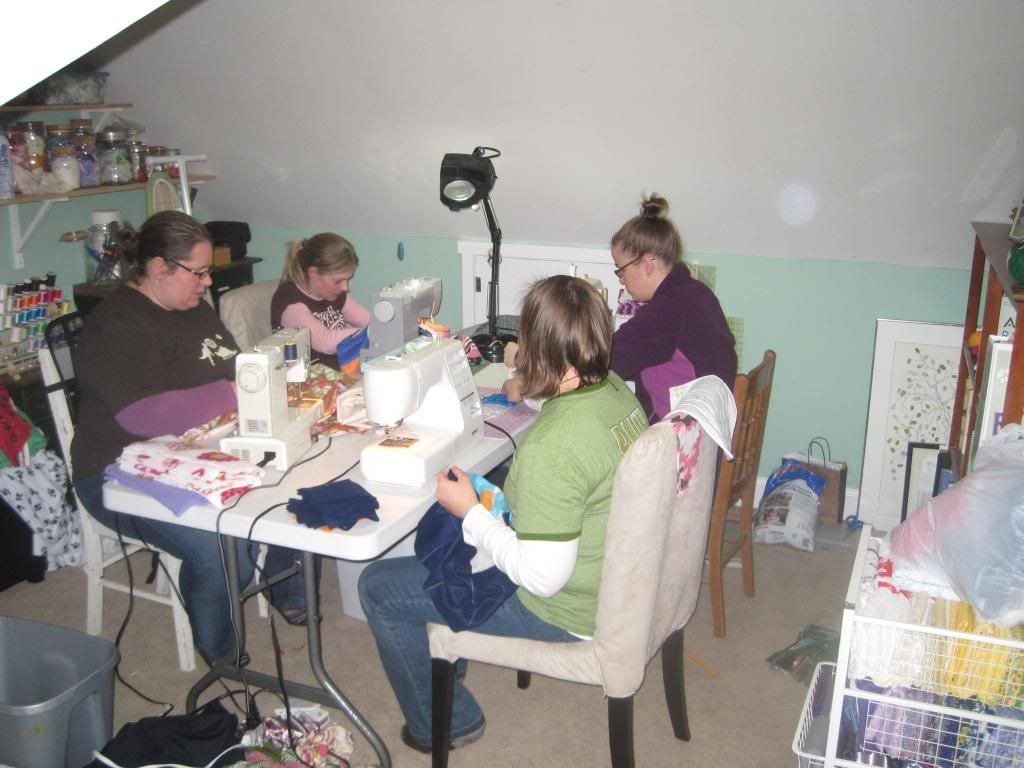
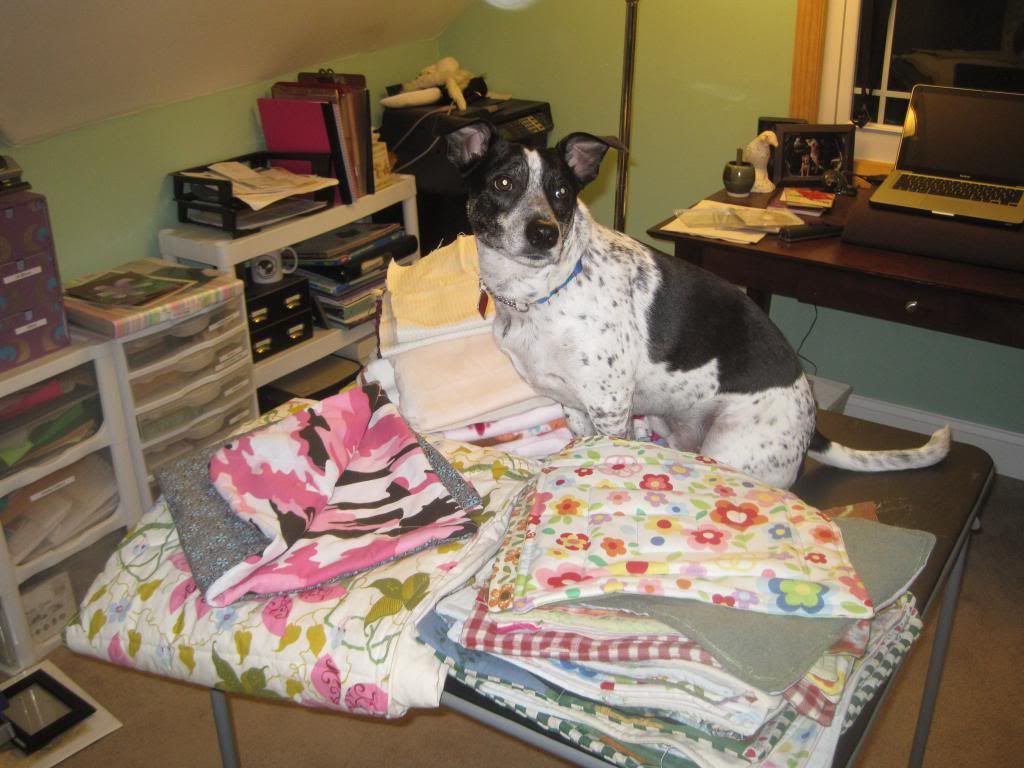
The four of us worked on sewn Snuggles and very quickly got into a grove.  Anita and Laura worked on pre-cut ones and churned out a huge stack of 14 x 14 Snuggles!  I cut out and assembled bigger Snuggles and then passed them to Sarah who did all the sewing.  We got three 14 x 14, one 24 x 24, and one 36 x 36 snuggle complete.  As a group we got over 27 snuggles made! All the 14 x 14 ones we made that evening will be donated to the Animal Rescue Foundation.  The three larger beds went home with me as I have other large beds to make and when they are completed the whole lot will be donated to the DeKalb County Animal Shelter.

Since our craft was a simple one we decided that we each had to try a new recipe and the theme was Asian.  We had some awesome pot stickers, delish mung bean salad, fantastic veggie noodles with peanut sauce, and yummy red bean rice cake.  My tummy could for some of that right now, it was such a good meal!  It's has been a long time since we have zoomed through the craft to the point of crazed laughter over four running sewing machines and it was marvelous.  I can't wait to see what rolls out next month, see you then!

Keeping it thoughtful,
Kelly, the origami ninja


Tuesday, January 29, 2013

Temari fun day

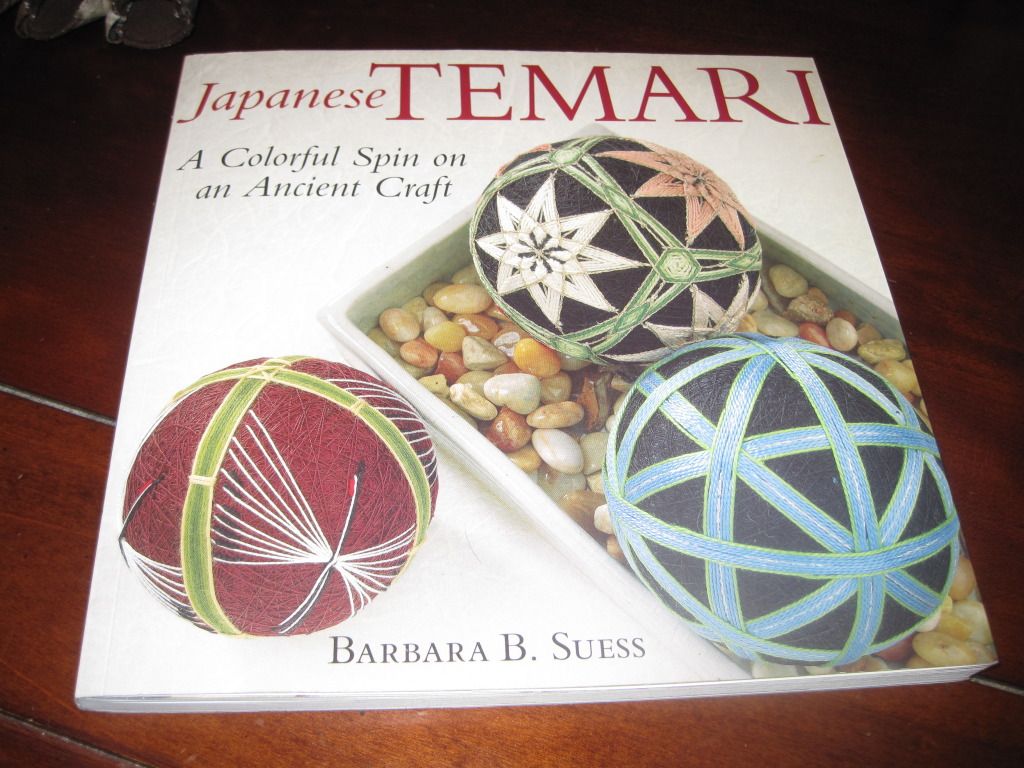
This post has been in the making now for over a year and Anita and I didn't even know it.  Let me start at the beginning and when I get to the end I'll stop, I promise.  In February of 2012 I took a cooking/baking class with my mom at the John C Campbell Folk School, which is very near her house in NC.  If you ever get a chance to take a class there you really should, this place is amazing, you can stay at the folk school in cute dorms and they have hundreds of classes.  They even feed you.  Anyhoo, their gift shop has a wonderful book section about all thing crafty and traditional.  The bread making and woodworking sections are to be envied! While thumbing through said room of literary requirement I came upon this book....
Now I had seen these round works of art made back when I was in college in Montana but I had no idea what they were or how to even start looking for them on the Internets, let alone the fact that they were a craft all the way from Japan.  So I peruse the book and decide that if I really want it I will come back and get it on my last day of class.  Well, that didn't work out so well as we got so busy I forgot to go back.  I spent the next nine months thinking about how I wish I had purchased that book and given the craft a try.  Fast forward to November and a trip to Disney World and then back to my mom's for a week with her.  I made sure that I went back to the Folk School to pick up that book.  If I had been thinking about it that long I definitely wanted to give that craft a go.  We go back to the gift shop and low and behold they have one copy left and it was even on sale, serendipity at its best I say.
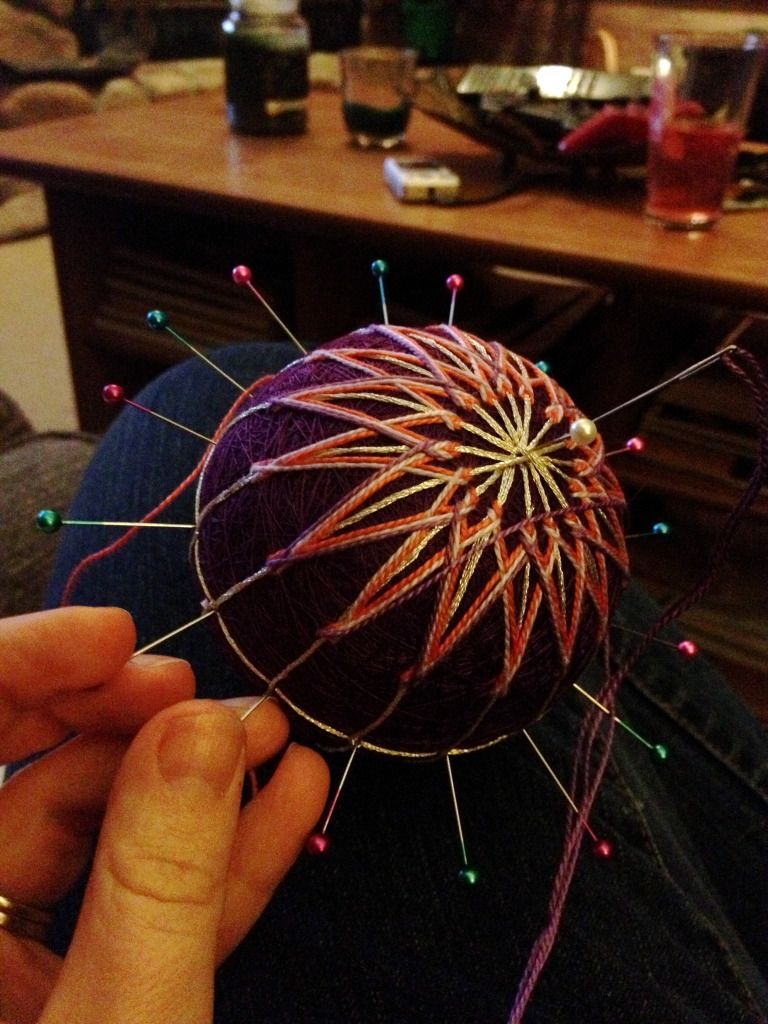
Jump forward a few more weeks and we are in January 2013.  I'm at work with Anita and she tells me she has this new craft she has been stalking on the Internets made out of these thread wrapped balls and it's called Temari.  I kid you not almost a year later the two of us independently come around to the same craft out of nowhere.  Well I tell her I just got a very nice book on the topic and we decide to make a date to try out this traditional craft.  I picked one of the very beginner Temari balls to start off with, but not Anita. No, never Anita. She finds the one that strikes her like a bolt of lightning upon first glance and vows to do it come hell or high water.  The one that jumped out at her was almost all the way at the back of the book in the "Ninja masters only" section.  But while I say all this about my lovely blog-buddy she always comes through with a phenomenal project in the end, so even though there is much to do about fussing during the crafting, she has a project to be proud of.
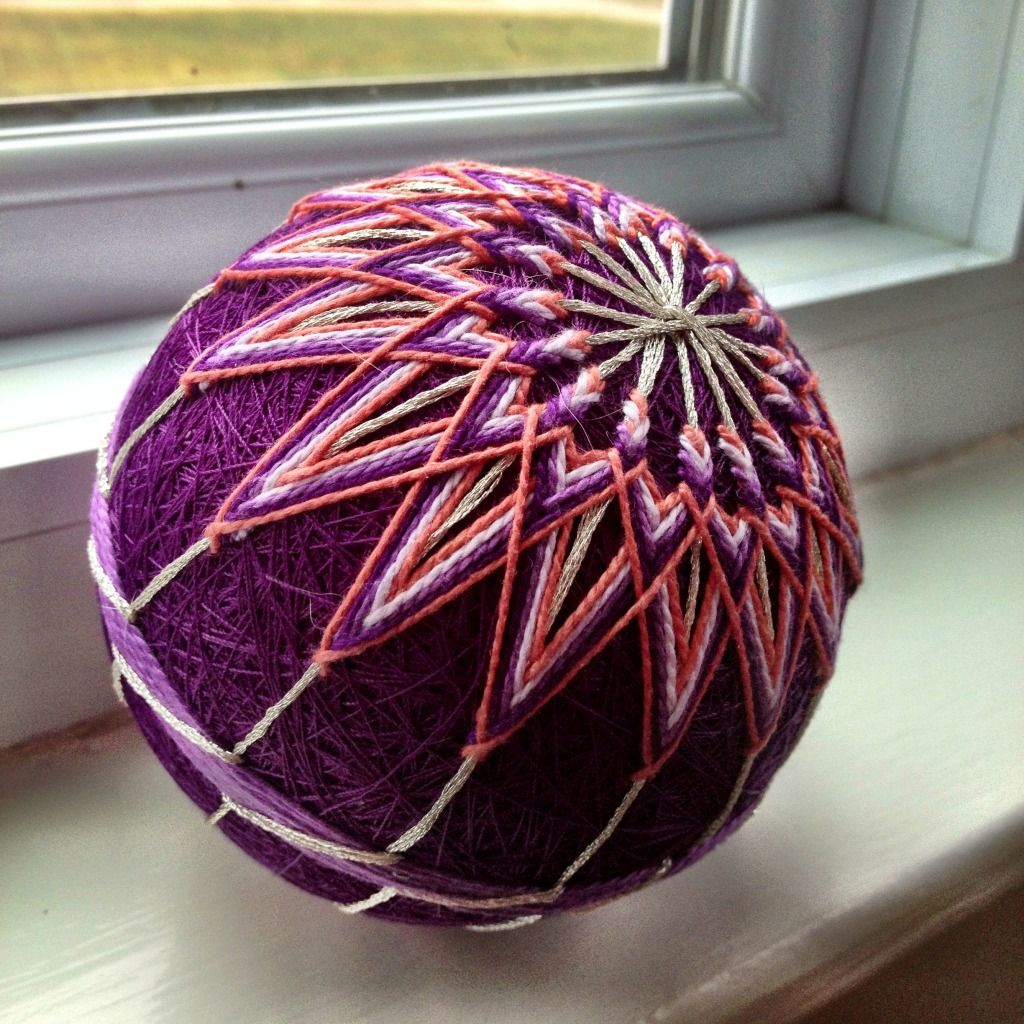
Anita's in all its wonderful purple glory.  She is a bit of a purple nerd, this is so up her alley it is silly.

This is my Temari ball, much less adventurous, though that gold floss is a pain in the butt to work with.

While the craft is a bit time consuming with all the thread wrapping, it is very relaxing, sans the gold floss that is, and I will keep this as a favorite craft to turn to when I need to keep myself busy and happy.  Have you been trying a new craft, we would love to hear about it!

Keeping it thready,
Kelly, the origami ninja

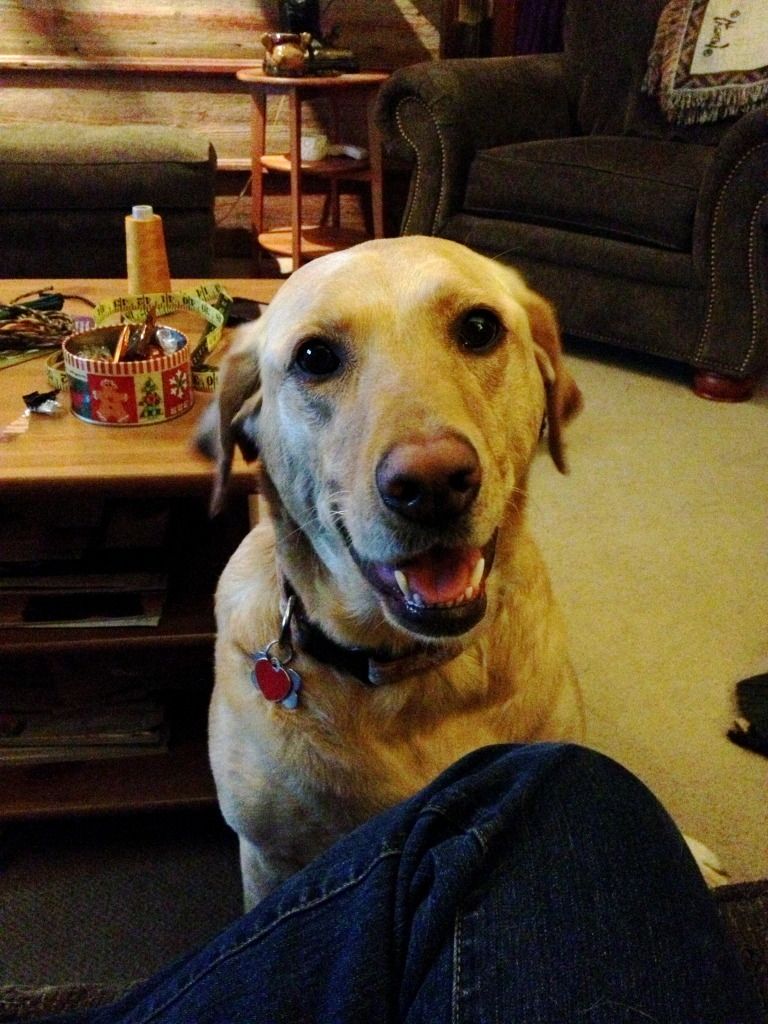
Abby though Anita needed help with the pinning, a tennis ball can work wonders on everything according to her.


Tuesday, October 30, 2012

Halloween Wreath

I have to sneak in this last Halloween craft before the big day tomorrow.  For July Craft Club we all got to explore our craft feelings and create a wreath that reflects our different personalities.  I took inspiration from a wreath made out of fabric and wire that required no sewing but lots of fun.  For my Halloween wreath I went with the same idea but added the twist of frugality.  A friend of mine is in a "de-cluttering phase"in her life so I took that to heart and applied that "use what you have" to my wreath.

The base of the wreath is a single circle off an old grapevine wreath.  I got the original grapevine wreath on the side of the road for free.  A neighbor had some items that they were giving away with a "free" sign in their yard.  This wreath had been loved since its creation in, I believe, the late eighties, including sporting some very faded fake birds.  The decorations may have been well past their prime but the actual grapevine wreath was ready to be born again with some inspiration and creativity.  I cut a continuous circle out of the wreath and wired the two ends together.

For the fabric I dug out all my orange, white, and black fabrics.  I had to buy some spooky holiday black fabrics to bulk up my selection for the wreath but everything was on sale so I got three new ones to use for less than three bucks total.  I cut each fabric strip one inch wide by six inches long.  I tied the strips around the grapevine wreath in the pattern 18 orange, 4 white, 18 black, 4 white, 18 orange, and so on.  The ribbon for the bow I had in my stash already from a Halloween project from two years ago.   I whipped out a quick puffy bow and wired it on and taa daa! A new Halloween wreath that cost me less that three dollars total and was completed in one Sunday evening.  I love these simple crafts that I can make with supplies I already have in my craftroom.  Now I have a Halloween wreath I can be proud of and more money in my bank account, tee hee it's a good thing.


The next project uses felt from past crafting exploits to make some gifts for Christmas.  A few bits of brightly colored felt and some glue and you have a cute craft to be given with some homebaked love.  Banana bread and trivits are my go to gift this year for a time strapped co-worker and parents of friends that are like family.  I love TRIVITS!!!!


Happy Halloween to everyone: may your crafts look their best and your candy be plentiful.

Boo,
Kelly, the origami ninja 


Tuesday, October 23, 2012

My Halloween craft insipration

All of the posts on the blog and around the intertubes has got my creative brain a thinkin.  I wanted to add to my decorations for this ultimate fun-time holiday, but money is tight in that arena so I took to the nets to see what I could find.  My first choice was based on the sweater pumpkins from the link party a few weeks ago. 
I had a few saved up sweaters from Goodwill that were burning a hole in my to-do box and this was calling their name.  I wanted to take them apart for the yarn but that was so not going to happen, either I can't take apart sweaters correctly or they talk about me and how to thwart my crafting exploits.  I think it's the latter.  So they sat in the box for three years until I saw the sweater pumpkins post at the link party and I knew what had to be done.  PUMPKINS!

I had one fuzzy forest green sweater and one fuzzy orange sweater.  The fuzzy orange one was the one I tried to deconstruct so one of the arms was annihilated.  Since the arms are what is used to make these adorable pumpkins I thought I was going to miss out but my craft muse smiled on me, she is so nice to me sometimes, and that fuzzy sweater gave me a short fat cowl to make into a cute little squat pumpkin.  I added some fun fabric stems and a bit of cotton string for my pumpkin necks and Houston we have decorations. I have these guys on my mantle, on my little decoration table in the hall, and on my kitchen table.  So cute!
 
I hope everybody is looking forward to tricks-or-treats coming up next week, I know I am!!!!
Let us know what you are up to with your crafting genes.
 
Kelly, the jack-o-lantern ninja


Friday, October 5, 2012

HTTC Canned Goods Ghosts

I picked a super cute but super simple craft for the craft-a-thon.  All you need is a few empty cans and some imagination and you have a craft.
I have three cleaned cans that have had the lids removed.  I went happy crazy with the white spray paint to get these guys all ghosted up.  I measured around the diameter of the can so I could cut some cheese cloth to go around the base.  I cut two diameters worth of cheese cloth and cut long flowy ribbons into it.
 I wrapped the cheese cloths around the base of the can and glued them on with tacky glue.  Now the flowing parts can hang down and blow in the breeze.  I let them dry overnight to really seal in the cling.  I filled the cans with water almost all the way yo the top and let them freeze all day while I was at work.
 I traced my ghost pattern on to a piece of paper and taped it onto my can.  The ice in the can will allow me to tap into my can with a hammer and awl but not dent the can.  I tapped the awl around the pattern leaving a little space in between to show the can through.  Additionally, I tapped three holes in the top of the can for the hanging string. 
 The strips of cheese cloth will get all ratty and dirty as they weather making it look even better.  I love the look of candles in these guys, but I use the fake ones to keep it fun and safe.

I can't wait to see what tute we have next!
Happy Halloween!
Kelly


Tuesday, June 12, 2012

This year I am knot waiting until November to start my Christmas gifts


As the name of the post suggests I have started my Christmas crafting much earlier this year than I normally do.  I purchased a big ole skein of hand dyed yarn at Stitches Midwest, which is like a comic book convention for yarnies, several years ago because I completely fell in love with it when I saw it!  Martha Stewart once said that if you see something crafty, but don't know what to do with it, you should get it, as the project it belongs to may not have presented itself to you yet, thus the giant yarn buy.  So I have my huge yarn for for a time and then I buy The Handmade Christmas magazine form said same Stewart back in 2009 and there is this pattern for a knotted scarf.  Well I pulled out that big green fluffiness and got to cutting to finally get that scarf going.  The one pictured here is for a family member, that shall remain nameless for obvious reasons, who is a great accessorizer of outfits.


Cut 12 pieces of Bulky weight yarn 1&1/2 times the desired length of your final scarf (example: 140 inch piece in length makes about an 86 inch scarf, and would require 47 total yards of yarn).  Divide yarn into four bunches of three strands each.  Tie two bunches together with a square knot, leaving six inches of fringe at the end.  Repeat with other pair of bunches.  Knot the inner two bunches together about one inch below the existing knots.  Then knot the left bunches together followed by the right bunches together one inch below existing center knot. 


 Alternate knotting the the inner bunches followed by the left and then right ones, spacing all knots evenly.  When approximately six inches remain finish so that the final knots mirror those at the opposite end and trim to make the ends even.  Not very complex but it makes a very nice pattern.  The scarft toom me a few nights of knot tying but these were an hour blocks at the most.  It will wrap aroud your neck more than once for a warmer feel. 


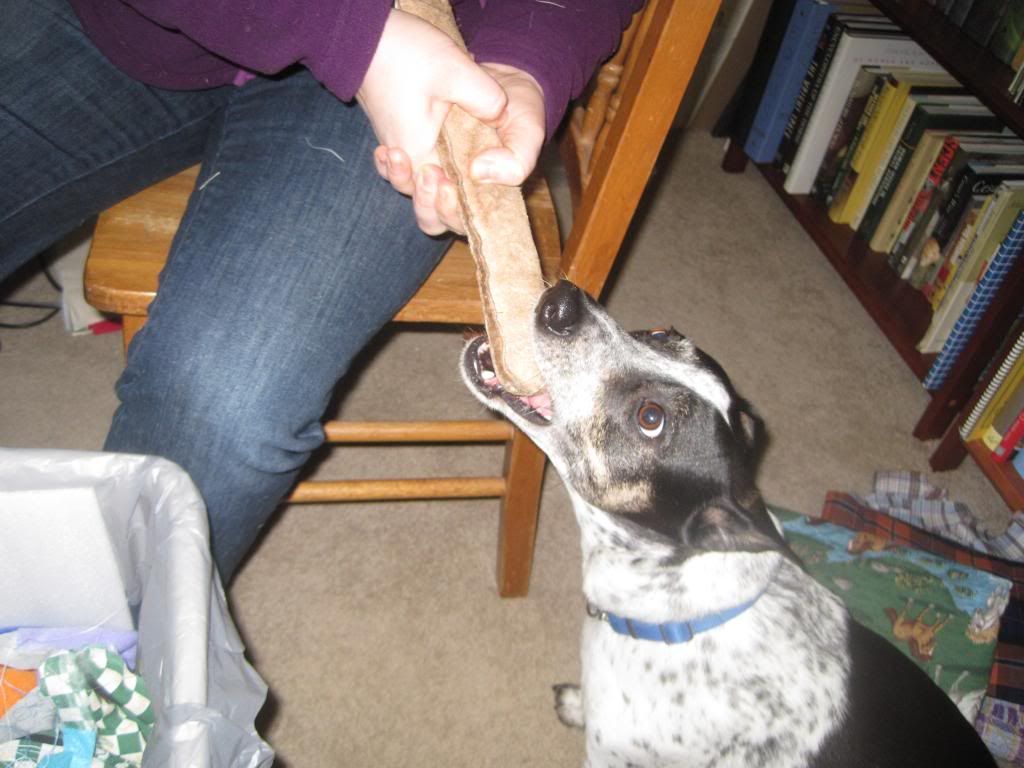
MUTT looks very cute in his fashion scarf don't you think?  Sage was a big help keeping me company while I tied knots.  Sprout did not want to be in the picture as she was diligently watching the guinea pigs and Abby got bored and wandered off.

I hope you have started your holiday crafting, or at least thought about it.  It does feel good getting a bit of it done, though I have knot the foggiest idea what the next gift will be....oh well.

Keeping it squishy,
Kelly, the origami ninja

Tuesday, April 24, 2012

Old Craft complete......cheep dog bed

It seems as if I have not been getting a darn thing done over here in my house of dogs.  My crafts are pleading for attention but I don't know which one to comfort first.  Should I quilt, or maybe crochet.  Bake or perhaps I should embrace some embroidery.  I got a bit of a full sail going yesterday during a Wallace and Gromit TV-a-thon, I completed my naughty dog bed.
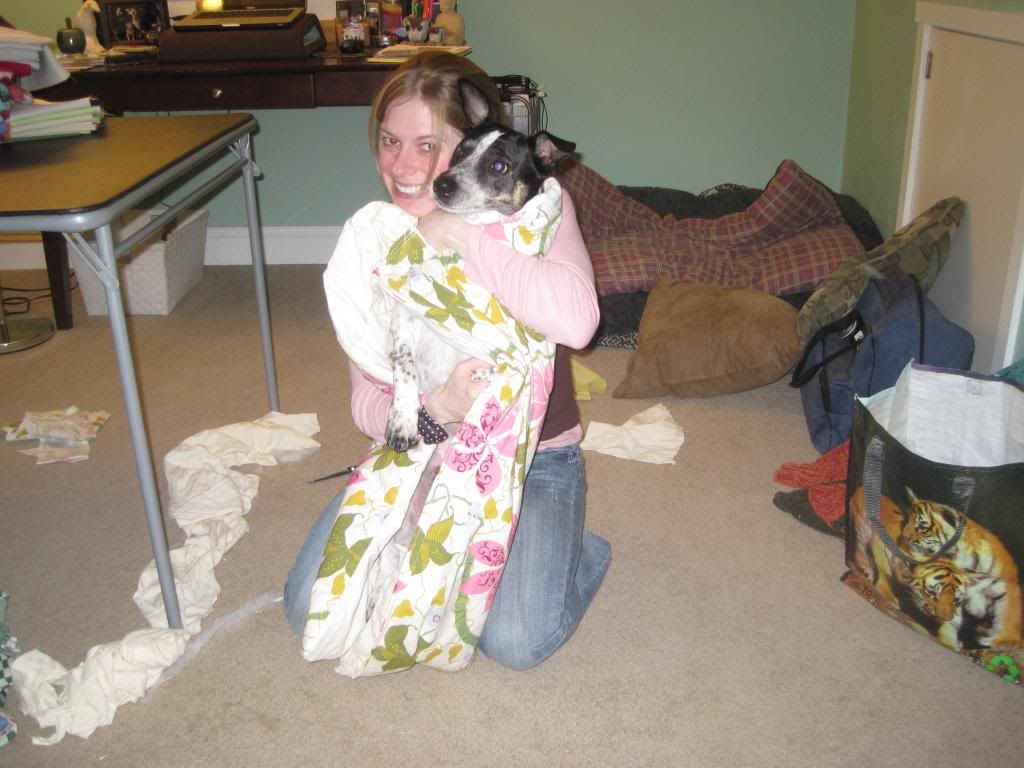
My dogs fully support the idea that nice things are for small dogs with cute hair styles, not large Labradors or greasy Plott hounds.  In other words our dog beds are an experiment in inexpensive recycling.  We have one of those really nice big dog beds with Sage and Sprou'ts name embroidered on it, but as soon as we got Abby that got a few chew holes in it and a broken zipper.  So on to plan B, the one here we buy lots and lots of those nice dog beds at Farm and Fleet and cover the floor of the laundry room.  In the end those turned into fluff and cedar shaving piles that stuck to fur like the dickens. Ok, let's try this again.  Plan C, Goodwill.  Harry Potter and Dora sleeping bags, Transformers blankets, and lawn furniture cushions.  Ha! Found the answer I was looking for.  Inexpensive, washable, and it helps the community.  In addition to all of that mentioned above we bought four throw pillows to sew together to make a bed for Sprout.  She is a very angular dog and needs the extra stuffing around her little elbows.  She was hit by a car before she came to be with us and has some nerve issues.  I finally got it all going and sewed those bad boys up to make her a nice snugly bed to keep her tiny tootsies happy.
Seriously, look at those tiny feet on that dog.  We covered the pillows with the transformers blanket so that she could nestle down into it and make the labs jealous.  It worked and she loved it.  Another craft down and another dog happy.  That little white chin makes me so happy at the end of the work day, anything for her.

Keeping doggle feet warm,
Kelly, the bed maker
 

Tuesday, February 28, 2012

Bookshelf makeover: Part 1

Well, here is a picture of my next "to do list" craft: my bookshelf.   I have a nice new craft room this year and this plain old bookshelf needed some funning up to be able to be allowed to reside in said  sparkly new craft room.  I pondered the nakedness of the shelves for a bit and realized that they were a blank canvas for all of those extra mailing label stickers I have accumulating in the office.  Enter the sticker in all its colorful glory.
Note the pile of papers in the upper right hand corner, that my friends, are the stickers calling out to be affixed to the bookshelf.  You can also enjoy all of my husbands re-loading equipment in the picture as well.  The bunny cage is on the floor in front of the bookshelf because all of the books are in boxes in the spot where his cage goes.  It's a vicious cycle that all leads back to covering that bookshelf with stickers and giving it a good shellacking.

I started covering and cutting and will update you next week on how far I got this week, wish me luck.
This is Oreo and Nutter Butter letting you know that they approve of this craft message and that they hope that you are crafting your way through winter! They also wanted carrots, guinea pigs are by no means complicated in their wants.

Keeping it sticky,
Kelly, the origami ninja