
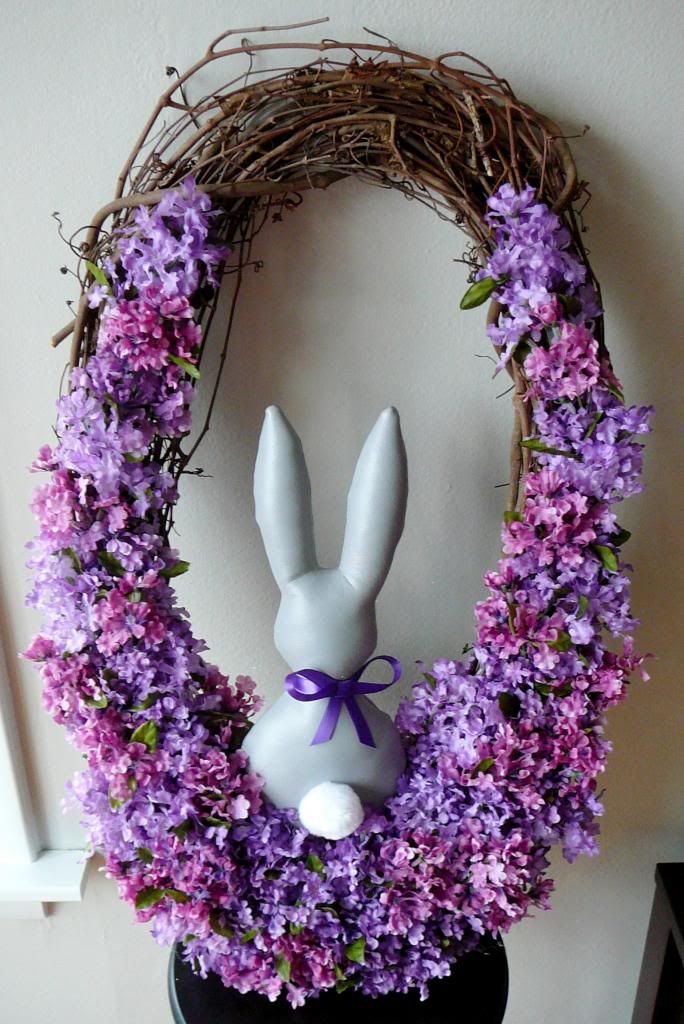
I've had this idea in my head for over a year and didn't get to it for last Easter.
It's also a great wreath to leave up all spring long.
Supplies
Bunny template
Oval grapevine wreath
1 wooden dowel
3 stems fake lilacs
Grey vinyl (1/3 yard is plenty)
Polyester stuffing
18" Purple ribbon
White pom pom
Glue gun with plenty of sticks
1. Print out the bunny template and trace/cut out two from your vinyl. The fabric that I used was labeled marine vinyl. I opted for it since its going to be outside exposed to all the spring rain.
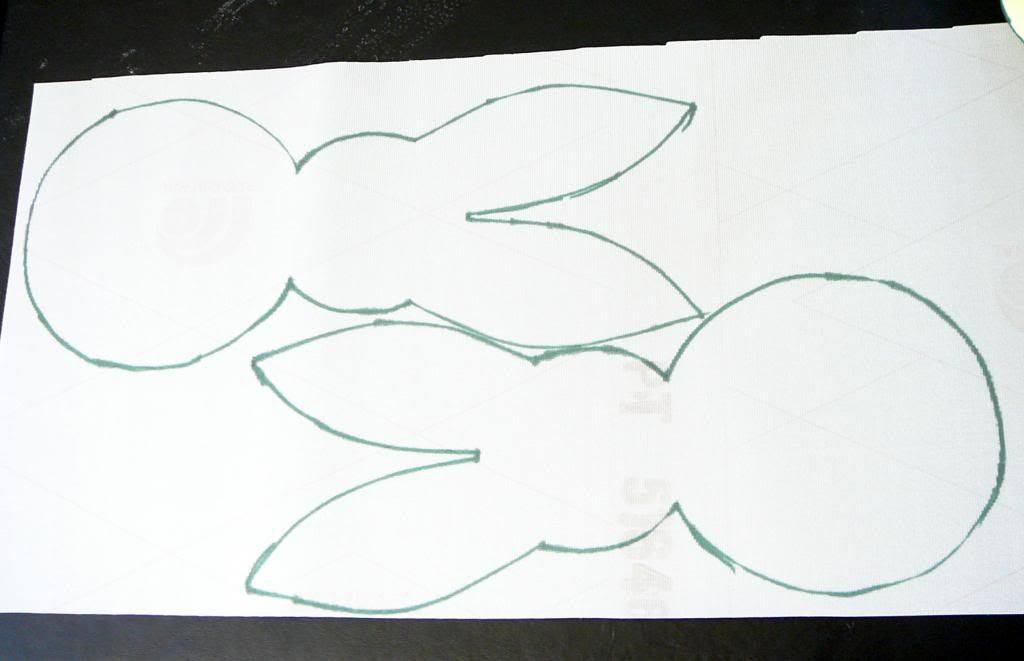
2. Place your two bunnies right sides together and stitch around the perimeter leaving the bottom open to turn and stuff them. But first, around all your curved seams make sure to make little snips up to the stitches. Don't clip your seam. This step is essential to making sure your bunny looks like a bunny.
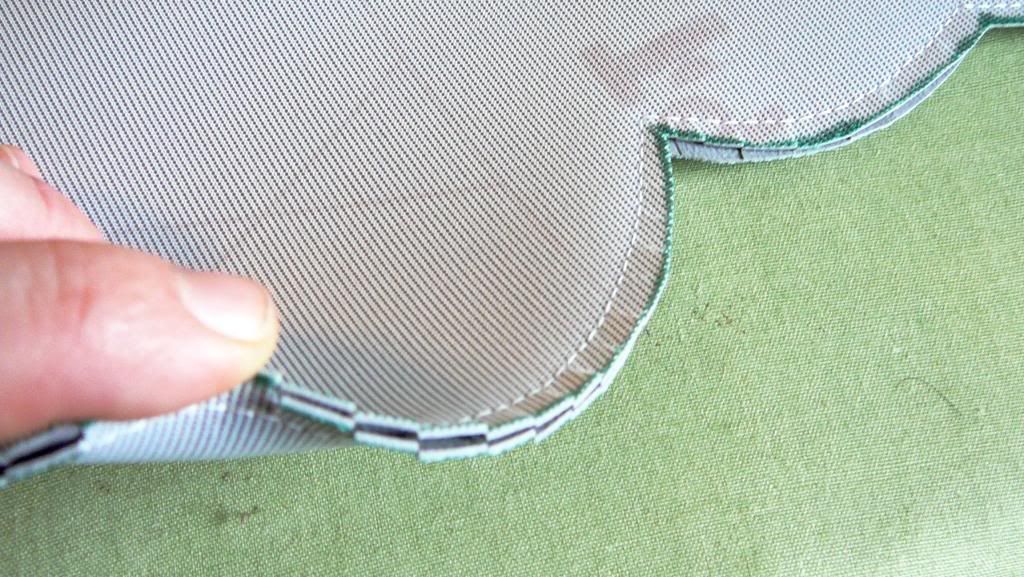
3. Now we need to turn your bunny right side out. Be forewarned this is a bit of a pain in the butt so make sure to take your time. If you try to force it you will rip your vinyl or the stitches. A bone folder is a very helpful tool for this step.

4. Now stuff your bunny with the polyester stuffing and hand stitch the bottom closed. Don't worry about making your closure pretty cuz you won't be able to see it anyway.

5. Next we need to mount your bunny into the wreath. First take your dowel and wedge it into the wreath towards the bottom and the back. This will be a support for the back of your bunny. Test fit your bunny in the wreath to make sure you like where you put your dowel and then glue it into place. Now glue your bunny to the wreath and dowel. Don't be shy with the glue.
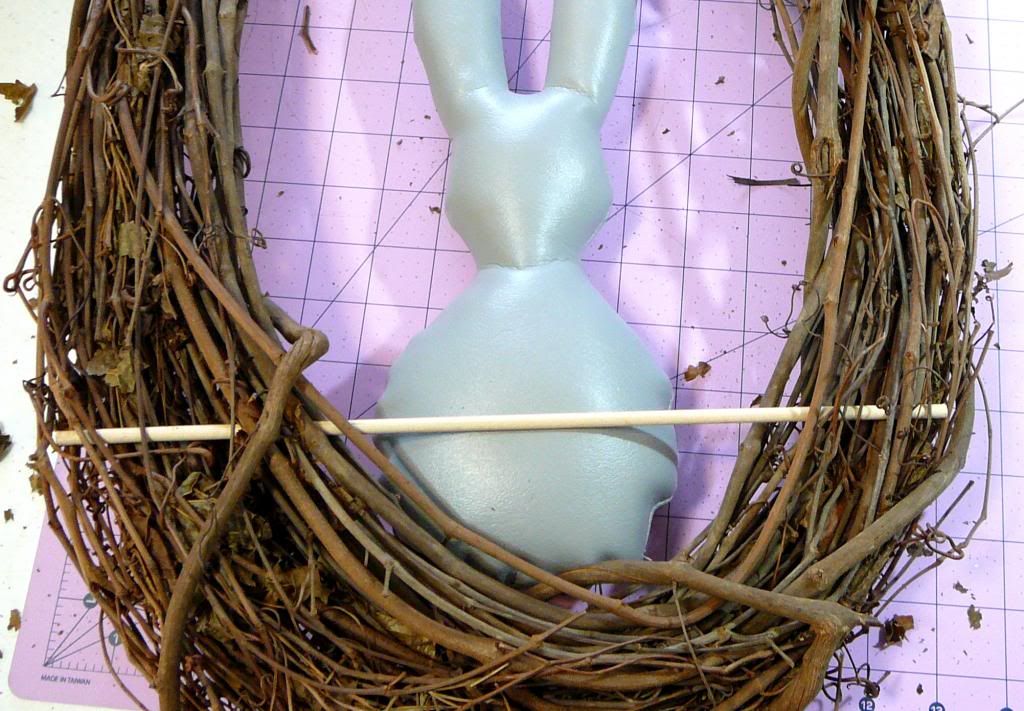
6. Now flip your wreath over and follow the pictures below to add a bow and tail to your bunny.

5. Now for the last step, and my favorite, we are going to add the flowers. First you will need to trim the flower clusters off the stems. There is a wire inside the flower stem so make sure you use something that can cut through it. I used almost all three stems of flowers to fill mine in.

Now beginning from the top down start gluing clusters of flowers down to the base. I tapered mine at the top and made the flowers fuller at the base. Also make sure to use the flowers to cover up any part of the dowel that is still showing through.

Mr. Biscuit liked the finished product so much he asked me to take his picture with it.
Craft on!
Anita
PS I've entered the bunny wreath into CSI's weekly crafty challenge. Go check out all the other spring wreaths for more fun & colorful inspiration!


