Showing posts with label Howl-o-ween Tricks and Treats Craftathon 2015. Show all posts
Saturday, October 31, 2015
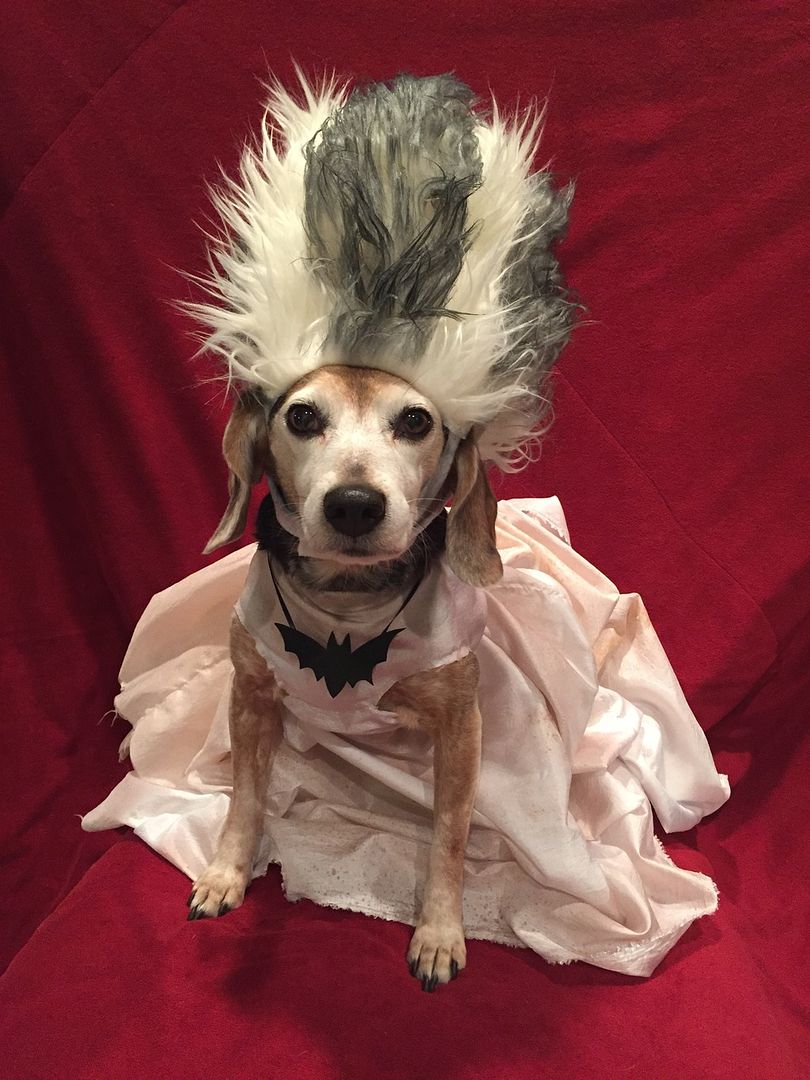
HTTC - Costumed Canines, Bride of Frankenstein
Gidget is starring as the bride of Frankenstein this year. She said she'd never really marry Mr. Biscuit but the costume is acceptable. Happy Howl-oween!
Tuesday, October 27, 2015
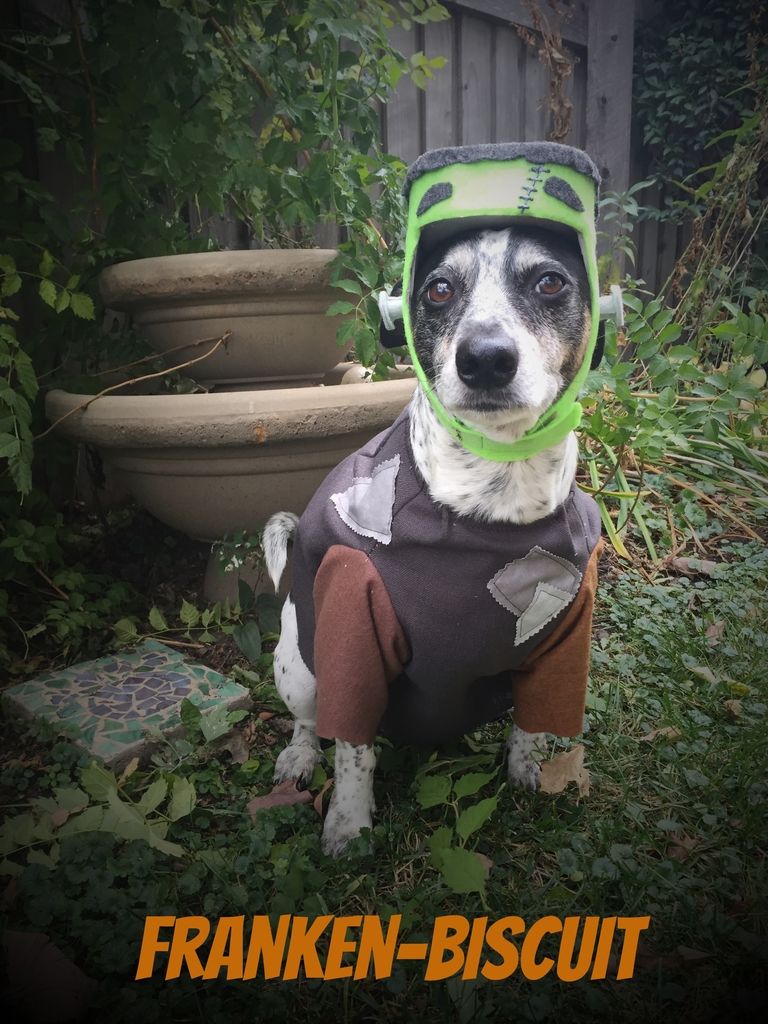
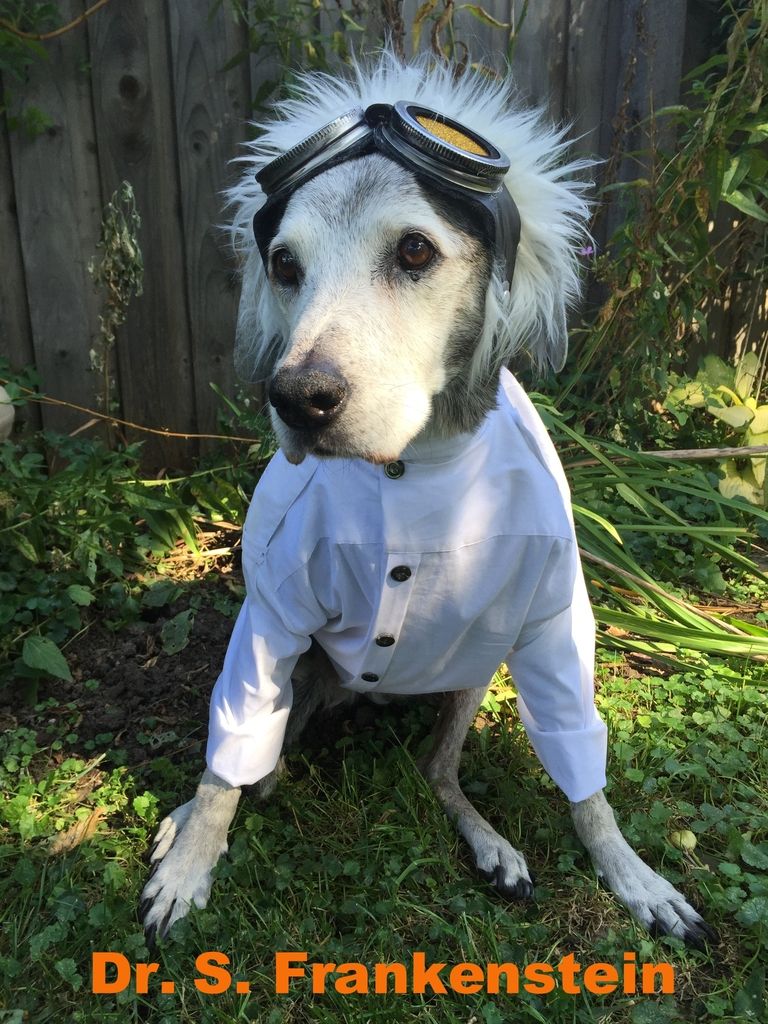
HTTC - Costumed Canines, Franken-biscuit
Have you ever wondered what it looked like to spend way too much time on a dog costume but every second was actually worth it in the end? Well here you go. This is the first creation from Dr. S. Frankenstein. She pieced together all the adorable puppy parts we had laying around and zapped it with some attitude. HE'S ALIVE!
Wednesday, October 21, 2015
HTTC - Crocheted Spooky Kitchen Towels
This all started last year at a thrift store. My father was looking for some pictures to hang up in his home and is "thrifty" to say it nicely. We found a very large Faith sponsored Thrift Store, and I mean huge, it took up most of the strip mall it was located in and then still had another separate store for furniture! I found a some cute decorations I used for work...and then there was this hand towel.
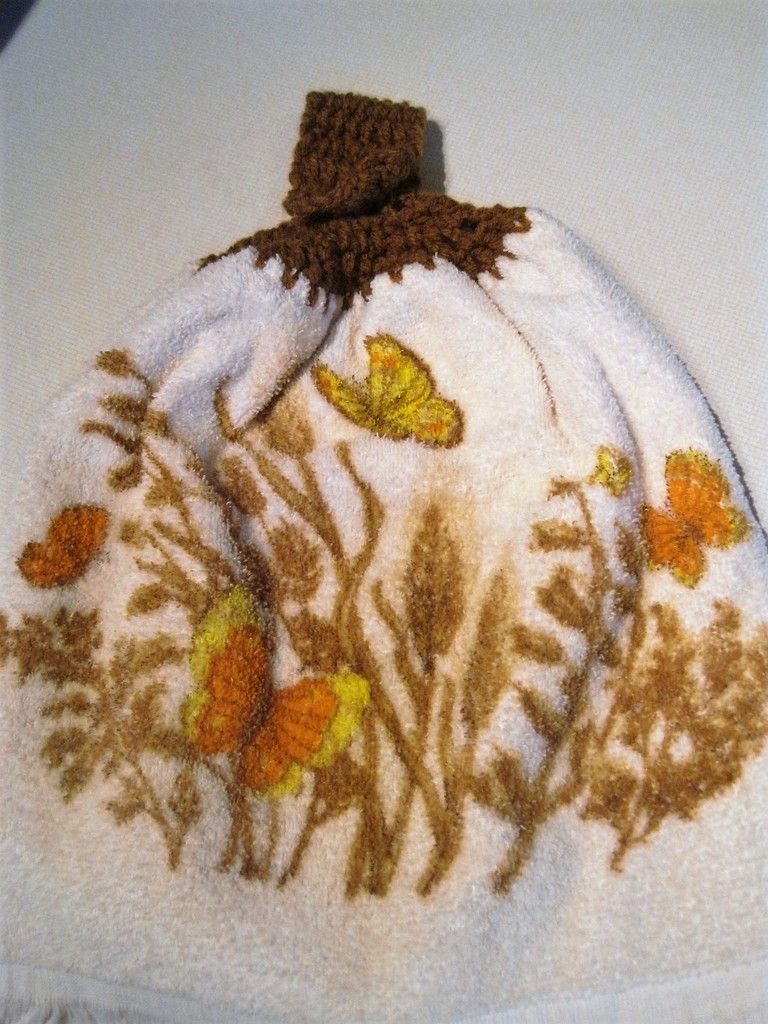
This hand towel was amazing, like when you see a piece or a bit or a bob of a craft that you have no idea how to do but it speaks to you so much, like calls out to your crafter soul, that you must purchase it. Martha Stewart once said that if that happens you MUST get the item, you may not know what to do with it at that exact moment but one day you will and you will be all that much happier that you bought it! This towel was all of that in one inexpensive package. For $2 I got the hand towel and a matching washcloth. These two were pristine, never been used, not even by a little old lady who drove it to church on Sundays. The towel was plush and soft, it even had that fine thread fringe on the bottom, perfect for luxurious hand drying moments. But what put the whole thing over the top was the immaculate brown and tan leaves and flowers with a delicate orange and yellow butterfly delicately alighting on one of the flowers. The Seventies decorating glory in one beautiful towel.
I bought it post haste with the goal of learning how to crochet a hanger on top of it so I could display it in all its epicness in my kitchen. Fast forward six months: I find the towel in my To-Do box and think now is the time to try this. I wandered on over to the Pinterest and started hunting for a pattern to try out on my towel. I found a classic looking hanging towel look and a pattern I felt I could do and set to work. By far the punching the holes in the towel is the hardest part, and as my husband told me "it can't be that bad, old ladies make those", I admit it is not really that difficult. I used a funky gold brown to match the color scheme of the towel and in less than two hours I had a new hanging kitchen hand towel!
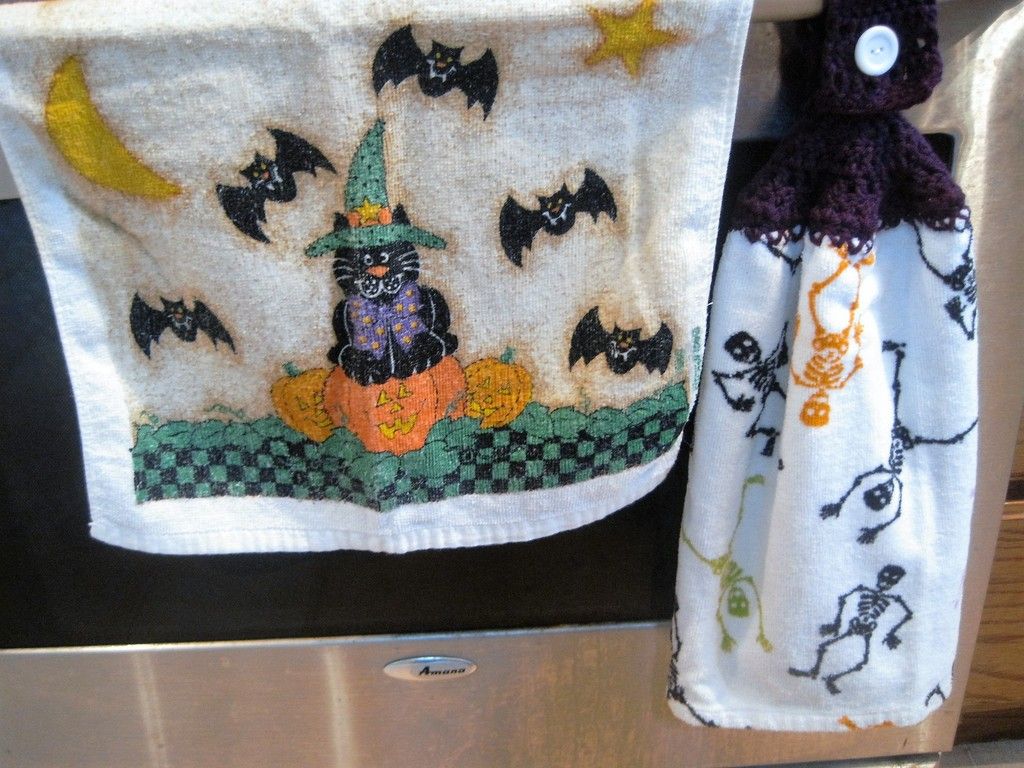
I have been wanting to work through the pattern again so when I found these skeleton towels in my Halloween decor I knew what had to be done. I love these towels but I could never find an appropriate way to display them. I have Halloween decorations that take up almost the entire rack for hanging on the oven so these guys were often left out in the bathroom which never did them justice. Enter some bright and creepy acrylic yarns in my stash and we have a recipe for thrifty functionality. Not only do I get to use my pattern again but I get to make my cute towels functional. Epic Win!
The pattern belongs to Harlean at Thrifty Fun! Considering how inexpensive the supplies are and how fast you can whip up a satisfying and functional craft I support her aptly named site. You can find the original pattern here: Crochet Kitchen Towel.
Halloween Crochet Kitchen Towel
Fingertip or Hand towel
4 ply yarn in whatever color makes you happy
Large metal knitting needle or Ice pick (this makes the holes in the towel material)
Size G crochet hook
Fun button and needle and thread to sew it on
Sicssors
ch= chain
SC= Single Crochet
DC= Double Crochet
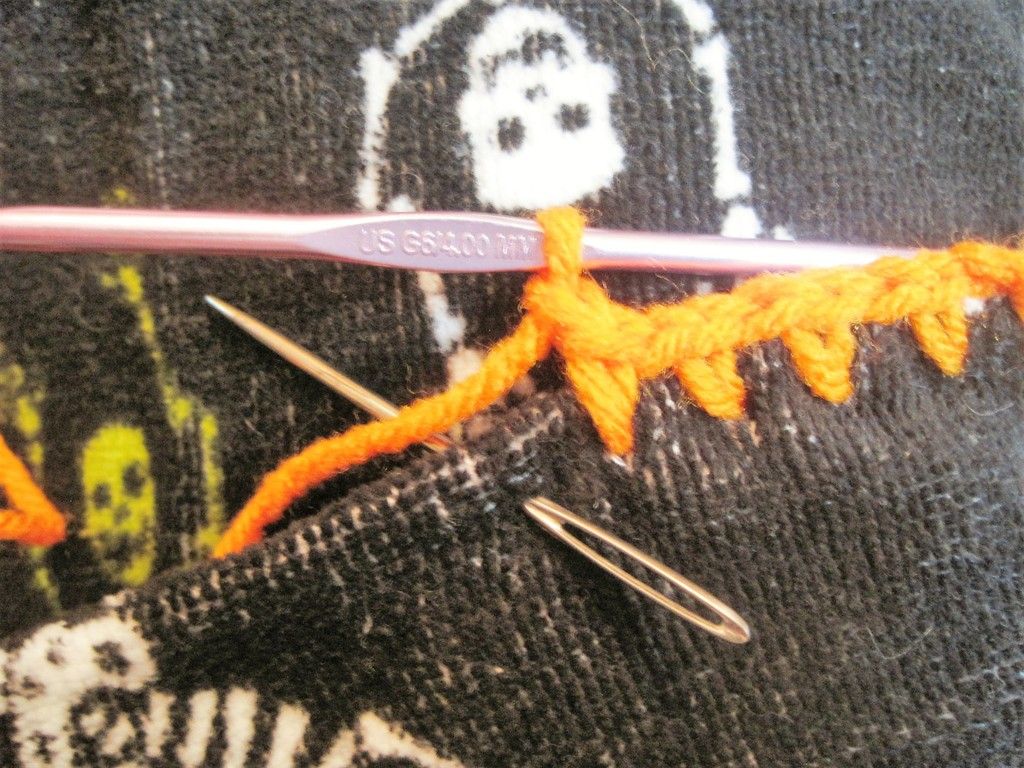
Fold towel in half width wise evenly or you can cut the towel in half to make two thinner ones. Using the metal knitting needle or ice pick, punch holes through both layers of the towel 1/2 inch apart and about 1/4 inch down from the fold of the towel. This will be your base holes for your stitches. I crocheted into each hole as I punched it but you can always punch the holes all out and then go back and start your crocheting.
Base Row (into the holes in the towel): SC in First hole, ch1* SC in next hole, ch1. Repeat from * across. ch2, turn.
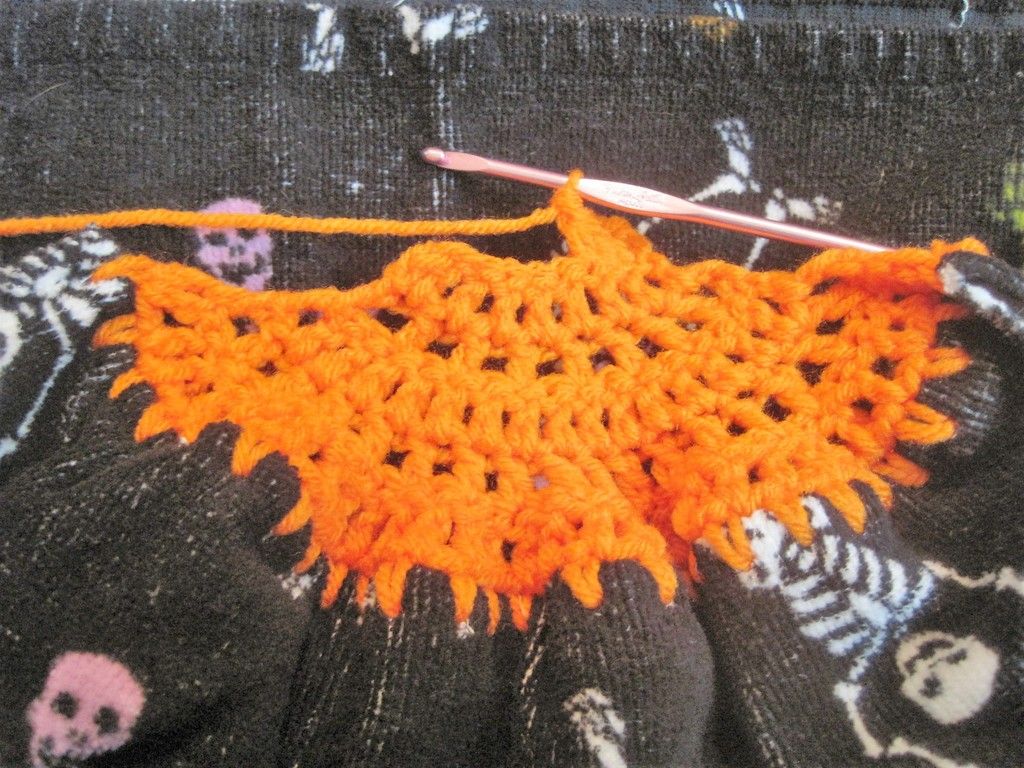
2nd Row: DC in each SC (Skip the ch1 stitches) across, ch2, turn.
3rd Row: Skip one DC, *DC in next DC, skip next DC. Repeat from * across, ch2, turn.
4th Row: DC in each ch1 space ending with a DC in turning ch, ch2, turn.
5th Row: Skip first ch1 space, DC in next space*Skip next space, DC in next space. Repeat from * across with DC in turning ch, ch2, turn.
6th Row: DC in each DC across, ch2, turn. You should have 8 DCs.
7th-15th Rows: Repeat row six.
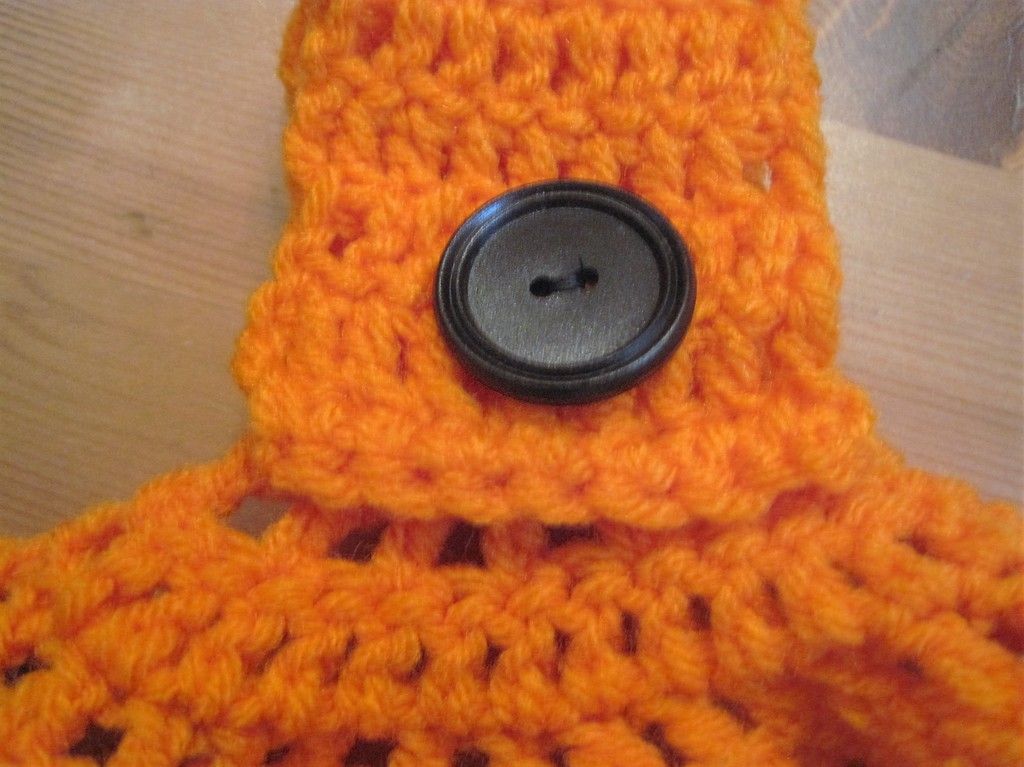
16th Row: DC in first 3 DCs, ch2, Skip 1 DC (this makes the button hole), DC in next 3 DCs, ch2, turn.
17th Row: DC in first 3 DCs, 2 DCs in ch2 space, DC in next 3 DCs, ch2 turn.
18th Row: SC in each DC across. Fasten off and weave yarn end into your work. Fasten your button into the center of the 6th row. Now sit back and admire your thrifty ingenuity!
Kelly
Here is a little "treat" for Halloween....my original towel!
This hand towel was amazing, like when you see a piece or a bit or a bob of a craft that you have no idea how to do but it speaks to you so much, like calls out to your crafter soul, that you must purchase it. Martha Stewart once said that if that happens you MUST get the item, you may not know what to do with it at that exact moment but one day you will and you will be all that much happier that you bought it! This towel was all of that in one inexpensive package. For $2 I got the hand towel and a matching washcloth. These two were pristine, never been used, not even by a little old lady who drove it to church on Sundays. The towel was plush and soft, it even had that fine thread fringe on the bottom, perfect for luxurious hand drying moments. But what put the whole thing over the top was the immaculate brown and tan leaves and flowers with a delicate orange and yellow butterfly delicately alighting on one of the flowers. The Seventies decorating glory in one beautiful towel.
I bought it post haste with the goal of learning how to crochet a hanger on top of it so I could display it in all its epicness in my kitchen. Fast forward six months: I find the towel in my To-Do box and think now is the time to try this. I wandered on over to the Pinterest and started hunting for a pattern to try out on my towel. I found a classic looking hanging towel look and a pattern I felt I could do and set to work. By far the punching the holes in the towel is the hardest part, and as my husband told me "it can't be that bad, old ladies make those", I admit it is not really that difficult. I used a funky gold brown to match the color scheme of the towel and in less than two hours I had a new hanging kitchen hand towel!
I have been wanting to work through the pattern again so when I found these skeleton towels in my Halloween decor I knew what had to be done. I love these towels but I could never find an appropriate way to display them. I have Halloween decorations that take up almost the entire rack for hanging on the oven so these guys were often left out in the bathroom which never did them justice. Enter some bright and creepy acrylic yarns in my stash and we have a recipe for thrifty functionality. Not only do I get to use my pattern again but I get to make my cute towels functional. Epic Win!
The pattern belongs to Harlean at Thrifty Fun! Considering how inexpensive the supplies are and how fast you can whip up a satisfying and functional craft I support her aptly named site. You can find the original pattern here: Crochet Kitchen Towel.
Halloween Crochet Kitchen Towel
Fingertip or Hand towel
4 ply yarn in whatever color makes you happy
Large metal knitting needle or Ice pick (this makes the holes in the towel material)
Size G crochet hook
Fun button and needle and thread to sew it on
Sicssors
ch= chain
SC= Single Crochet
DC= Double Crochet
Fold towel in half width wise evenly or you can cut the towel in half to make two thinner ones. Using the metal knitting needle or ice pick, punch holes through both layers of the towel 1/2 inch apart and about 1/4 inch down from the fold of the towel. This will be your base holes for your stitches. I crocheted into each hole as I punched it but you can always punch the holes all out and then go back and start your crocheting.
Base Row (into the holes in the towel): SC in First hole, ch1* SC in next hole, ch1. Repeat from * across. ch2, turn.
3rd Row: Skip one DC, *DC in next DC, skip next DC. Repeat from * across, ch2, turn.
4th Row: DC in each ch1 space ending with a DC in turning ch, ch2, turn.
5th Row: Skip first ch1 space, DC in next space*Skip next space, DC in next space. Repeat from * across with DC in turning ch, ch2, turn.
6th Row: DC in each DC across, ch2, turn. You should have 8 DCs.
7th-15th Rows: Repeat row six.
17th Row: DC in first 3 DCs, 2 DCs in ch2 space, DC in next 3 DCs, ch2 turn.
18th Row: SC in each DC across. Fasten off and weave yarn end into your work. Fasten your button into the center of the 6th row. Now sit back and admire your thrifty ingenuity!
I well admit this is not a massive crafty undertaking, but it is no less satisfying. As I seek to clean out my world, to consume less and enjoy more, crafts like this fit right in. I can use things I already have to create useful decorative items. They are also a handmade gift I feel good about giving, not just a nice trinket, but a thoughtful gift my loved ones can use daily. I hope you enjoy these as much as I do!
Here is a little "treat" for Halloween....my original towel!
Sunday, October 18, 2015
HTTC - Costumed Canines, Auntie Bellum
Abby is quite stylish in her Auntie Bellum costume. She may not be the greenest thumb though, she has planted many a tennis ball tree, yet so far, none have grown. :(
Thursday, October 15, 2015
Saturday, October 10, 2015
HTTC - Glowing Ghost Ornaments
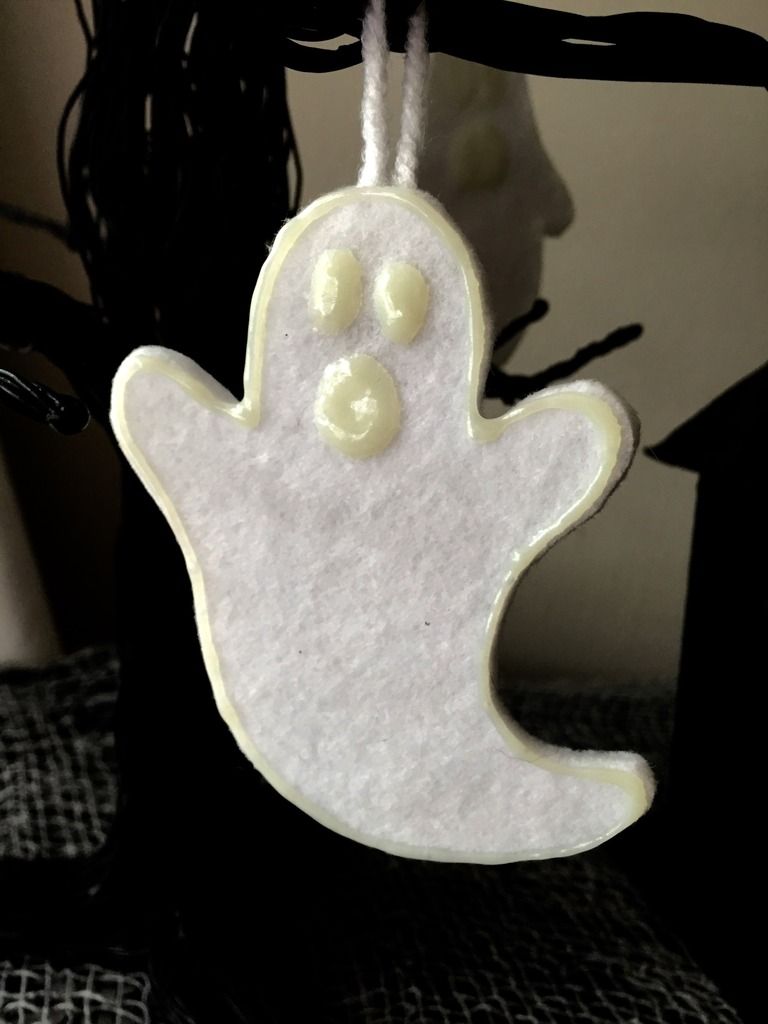
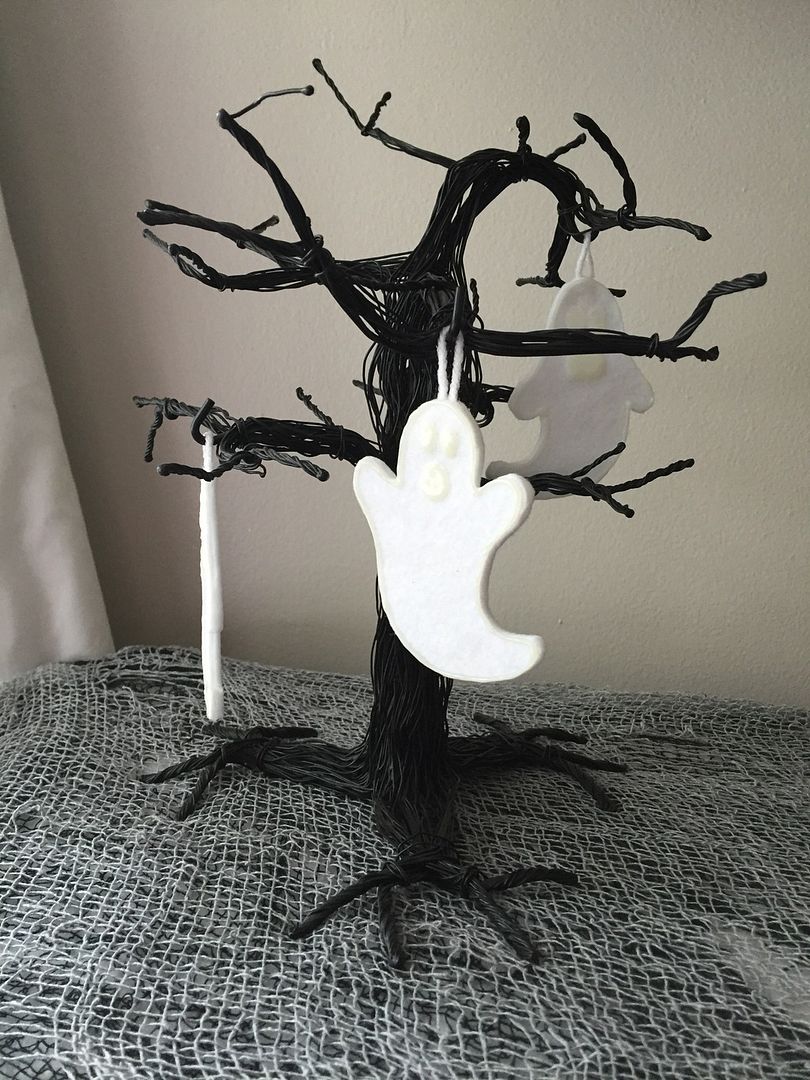
So I've had these awesome black wire trees in my Halloween decor arsenal for some time now. They originally came with orange glass containers to hang candles from their branches but they all broke long ago. I've been thinking about what to hang from their limbs and what was missing from my display were some spooky ghosts. How do we make them extra spooky? Make them glow in the dark!
Supplies
Ghost template
White Felt
Scrap white yarn - only about 3" for each ghost
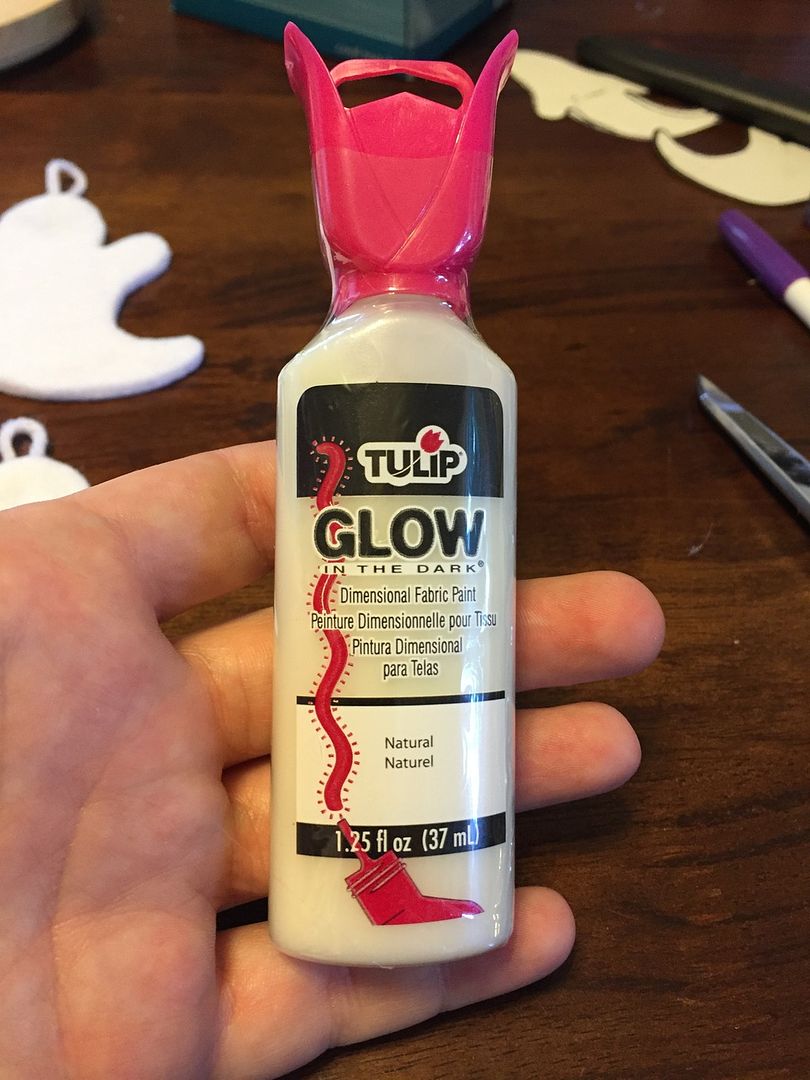
Glow in the Dark puffy paint - I used the Tulip brand.
Glue gun with sticks
Scissors
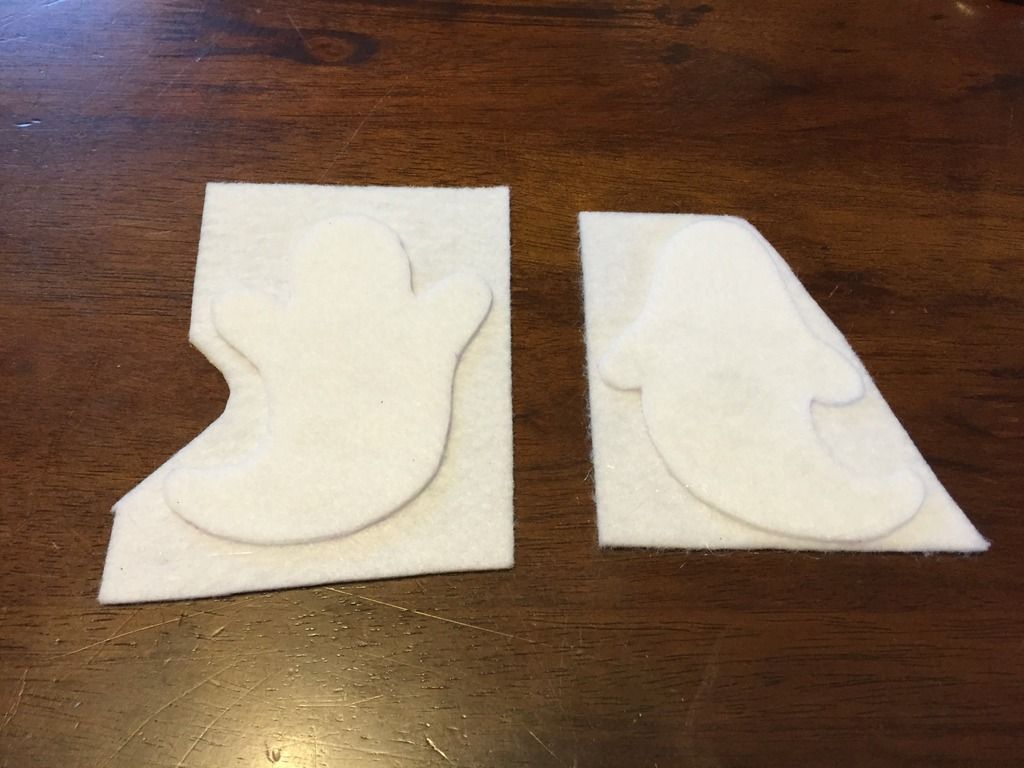
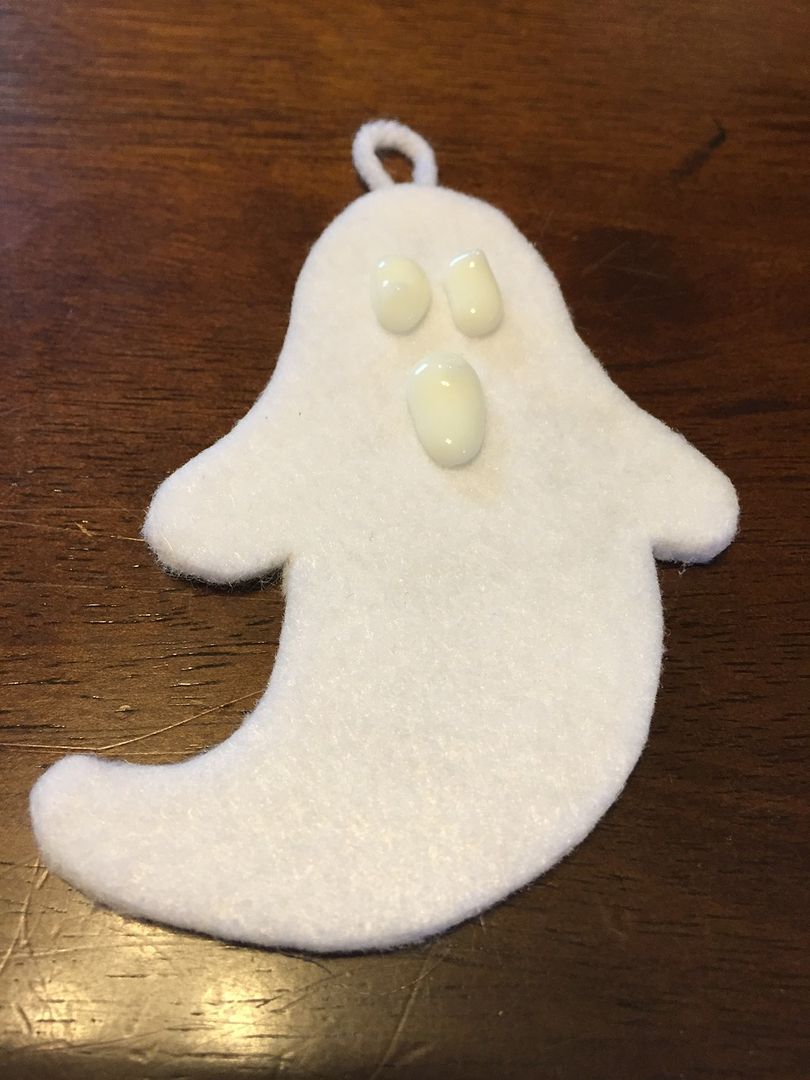
1. First trace your desired number of ghosts onto a piece of white felt and cut them out.
2. Now glue those ghosts down to a second piece of white felt leaving the head glue free. Don't Glue the Head Yet!
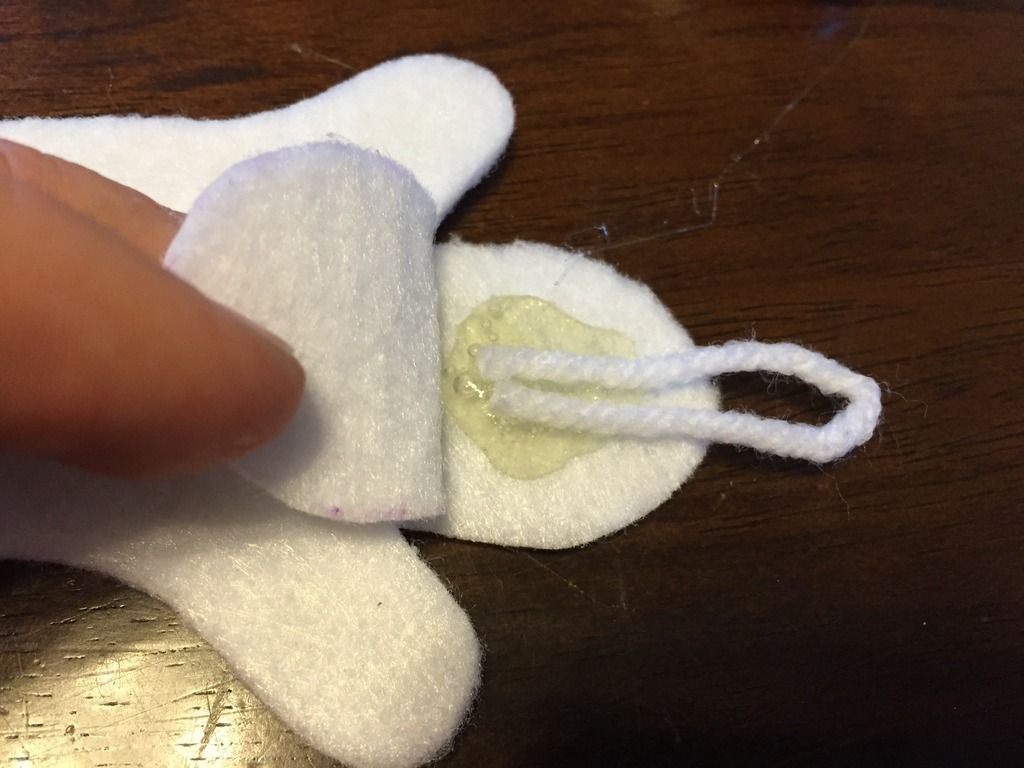
3. Peal back the ghosts head sandwich and place a dollop of hot glue there. Take a piece of your white yarn and double it over, sticking the ends in your glue dollop.
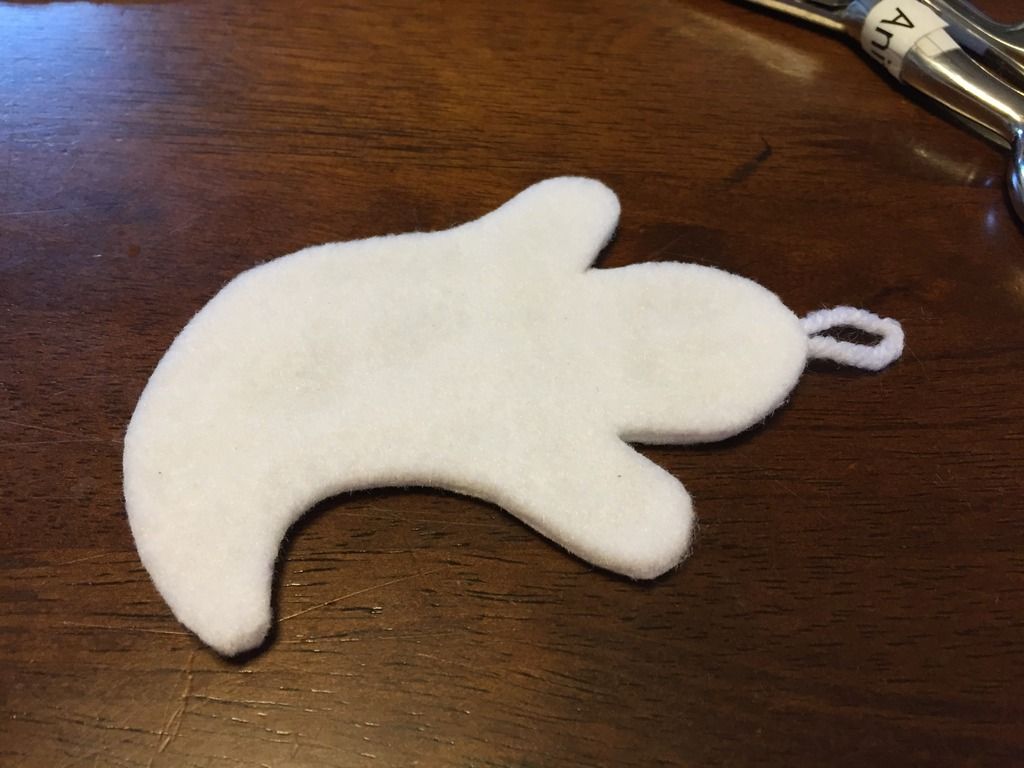
Squish the head closed.
4. Now you will break out your puffy paint.
First add the face.
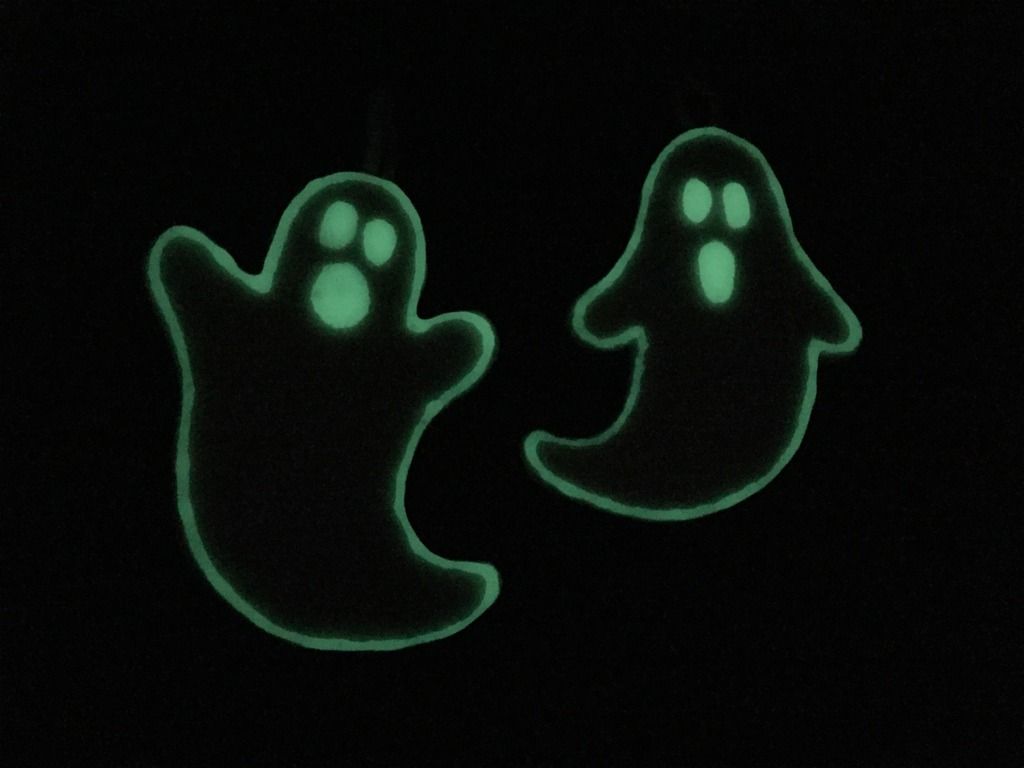
Then outline the ghost's whole body.
You will want to let these dry completely before hanging them. The bottle recommended 4 hours but that might change with your temperature and humidity. Check out how cool the glow paint looks in the dark.
DONE!
![]() |
| Here's how they look on the trees. Spooky! |
Haunt on!
Anita
Wednesday, October 7, 2015
HTTC : Costumed Canines - Dr. Sadie Frankenstein
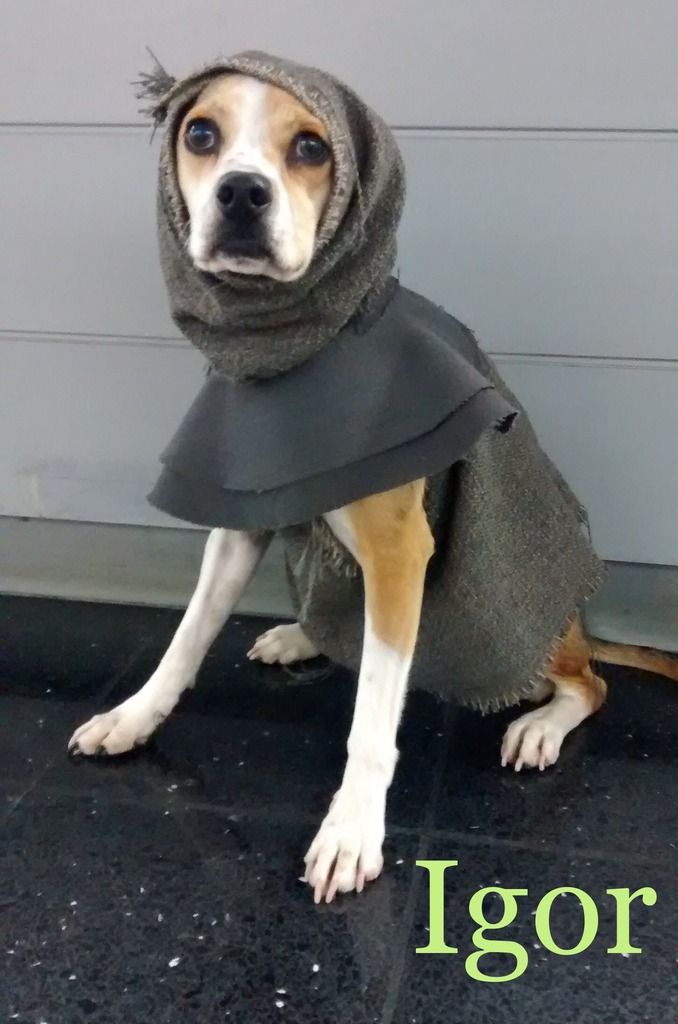
You will see a pattern for my dogs in this years costumed canine parade through the Howl-oween Tricks or Treats Craftathon. Just wait until you see what the mad Dr. Sadie has created later this month.
Howl on!
Anita
Subscribe to:
Posts (Atom)