Showing posts with label Pinterest Fab or Flop. Show all posts

Tuesday, May 27, 2014

Fab or Flop: Homemade Feminine Facial hair removal

Ok, so I am not the most feminine of ladies, I'm not offensive, just not super girly.  I am not keen on the skirt or the dress, though I am starting to eyeball the long cottony ones for the summer that just look so pretty in the breeze.  I don't wear makeup unless I am wearing a costume for a comic book convention.  My husband likes Rom-Coms more than I do and I have G.I. Joe and Transformer stickers on the side of my jeep.  I am more of a tomboy type, even my summer sandals look like they have a safety toe on them, but there are just some things a lady can't abide no matter how un-girly we claim to be, and that my friends is feminine Magnum PI mustache!

I have tried to pretend that my facial hair was normal for a woman, and most of it is.  I have cute peach fuzz on most of may face giving me a nice summer glow, you mix that with my baby hairs at my temple hair line and its quite becoming.  Both of these hairs make me happy, but that under the nose stuff...um no.  It was too dark to go unnoticed and too thick to blend in therefore it must be destroyed!  Thanks to a sweet Pinterest search we had a fantastic Hair Removal idea.  Its all natural and only has two ingredients.  I was very scared at first but the husband convinced me to give it a go, he even offered his back to try it out on if I wanted it.

The recipe is equal parts white sugar and real lemon juice, we did 3/4 cup of each to start.  I wouldn't go much less just because you have to boil it on the stove top and if you don't have enough ingredient in the pan it could possibly burn.  To get 3/4 cup lemon juice we squeezed the brains out of 4 big lemons.

Mix the white sugar and the lemon juice in a small sauce pan and cook over medium-high high heat stirring often until nice and thick.  We are basically making candy with this.  I know we got up to 230 degrees on the thermometer but the best test for facial sugar wax doneness is the cold glass of water test.  Take a drop of your cooked candy, I mean facial sugar wax, at various points during cooking process and let it fall into a cold glass of water.  If it dissolves it still needs to cook, if it holds together in a little ball and sinks to bottom of the glass than you are done!  You mixture should be marmalade colored.
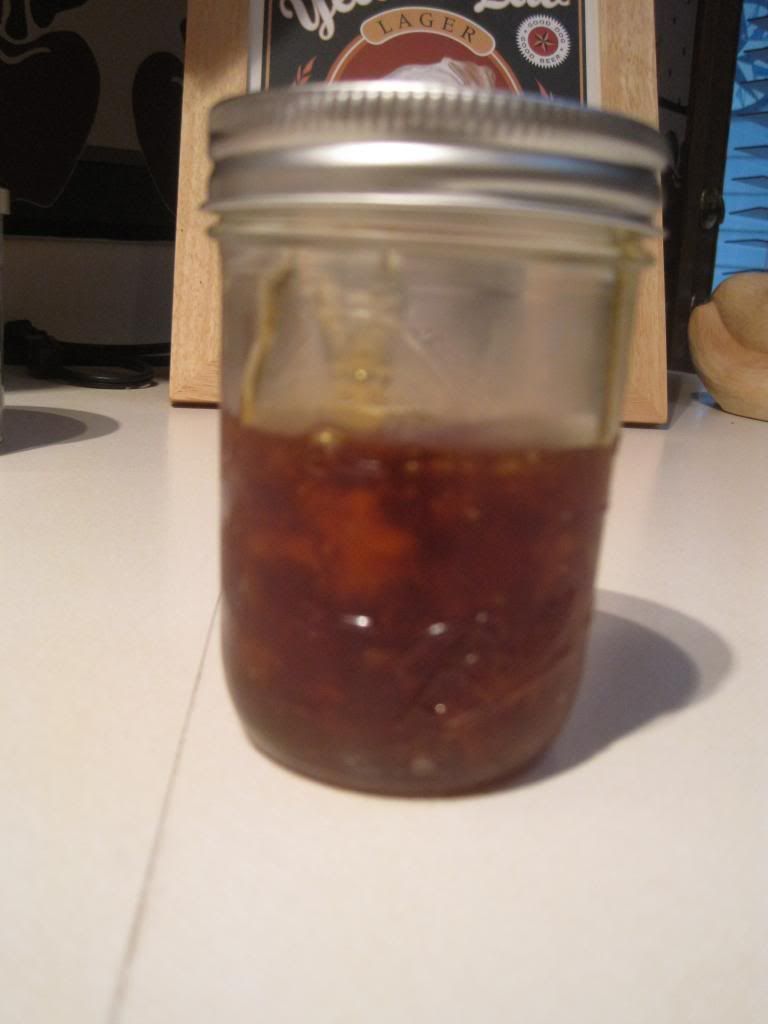
Let the sugar wax cool in the pan until it is barely luke warm.  It should still be spreadable but at no point be hot to your skin.  With a cotton ball dust the facial area to be waxed with baby powder, your goal is to get the powder on your skin beneath the hair to keep the wax from sticking.   Cut up an old t-shirt into strips about two inches by three inches.  With the back of a spoon or a wood craft stick smear the sugar wax on the parts of your face that needs waxing, I got it all up in that stash let me tell you.  Take the strip of t-shirt and spread it over the wax, working it down into the wax with your finger tips, use that sticky quotient to your advantage.  I used a cold pack to give it some solidity before pulling it off by holding it over the waxy part of the strip until chilled.  Then hold down that lip and let her rip! Not going to lie, it stings like heck! But it has to be done and this is better than the chemically infused alternative.  I had very little redness or sensitivity.  Gently wipe of the extra sticky and apply a calming moisturizer.  

This is totally fab! I am no longer ashamed of my stash and we were able to make our own sugar wax to take care of the problem, happy day! Give this simple recipe a try if you need to do a bit of hair taming of your own, you can store the extra in a lidded jar in the fridge and warm it up as needed.

Kelly

Sunday, May 25, 2014

Fab or Flop: Pit stain removal

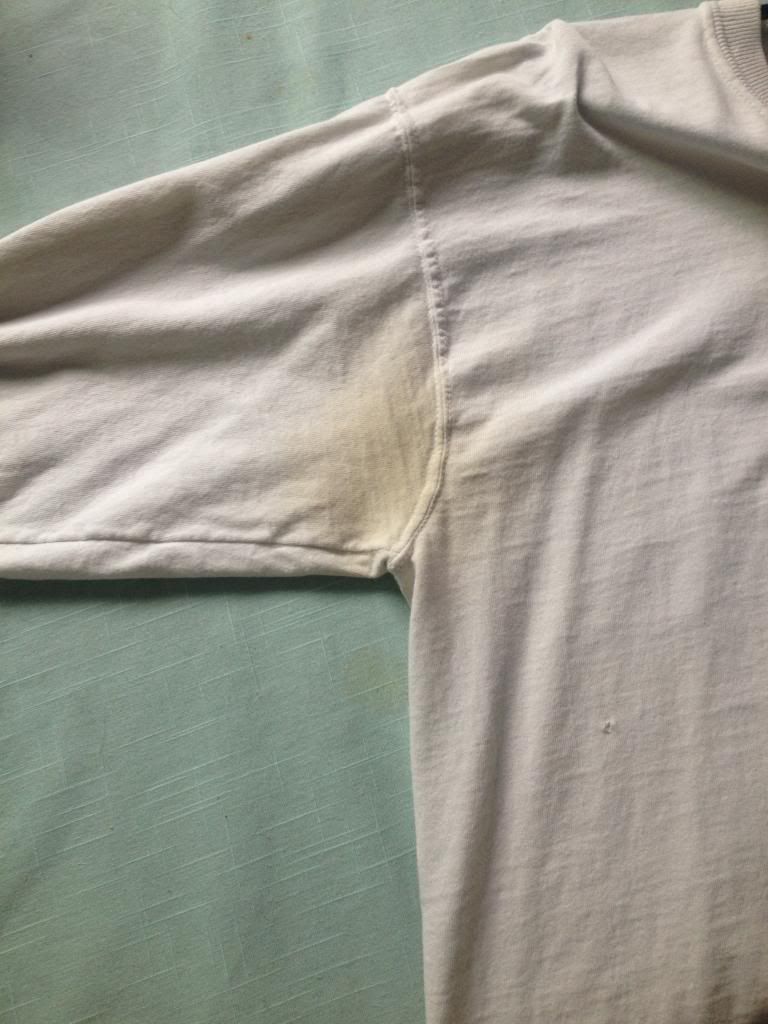
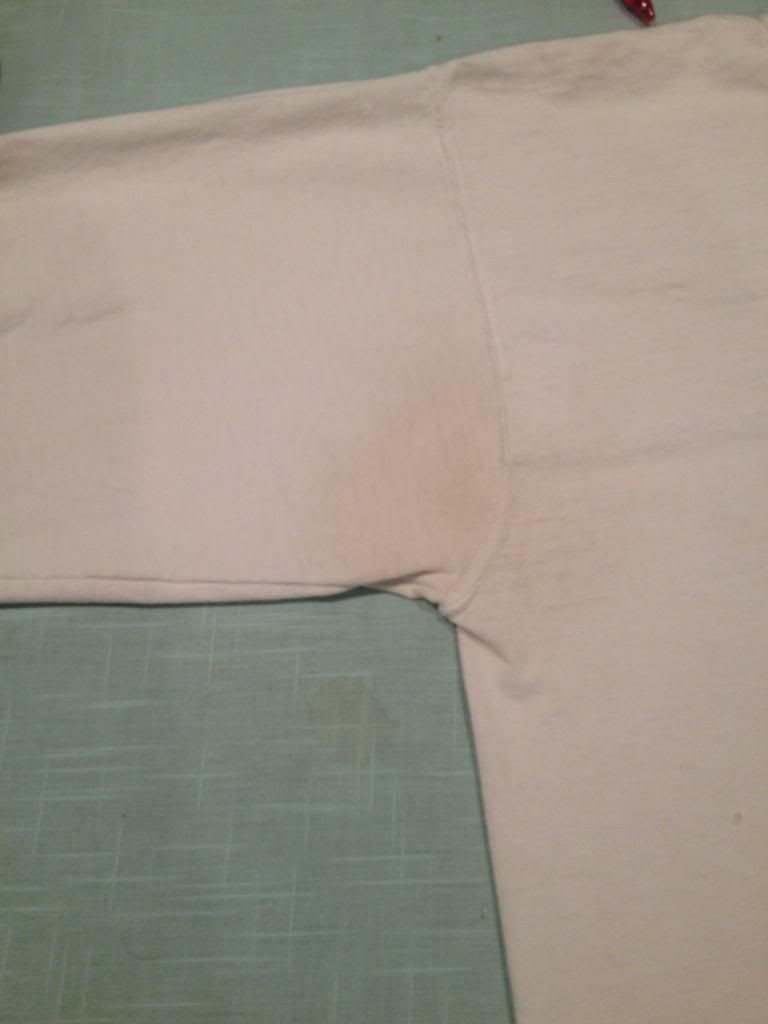
This is one of those pins that I put in the "For the Home" board forever ago.  This is going to be a short and sweet review cuz either it works or it doesn't.  Basically the post, originally from One Good Thing by Jillee, said to use this concoction from dawn, hydrogen peroxide and baking soda and poof!  No more yellow pit stains.  I followed the directions but my one difference is that I used a 10+ year old shirt.  You can see from the below before pic that there are some pretty prominent yellow stains to tackle.

I don't have many white shirts left so that was one reason to use this archaic specimen but the other is that I didn't want to damage any of my nicer ones.  So how did it go?


The after pic is a very good representation of the finished product.  The yellow is completely gone.  My caveat is that because the stains had been there so long there was still a dark spot even without the yellow.  So even though the "after" didn't come out perfect, I would put this as a Fab just because I really started in the hole with such an old shirt.  I'll totally be trying this on more white clothing in the near future.  I'm sure if it's a newer piece of clothing there wouldn't be any stain left.

Clean on!
Anita

Tuesday, May 20, 2014

Fab or Flop: Spicy Fish Taco Bowls

I decided that I want to clean out my cupboards of all the half used nubbins and bits of dry goods that have accumulated: half a bag dry beans here, some tiny pasta hidden over there.  I admit that being only a family of two it’s not a huge amount of these things but I don’t want to waste the food if I could find a yummy recipe that calls for the little amount that I have.  I have some brown rice on my rice shelf so I searched “brown rice recipes” in the Pinterest and came up with a big long list.  After searching through a huge selection of tasty salads, puddings, and casseroles, I came upon this simple weeknight meal I could put together in a snap.  Of course we have to have a change from the original; I can’t seem to do any of these exactly as made.  We switched out US catfish for the tilapia, as we can only find the imports from China and not a chance I’m eating that, and I doubled up the avocado to one whole one, other than that all kinds of the same and yummy!

2 tilapia fish fillets
2 tbsp olive oil
1 tbsp cumin
1/8-1/4 tsp cayenne pepper
1 tsp chili powder
2 cloves garlic, minced
2 green onions, chopped
1 red bell pepper
1 cup corn kernels
1 cup black beans
salt and pepper to taste
1 avocado, cut in small pieces
1 lemon
2 cups cooked brown rice


In a small bowl mix the cumin, cayenne pepper and chill powder. Rub generously over the tilapia fillets on both sides.  Heat the olive oil in a large skillet over medium heat. Add the fish to the skillet and cook for about 3 minutes on each side. You want to make sure it gets almost blackened and that the fish is cooked through, inside it should be white. Remove fish from skillet and shred with a couple forks.

In the same skillet add, garlic, green onions, corn and red pepper. Season with salt and pepper if preferred. Stir and cook. Let it cook for a couple minutes then stir again. You want to make sure the corn is brown and looks roasted, it is worth it to get that roasted toasted taste. Add beans and cook until beans are heated through.  To serve, layer rice, corn/bean mixture, fish, avocados and sprinkle with fresh lemon juice. Top with salt if needed.


 This dish is fresh and bright at the same time the brown rice, fish, and avocado give it some good staying power in the “I’m full” department.  This great recipe that I look forward to enjoying again very soon.
FAB!

Kelly

Sunday, May 18, 2014

Fab or Flop: Glue gun holder


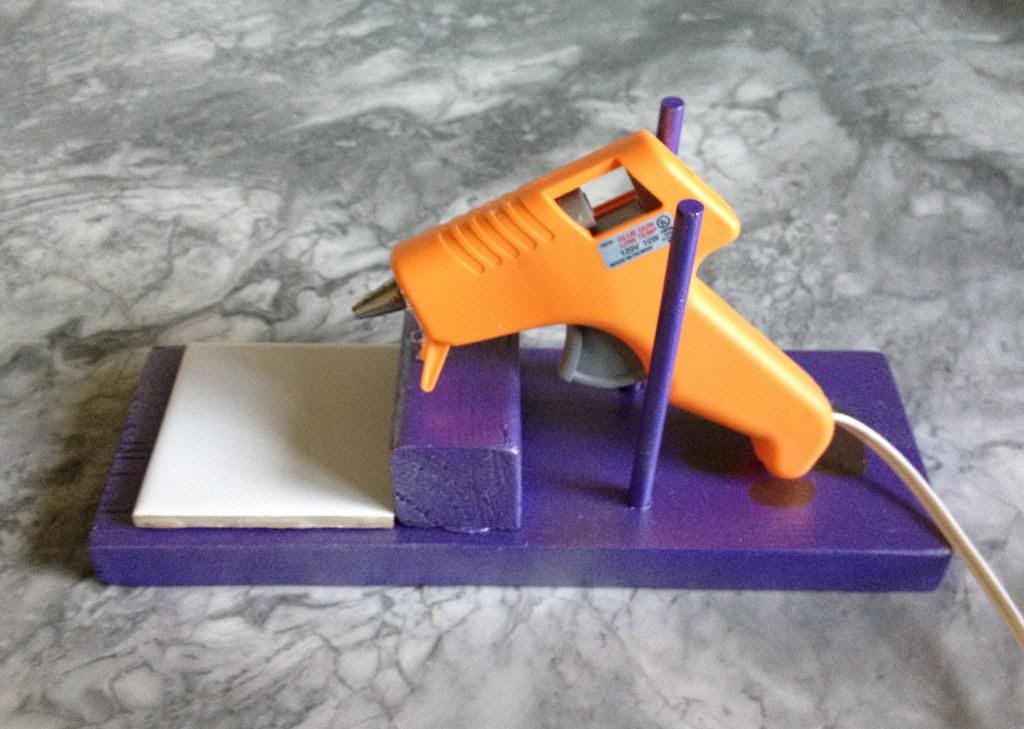
Up next on my "pins to be tried" list is a tutorial from Shanty 2 Chic for a glue gun holder.  I pinned this forever ago.  It's one of those projects that I keep coming back to saying "man, I really need to make that.  It would be super useful."  So here we go.

I had almost all the stuff to make this already on hand.  Only missing two things.... a 1X4 and a piece of tile.  The 1X4 was easy to remedy but I have to tell you the one thing that almost made this a flop was trying to find a piece of 3x3 tile in stores near me.  We have plenty of tile left over from the bathroom remodel but they are all 3x6 subways.  What to do?

After assembling the whole thing, which was just as easy as the tutorial made it seem, I made one last trip to my local DIY flooring store, Floor and Decor.  There I discovered a tool called a handheld tile cutter I bought for $13.  It basically scores the tile like a glass cutter using a carbide wheel and then you break it along the score line.   I don't know if it was beginner's luck but I got it on the first try.  Problem solved and now I have a new tool in my arsenal.
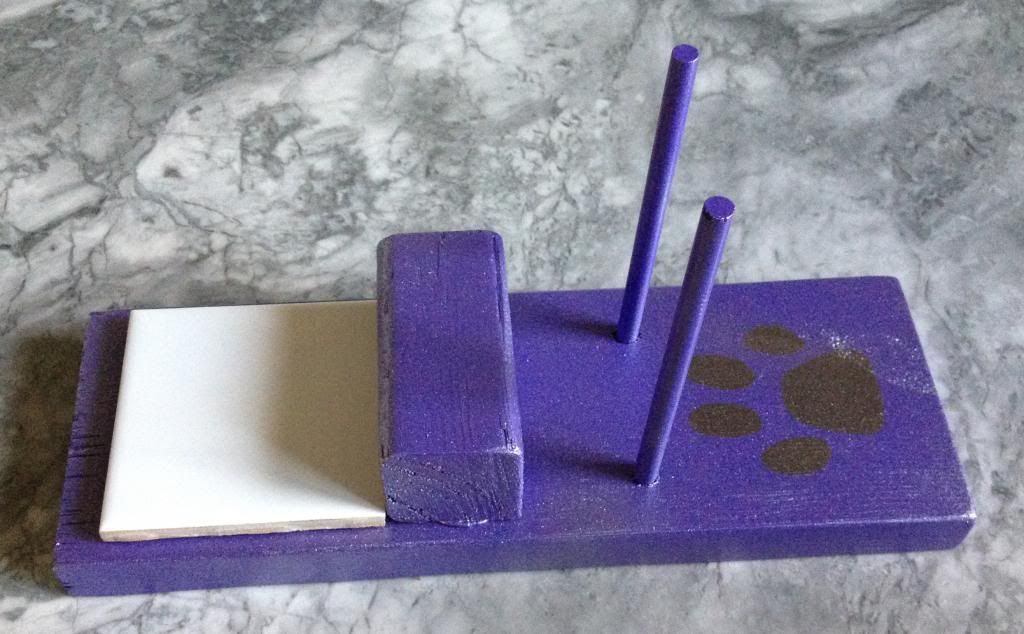
I did a sparkley silver over my purple paint job and of course the paw print is a necessary.
Overall I would say this was a Fab pin.  I love how heavy the finished piece is so I don't have to worry about it sliding around on the table.  I have two tiny glue guns but it's totally big enough to accommodate one of those bigger models.  I encourage you all to whip one of these up but find the tile first.

Craft on!
Anita

Tuesday, May 13, 2014

Fab or Flop: Biscuit and Egg Puffs

I am always on the hunt for a recipe that can deliver a good amount of protein with little or no meat.  An egg based recipe, if it is savory in nature, usually fits that bill with nutrients to spare.  Egg recipes are tasty and filling with only a small hit to the food budget.  We rarely eat processed foods with hidden egg ingredients so we can keep track of the amount of egg we eat daily.  Additionally, egg dishes often do not rely heavily on meat for flavorings making them perfect for us as we are trying to eat less and less of the real stuff.  My husband can eat these protein dense foods for breakfast before he leaves for work making them a good choice to keep him on the healthy path and keep up his weight loss.

This recipe for Biscuit and Egg Puffs by Joyful Homemaking calls for all of your favorite breakfast items: eggs, bacon/ham, cheese, and a biscuit, in a little bundle of delish! My husband has a heart condition that forced me to make one change to this recipe when I made it for the Pinterest challenge.  Instead of the canned biscuits we used the Hearth Healthy Bisquick mix rolled biscuits that has been oked by the doctor for him to eat.  I mention this because for us the recipe was a flop and I am sure it was this change that made it so.

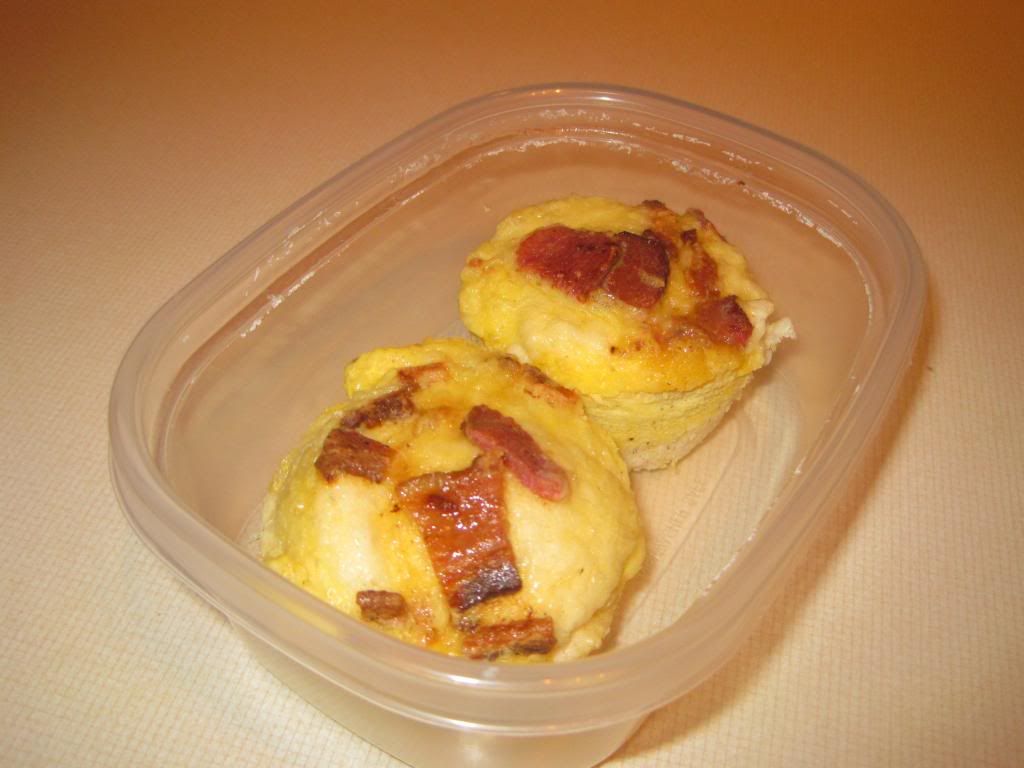
I totally review this recipe as one you should all try with your families! Since we had to sub out the Bisquick we ran into some unseen issues that would not have been there had be followed the recipe as Margo suggested in her blog.  The Bisquick way over filled the muffin tins as it baked and pushed out the egg on to the metal where it was over cooked and spongy.  With so much biscuit in each muffin the small amount of cheese and bacon, which would have been the perfect amount with the original directions, was almost lost in the breadiness leaving these somewhat bland.  They still turned out pretty and would look great on a buffet or brunch spread.  So even though these muffins won't be a regular in our household, one without the dietary restrictions would be able to make these in lots of tasty different ways!

Biscuit and Egg Puffs

1 7.5 oz can of biscuits (10 small biscuits)
5 eggs beaten
1/2 cup shredded cheese
1/2 cup cooked bacon or ham (optional)

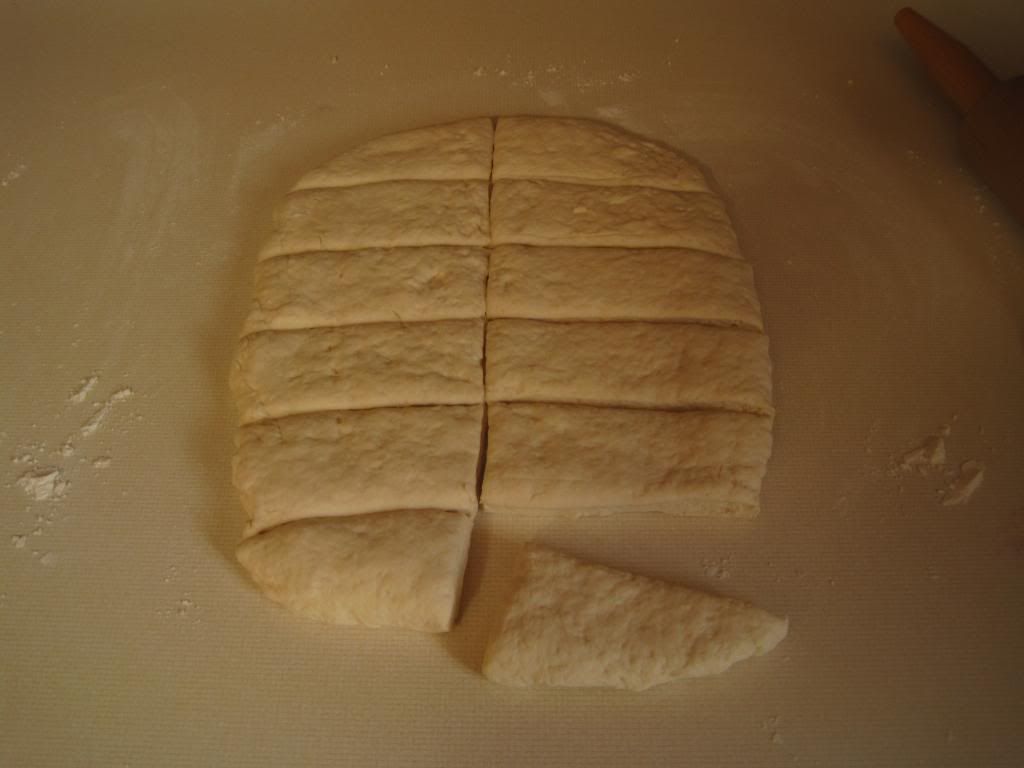
Pat each biscuit in the bottom and up the sides of a lightly greased muffin tin.  Pour the equivalent of half an egg into each tin.  Top with cheese and bacon or ham if you want to.  Bake @ 375 for 12 minutes until your egg is cooked all the way through.

This is such a simple recipe that you should definitely give a try!  My only suggestion is that you stick with the small canned biscuits that the recipe calls for.

Kelly


Saturday, May 10, 2014

Fab or Flop: Weekend in Stockholm Afghan


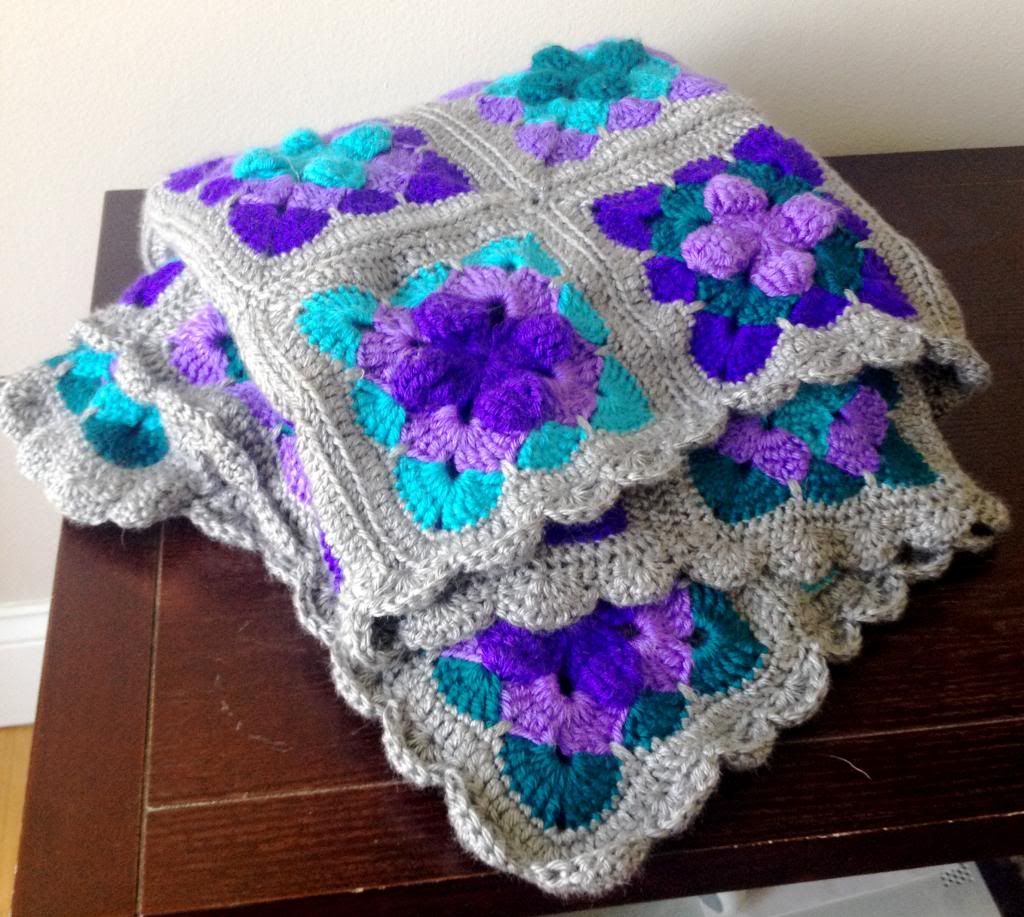
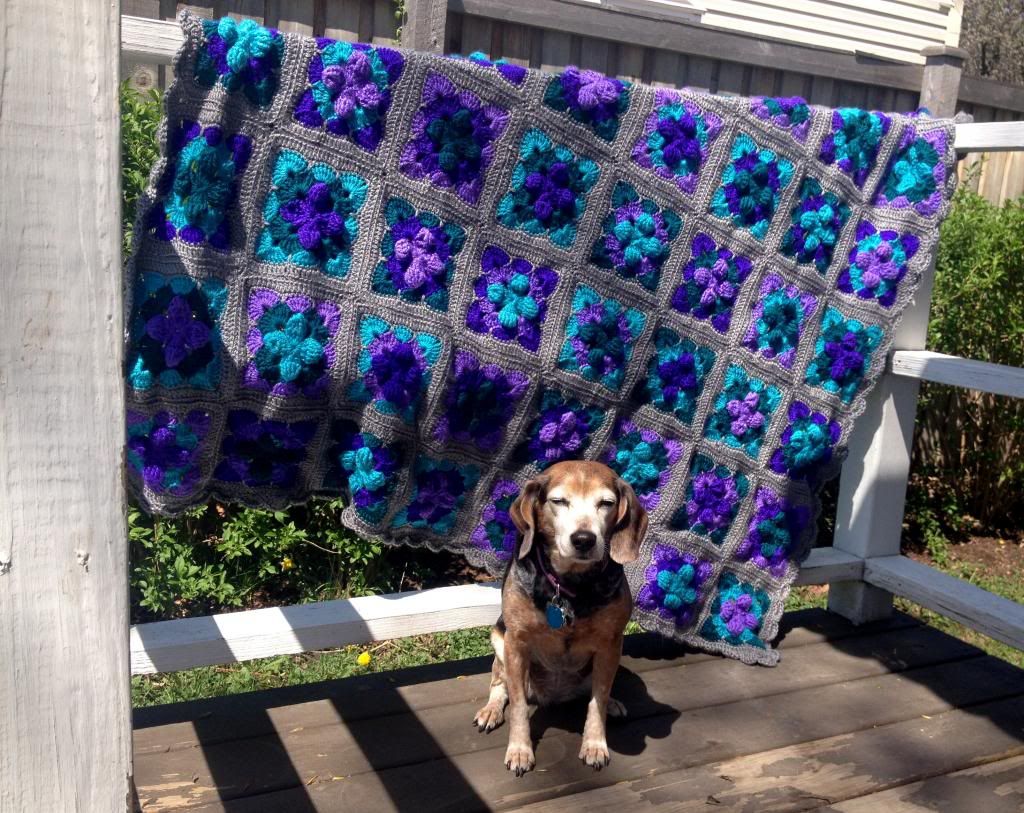
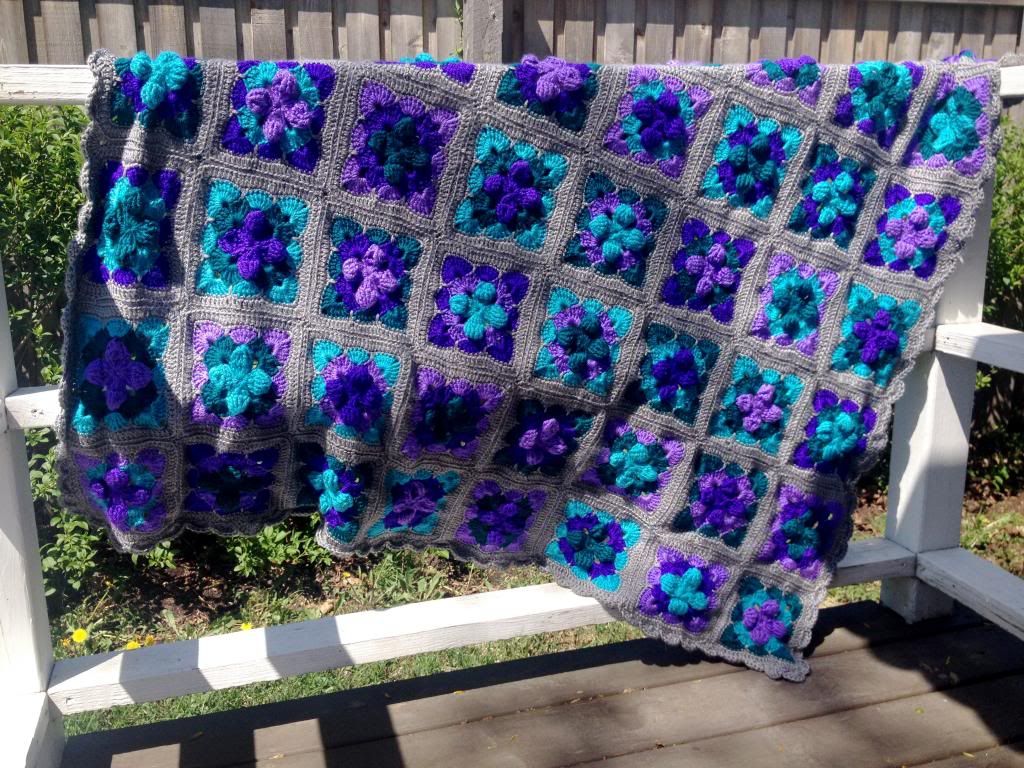
For my first fab or flop post I have a huge project from my WIP pile finally completed.  I started this afghan last year and am happy to say I can put a nice big red check mark next to it.  The pattern is called the Weekend in Stockholm afghan from Red Heart.  I originally pinned this pattern to the Crochet projects board from someone else's page but here is the direct link to the pattern, and guess what....it's totally free.  I've pretty much abandoned buying patterns at this point unless it's a "I'll die without that" kind of response. Red Heart and other yarn companies like Lion Brand have some great free patterns on their sites.  I even follow them on pinterest.

So how did it go?  Not too bad.  I think I could have done better with the finished scalloped edge but being that this is my first full fledged afghan I'm pretty happy.  I have also gone through a bit of a roller coaster with the color selection.  From love, to unease, to dislike, to disappointment, back to love.  This all happened as the blanket was assembled.  I had no worries until that step.  Somehow, though, once I completed the boarder and stepped back, all my love for the original idea returned.  I especially love the yarn I chose, Caron Simply Soft, which I got at Joann of course.

Like I said this project was started last year and was sitting in a bag in the craft room.  I had all but maybe 8 squares done when I gave up.  How silly am I.  I was on the downhill slide to the finish and couldn't see it.  I had a three day weekend from work this last week and it was rain central around here so what did I do?  Curled up in the lazyboy, with both little dogs in my lap of course, and pounded out the finished product.  I was surprised at how quickly the joining process went.  I mainly listened to an audio book as I went along but one day I even just sat in the quiet.  (I have become a lover of quiet lately.)  Nature provided a soundtrack that day with the rain an thunder.  Way better than any recording.
When the sun finally came out.
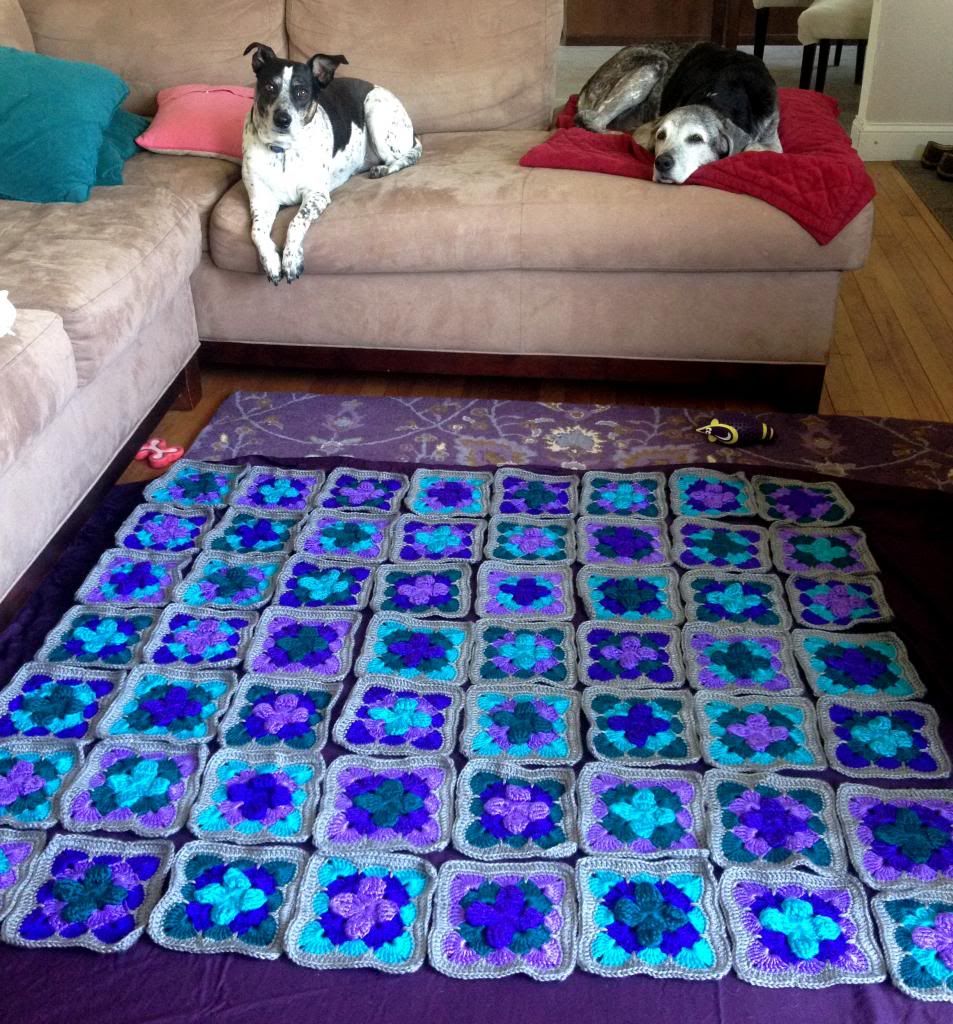
The last thing I'd like to mention is that I didn't follow the pattern layout exactly in choosing my color pattern.  This took some math, which thankfully I'm pretty good at, and a couple pieces of scrap paper but it worked out great.  I have 24 different squares whereas the pattern calls for 10.  This translated to me having an uneven number divided into the total of 56 squares.  I made two of each and then for 8 strategically chosen squares I made an extra to bring me up to the right number.  The layout was a little tricky but the trial and error is just like putting together a puzzle(one of my favorite things to do).  Mr. Biscuit and Sadie made sure everything looked good before giving the final OK for me to start assembly.

I'd say the planning and patience to make it to the end were the toughest parts of this project.  The pattern itself looks much more challenging than it is.  After a few squares I got into a rhythm that was easy to maintain.  Plus it's alot of treble crochet so the squares grow quickly.  This is definitely a pattern that I would recommend to someone who has a little crochet experience but you don't even need to be a novice.

Tiny diva Gidget totally crashed my final photo shoot.  This was the best shot because she was doing it in protest.  The only thing she would tell me was that she disapproved of the lighting.
 
All in all I would say this is a FAB, but long, pin.  A keeper in the afghan library.

Crochet on!
Anita

Tuesday, May 6, 2014

Roasted Brussels Sprouts Fab or Flop

Yay! I get to be the first Fab or Flop post! My posts will be mostly food, and by mostly I mean totally. I am working on costumes for upcoming conventions so tackling a new craft is not in the cards for me...but tackling a tasty, we hope, dish that I can do!  If I can get one that my husband will eat too that is quite the win indeed.

My first Pinterest pin is for Roasted Brussels Sprouts with Garlic Aioli. I have always wanted to love sprouts, watching my vegetarian friend devour a big ole bowl caused such envy in my taste buds.  As a cabbage lover this just seemed natural, but every time I attempted to cook these little buggers they would come out all dry and unappetizing.  I mean an over cooked Brussels Sprout is one of THE nastiest foods out there along with malt anything and burnt sugar!  To the Pinterest I went and scoured it for quick and yummy sprout recipe.  I pinned this one a few weeks ago in earnest hope for the soon fresh farmers market veggies!
The one I pinned had simple ingredients and even simpler instructions.  Cut 'em, roast 'em, dip 'em, eat 'em...this I can do!  Oh what if this works?!?!! What if I find a recipe that I can enjoy on a regular basis, oh the excitement!

Roasted Brussels Sprouts with Garlic Aioli

1 lb sprouts, or around 8 sprouts per person
olive oil
salt and pepper

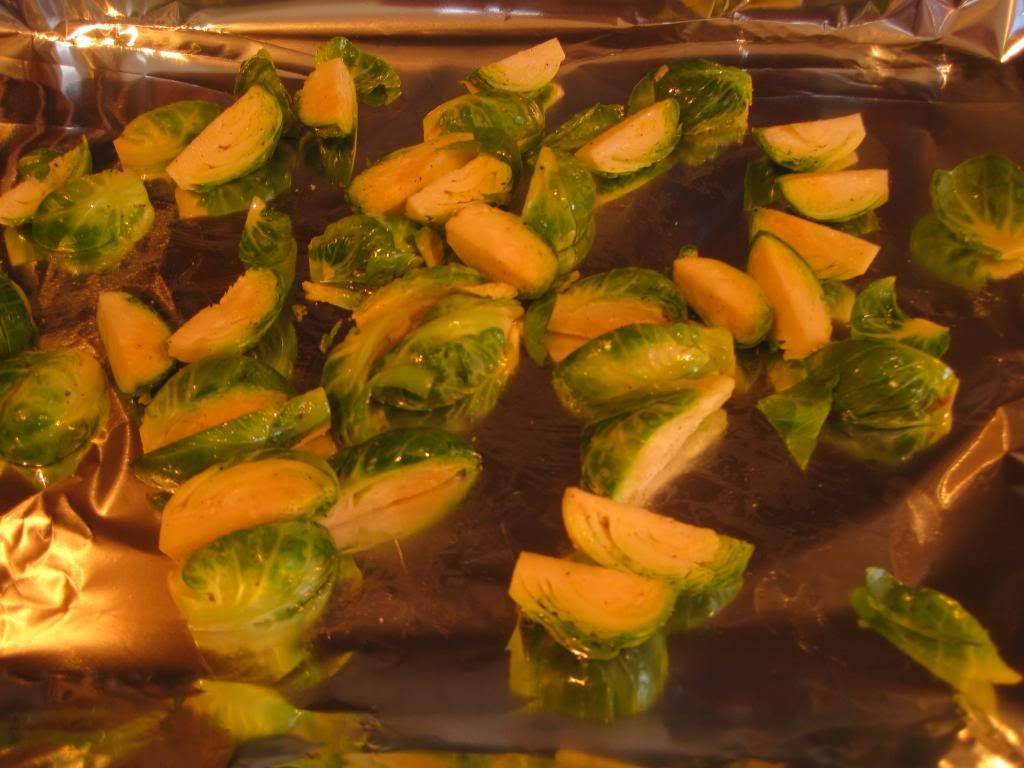
Preheat oven to 400.  Slice the sprouts into quarters, make sure to keep any loose leafs that fall off, they make little tasty chips when roasted! In a bowl toss the quartered sprouts and leafs, salt and pepper, and a healthy drizzle of olive oil.  Mix well and spread out on a tin foil lined cookie sheet.  Roast in the oven for 15 minutes until nice and crispy, turning if you want, but I like them really crispy on the one side.

For the Garlic Aioli

3 Tbsp  mayonnaise
3/4 tsp garlic powder
healthy squirt of lemon juice

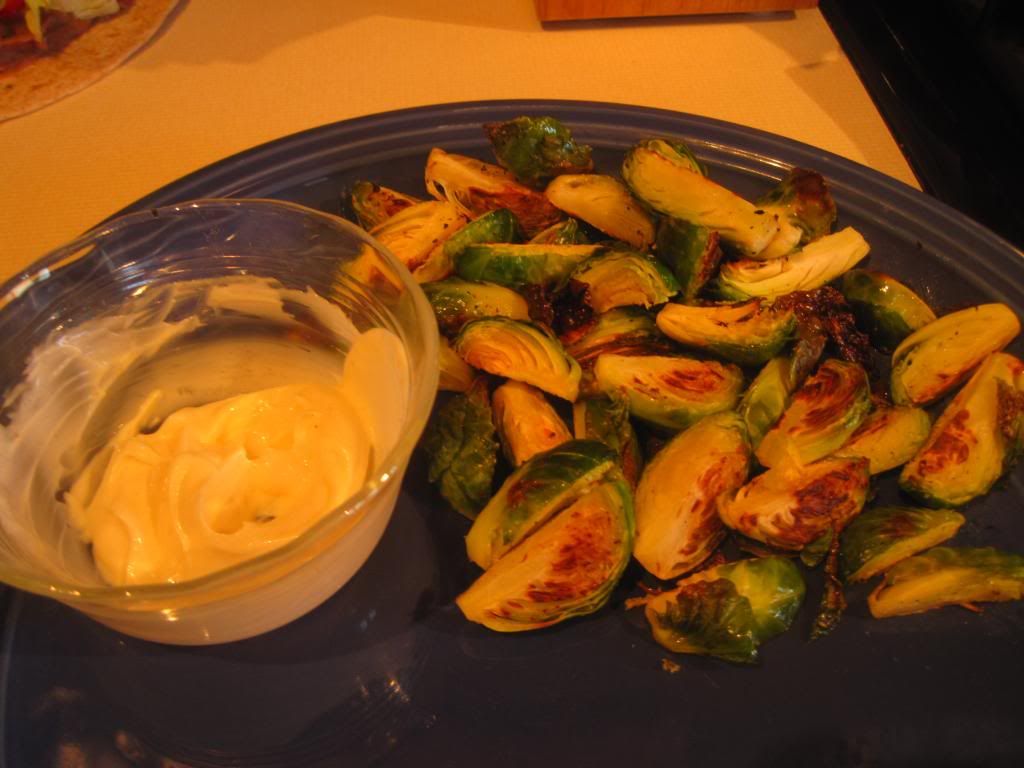
Mix all aioli ingredients together and let sit one minute before dipping your heart out!  This will make three servings of the dip. In the picture there is only one serving of dip for all those sprouts and there was plenty.

The original recipe called for fresh garlic, I was out at the time so I tossed in the powdered kind and I was very happy! Aioli was another food that I wanted to enjoy but often found it over powering whatever food it was paired with.  This one is creamy garlic that melts into warm roasty sprouts!

This was a FAB for sure, I could eat this every week.  I can't wait to see what Anita picks for her first pin!
Pin it up and have fun!
Kelly
 

Saturday, May 3, 2014

Pinterest Fab or Flop challenge

Rhinestone Beagle
Are you a Pinterest hoarder?  Do you have an inappropriate number of pins and/or boards and you have totally forgotten about most of them from the moment you hit that "Pin it" button?  We here at the Rhinestone Beagle family, more specifically ME, have that condition.  We decided to try and start actually attempting some of these pins to see if they should stay on the board or go.  Or in other words are they FAB or a FLOP?  Stay tuned this month for posts each week.  From recipe to crafts to beauty techniques, we are going to try and cover a large variety.  In the mean time, check out our plethora of pins on our Pinterest page.  Better yet, if you wanna get in the purging spirit let us know if you try a pin and if it's a fab or flop and we will include you in the round up at the end of the month.  You can even grab the button above.

Craft on!
Anita