
I knew I was in trouble last week when my fabric stash started looking like this.

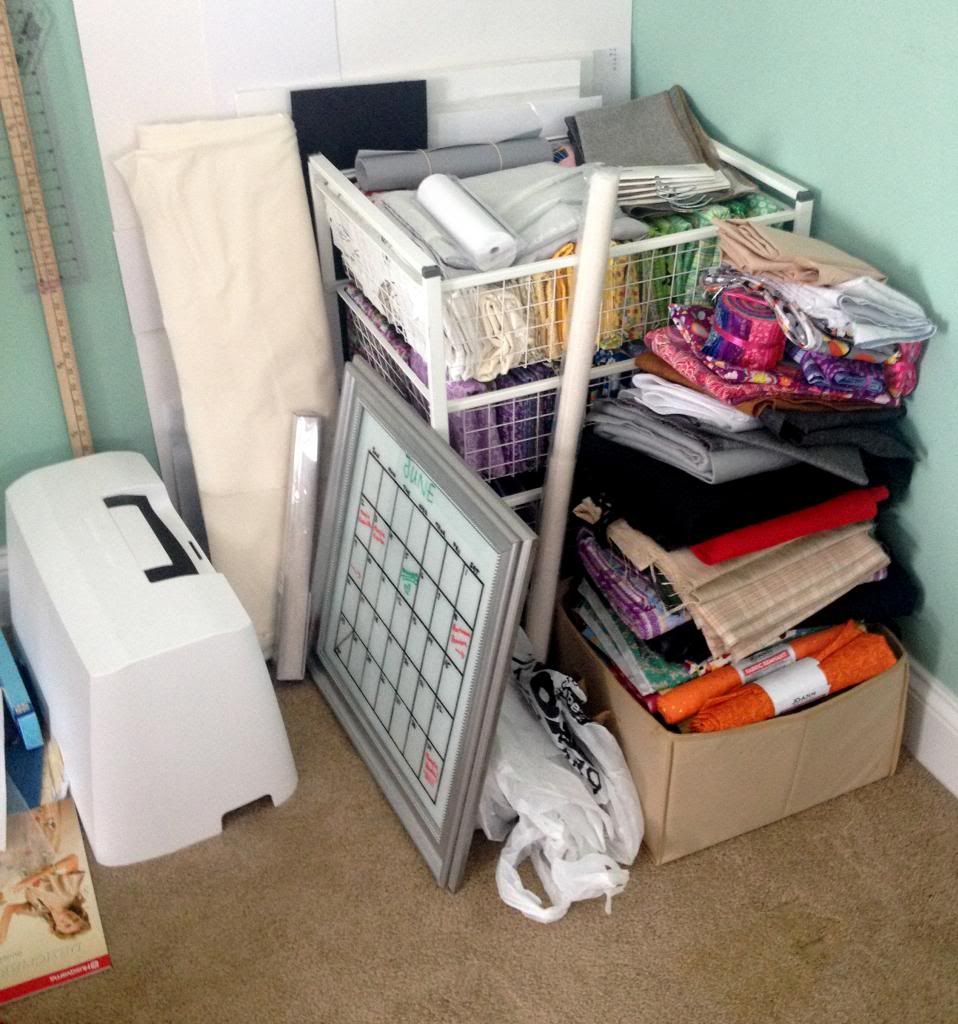
I've been a fabric horder for a long time and I have a sickening weakness for the remnant section of any fabric store. I don't think it has completely gotten out of control yet but I was well on my way with that wonderful mess/pile forming. It was conquer the pile or get swallowed by it so here's what I came up with. The best part is that this only cost me $30, not counting the drill and hammer I used to put it all together. I got the shelving units on sale for $10 a piece. They normally only sell for $20 each so it would be more like $50 for you to make this full price. Still a steal for a fully functional piece of furniture. Here's what you'll need.
Supplies
2 Antonius wire basket shelving unit from IKEA - $19.99 ea
1 small Linnmon table top from IKEA - $4.49 (I picked white but they also have black.)
8 Metal conduit straps, 1/2" w/ 2 holes - $.99 for a bag of three
16 screws (I used wood screws but I've also seen drywall screws recommended for MDF.)
16 small metal washers
3 white zip ties
a couple pipe cleaners to help with assembly
drill with bit to fit your screws
hammer
1. Assemble both the Antonius shelving units according to IKEA's instructions. Leave the baskets out for the time being.

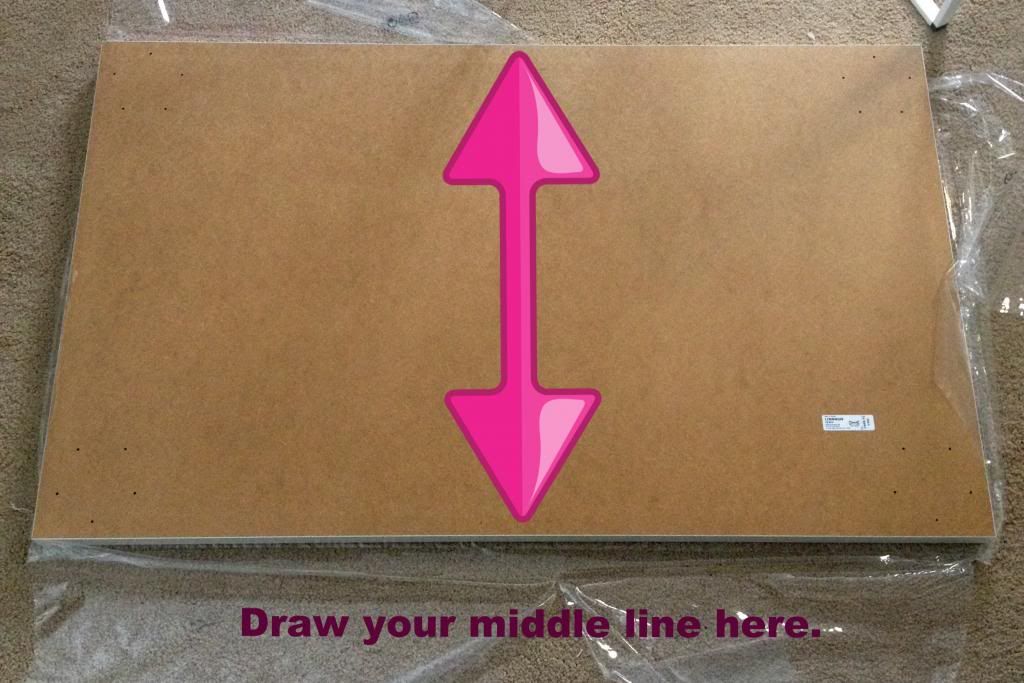
2. Now unwrap your Linnmon table top and place it wrong side up. Find the center and draw a line down the vertical middle of the long side.
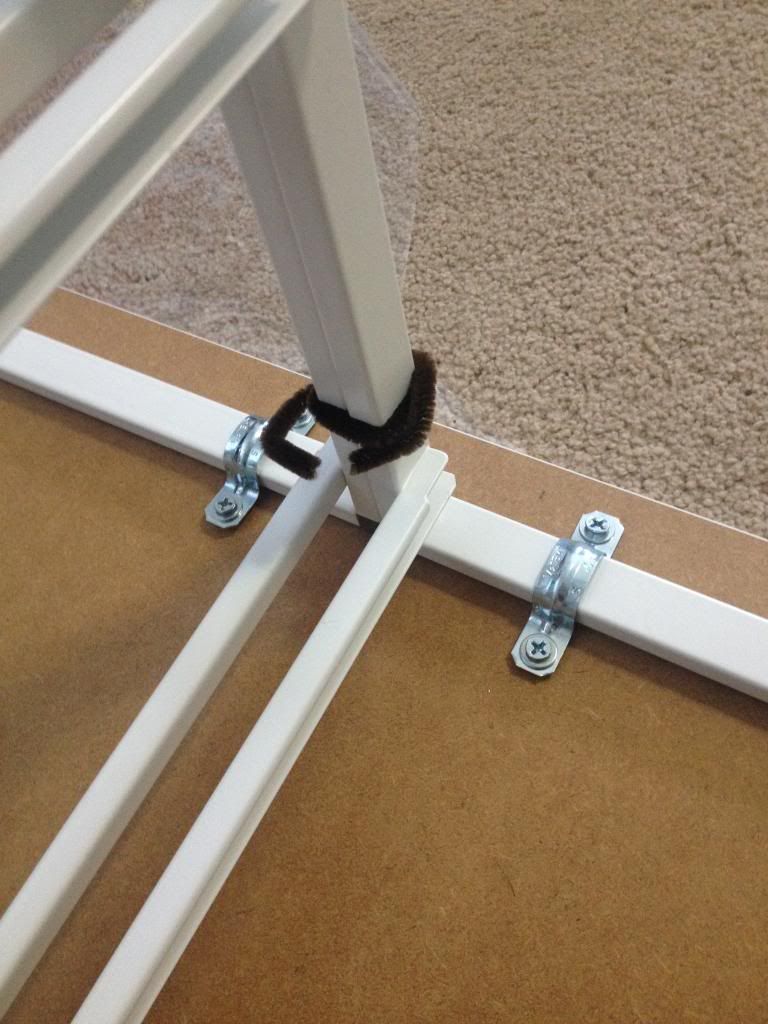
3. Place your shelving unit frames side by side on top of the table top. ( I used the pipe cleaners to snug them together for the time being.) Line up where they meat on that center line you drew in the last step.
4. Now we need to attach the frames to the table top. Here's where those metal conduit straps come into play. Before you can use them you need to flatten them out a little so the opening isn't so rounded. This will help them hug the shelving unit frame better. I just placed them one at a time on the underside of the table top and used a hammer hitting them on the curved opening until they start to look like this.
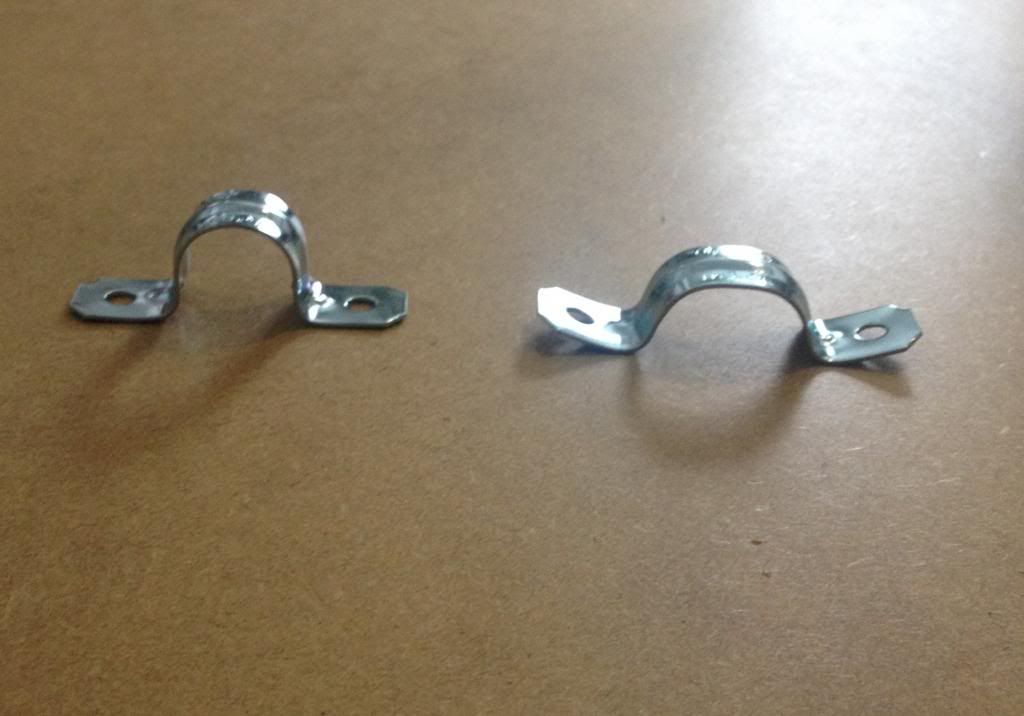
Don't worry about how the ends are upturned. You can just use the hammer to gently tap them down.
5. Now place the adjusted strap across one of the shelving unit frame pieces and screw it in on one side with a washer between the screw and the strap. Don't over do it with trying to get the screw in too tight. MDF isn't as strong as wood so if you put too much force on it the screw will strip the hole and it will become wobbly. Just go until it is sunk all the way and feels snug. Screw in the other side the same way and repeat for the other 7 straps.

Here's how I laid them out on the under side of my table. I used 4 on each frame with two in the front and two in the back.
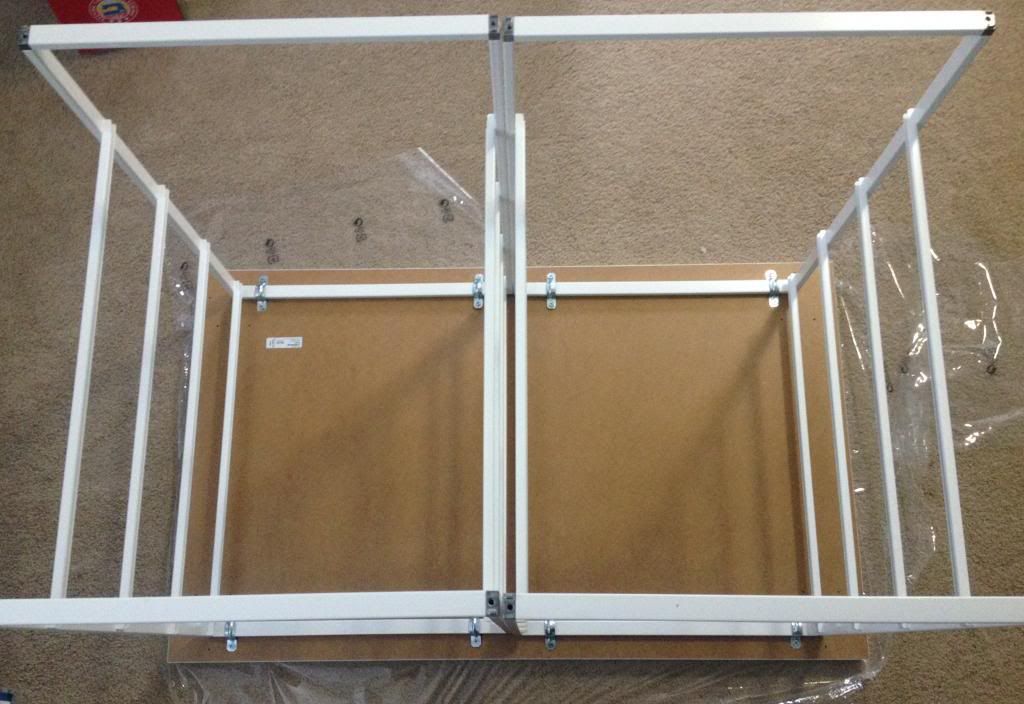
6. One last thing I did before turning the unit over was to zip tie the vertical pieces together where they meet in the middle but only at the back so you can't see them. I did three ties, one at the very bottom of the shelving units and two more moving up toward the table top.

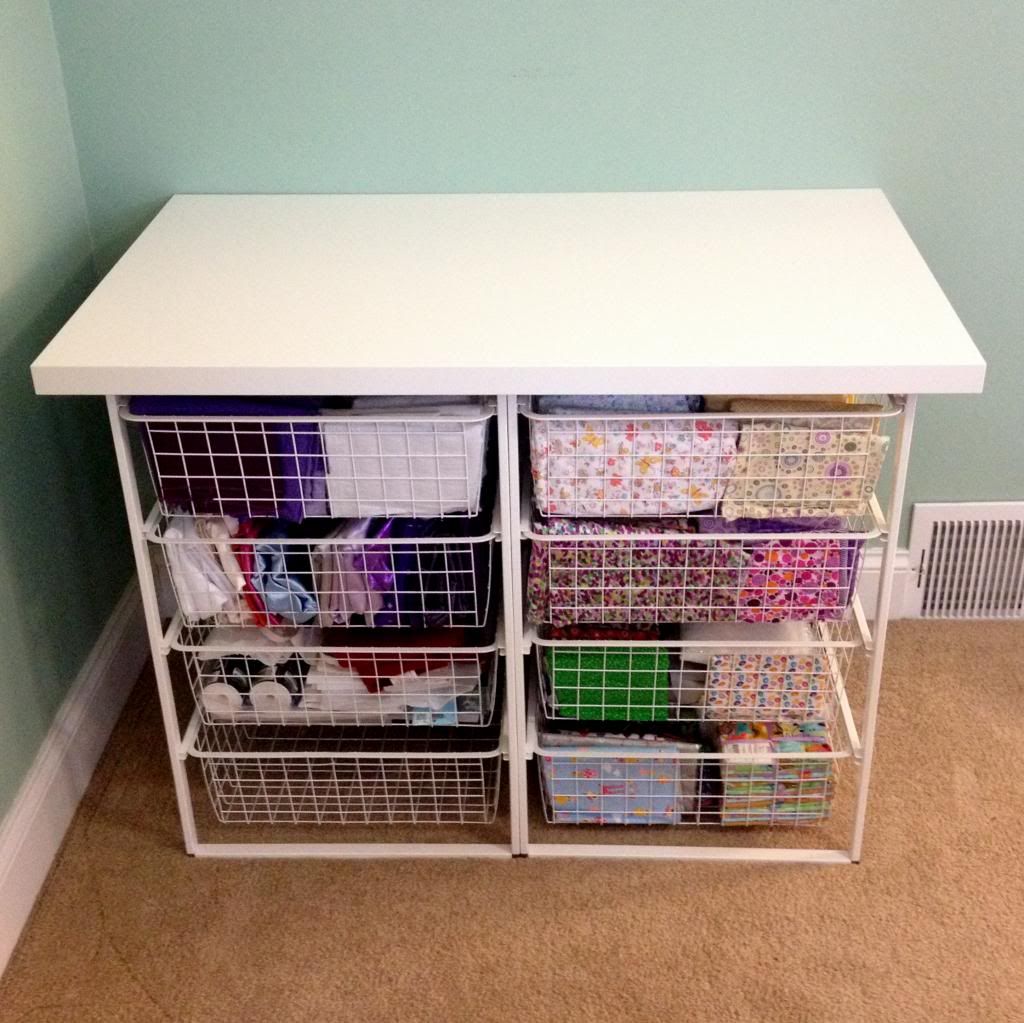
7. Now turn it over and slide in your baskets. TADA!

Of course it took me longer to organize my fabric than it did to assemble this entire storage station but I loved every minute of it. I get so excited about purging and organizing. It's totally rejuvenated my crafty spirit for the new year.
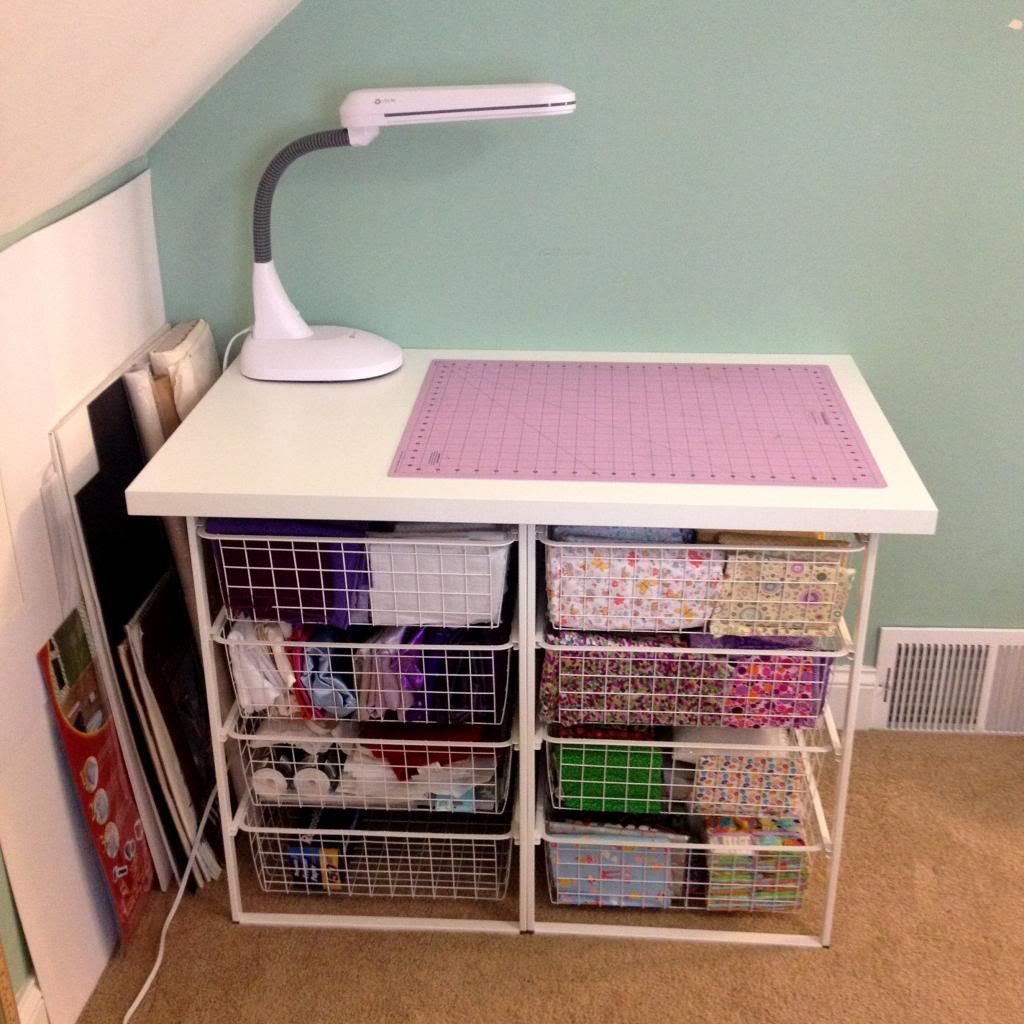
I use the station as a cutting table, complete with one of the Ott lights my wonderful hubby bought me for christmas. It's also my new favorite place to charge my computer. I don't need to tell you how much the dogs love to model new things so here's a pic just to emphasize it.
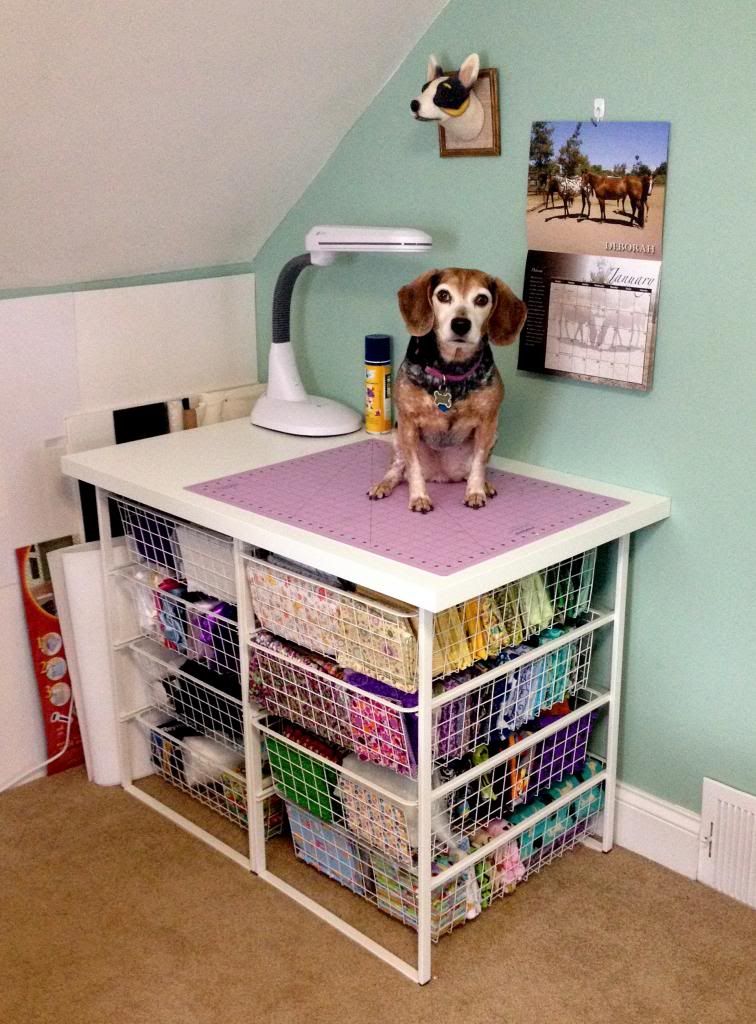
Gidget loves the craft room by the way. I think it's the soft carpet and that there are tons of places to take naps.
Have you ever done an IKEA furniture hack? Let me know all about it in the comments!
I use the station as a cutting table, complete with one of the Ott lights my wonderful hubby bought me for christmas. It's also my new favorite place to charge my computer. I don't need to tell you how much the dogs love to model new things so here's a pic just to emphasize it.
Gidget loves the craft room by the way. I think it's the soft carpet and that there are tons of places to take naps.
Have you ever done an IKEA furniture hack? Let me know all about it in the comments!
I love your new storage center! My fabric pile is in a ridiculous mess! Isn't Gidget just the cutest?! -Marci @ Stone Cottage Adventures
ReplyDeleteGidget is absolutely adorable! I love this storage idea! Although, if I used something like this my husband would know just how big my stash is!! LOL But seriously, this might require a trip to Ikea.... I know I am likely the last person on the planet but - I have never been!
ReplyDeleteThank you so much for sharing this!!
Excellent idea. I'm yet to figure out a good storage solution for myself.
ReplyDeleteI did not know Ikea had these! I have lots of Elfa from the Container Store. LOVE your hack!
ReplyDeleteThis is a great idea - pinning it to my craft organizing board. I've got those same drawers and have used them in my closet & for my kids' games/crafts/etc. Would love for you to link this to my Craftastic party: http://www.sewcando.com/2014/01/show-off-your-craft-projects-at.html
ReplyDeleteWOW, what get up and go energy You have-fantastic :)
ReplyDeleteawesome idea works great with it all in one place
ReplyDeleteshopannies@yahoo.com
This is a very nice a convenient way to store material! Love it! :)
ReplyDeleteSuch a great idea! My cutting table is far too low - that looks a good height!
ReplyDeleteThis is great! I have a larger version of this that I also use for my cutting table. It's wonderful to store things - in my case cutting tools, interfacing, patterns and lining - and is so functional! Great new addition to your sewing room!
ReplyDeleteThis is awesome and can be used to organize other things as well. I have a closet with my herbs all over the floor this might be my answer. Pinned to my DIY board, shared on g+, thanks so much for sharing on Tuesdays With a Twist.
ReplyDeleteWhat a great idea! Your directions are so good. I will have to go to Ikea and pick these items up. Can't wait to get my sewing room a little more organized. Thanks!
ReplyDelete