
Supplies
Deco mesh wreath from part 1
Craft Styrofoam board - mine was I got it at Joann in the styrofoam/wreath area.
Black fabric - I chose a polyester cuz it will be outside.
Black craft felt sheets - 2 pieces
Ribbon - 20" piece for hat band
Feather spike - Also in wreath section
Puffy Paint - 2 colors
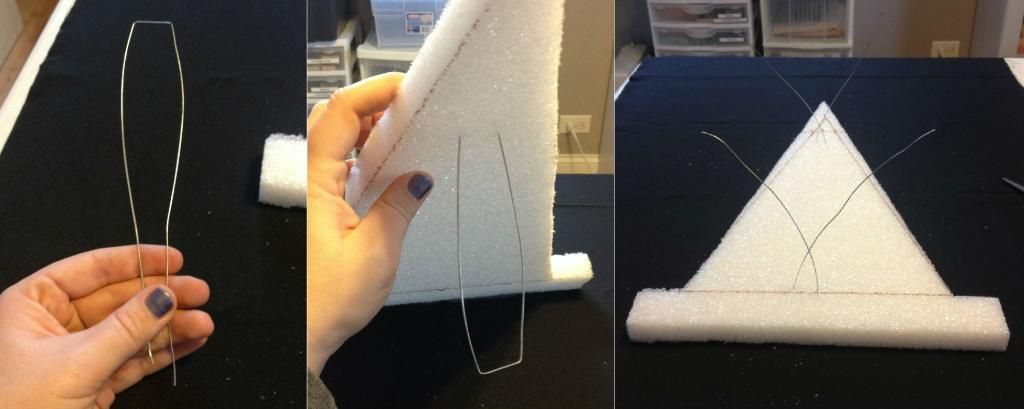
Small gauge wire - 2 pieces, 12" each
Pipe cleaners - use the same color as in the part 1 tutorial
Glue gun and sticks
Scissors
Box cutter or something to cut the foam
*I've numbered a lot of the photos and they will be notated in each step with a colored number.*
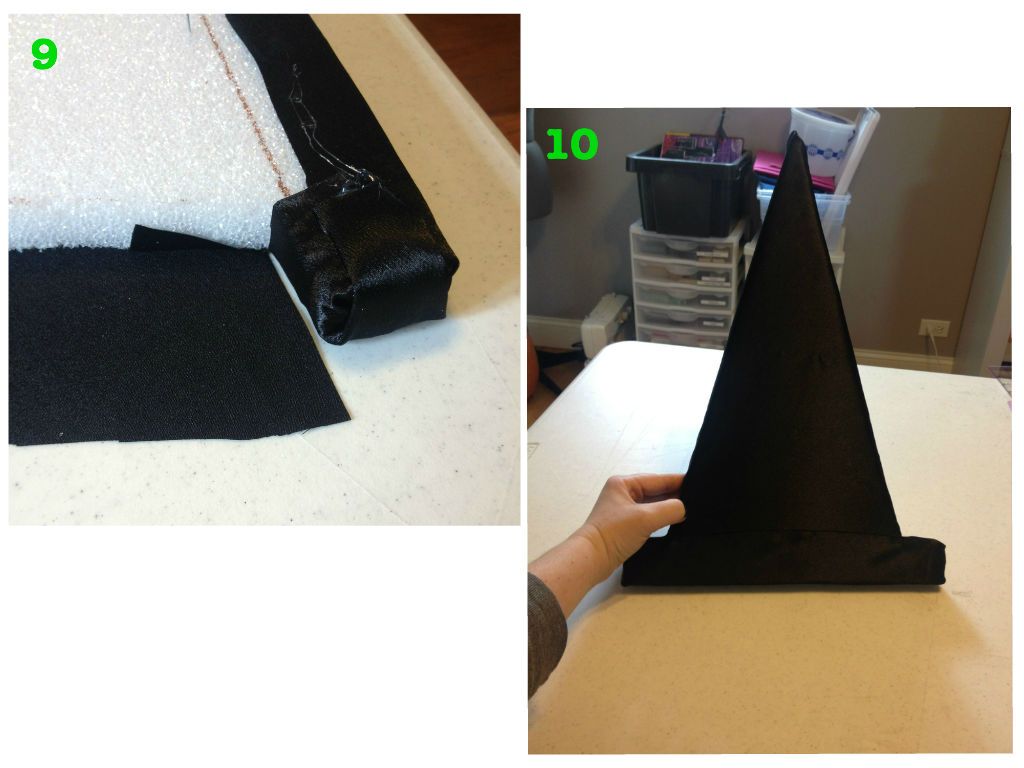
1. First you will need to cut your hat shape from the foam. I drew a 1.5" X 12" rectangle for the brim and then a tall triangle on top.(1) Now use your box cutter/blade to cut it out.(2) EASY!

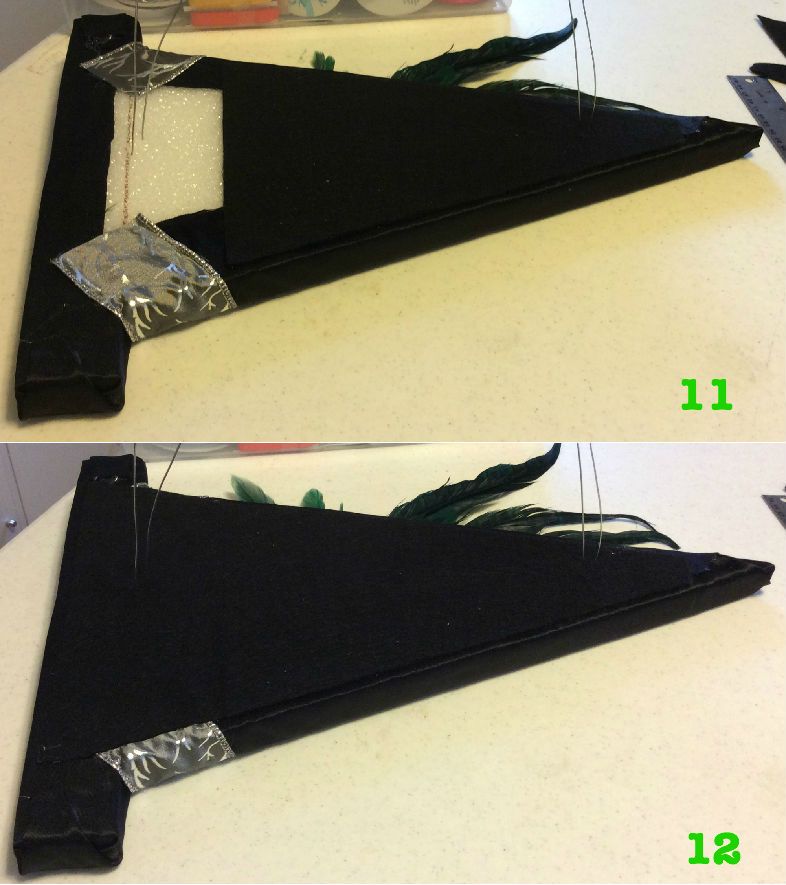
2. Next we will insert your two pieces of wire through the foam. Bend the wire in half will a squared off edge like in the picture. You can just push the wire through the foam till the squared edge is flush with the surface. I put one towards the top and another closer to the base.
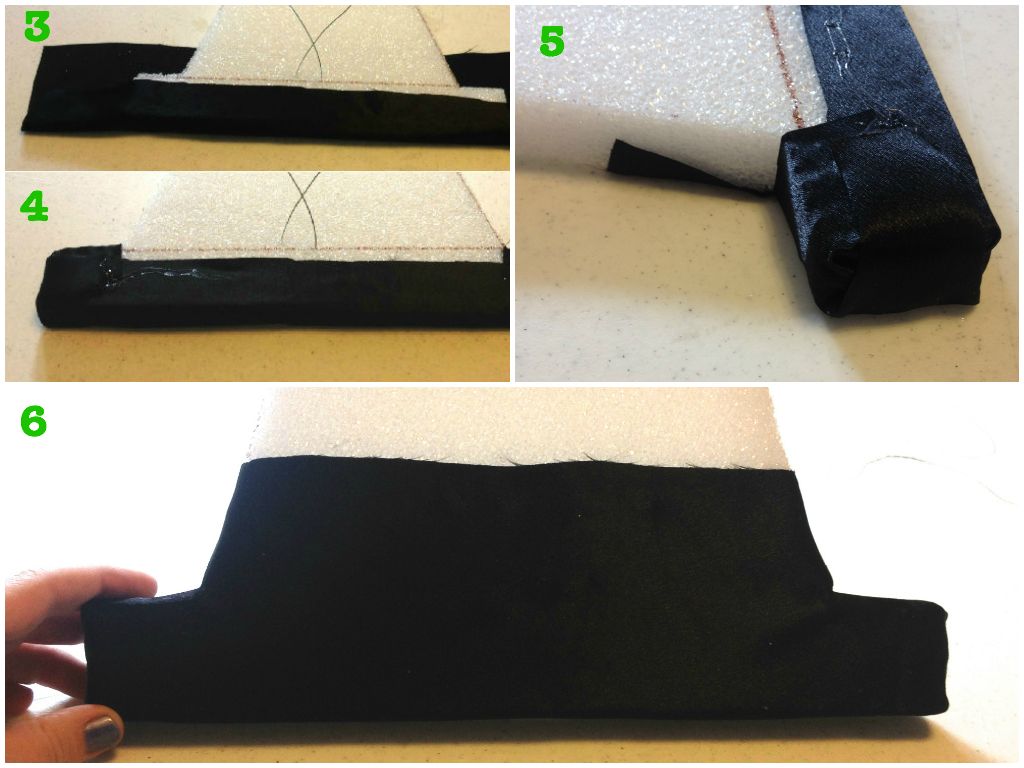
3. Now we will cover the hat form with fabric. You basically just wrap it like a present, using the glue gun instead of tape, but in two steps. Do the brim first following the photos from 3 through 5. When you are done the front should look like 6.
Now you will wrap the top "triangle" part in another piece, keeping all the edges wrapped around the back of the form. There will be one raw edge on the front where you overlapped the pieces but don't worry we will cover it.
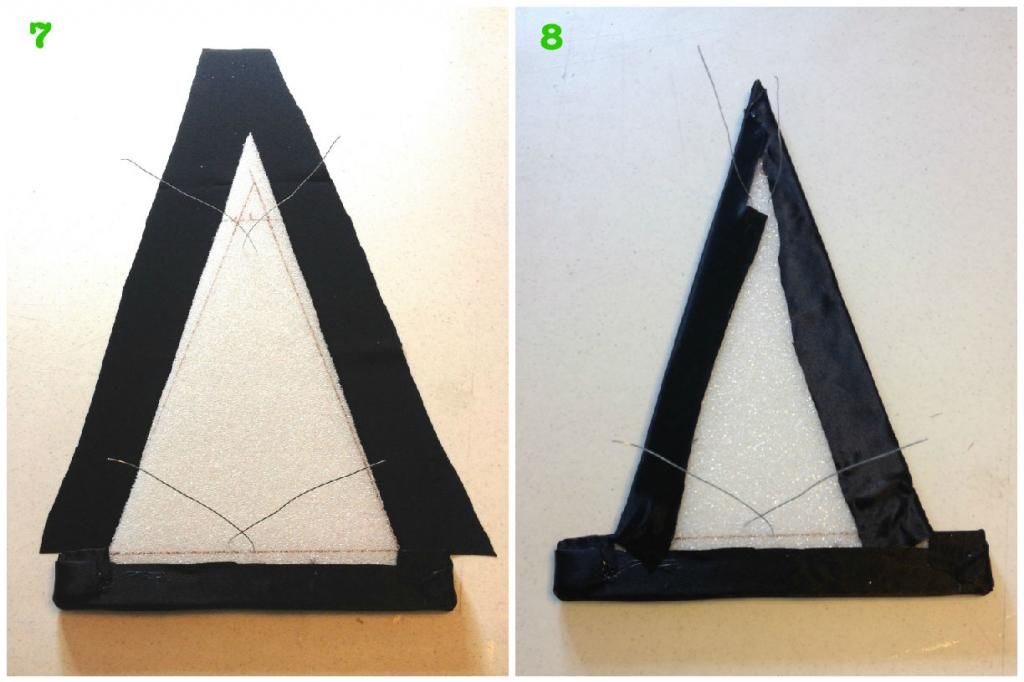

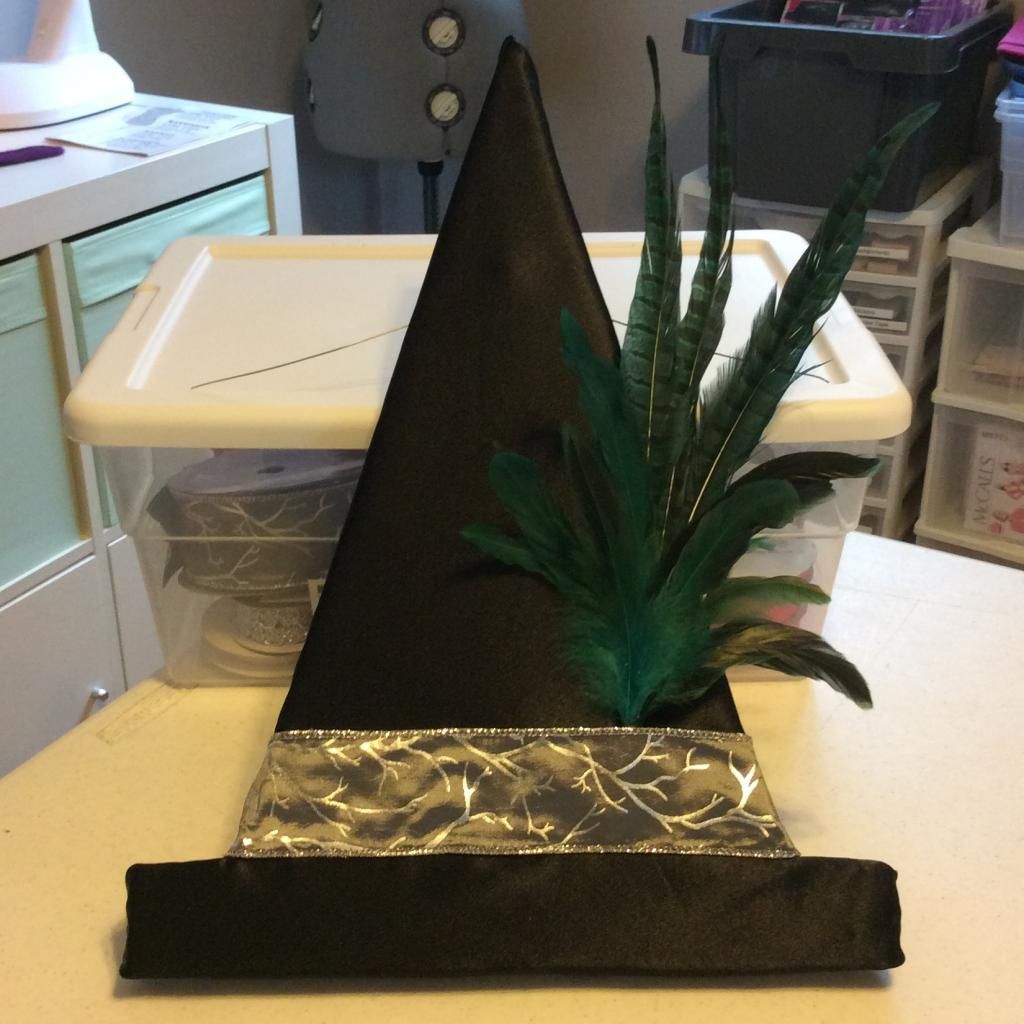
5. Now you will add your ribbon hat band covering the raw edge of fabric and the glued end of your feather spike. Wrap the ends around to the back and glue in place.
6. This is really an optional step but I like my wreaths to look clean from the back since I can see them through the window. Take your felt and cut it to fit over the back of your form coming about 1/4" from the edge. I had to do this in two pieces since my hat was bigger that the felt I had on hand. You can poke little holes into the felt for the wire to go through. I also recommend adding a bunch of extra glue around the wire when applying the felt. This will keep them extra secure.
7. Now we will break out this paints I had in the supply list to add our festive message. If you have another way you'd like to add the letters instead have at it. I painted the letters first and then filled in some of the blank spaces with a few swirls in a contrasting color. Note I tied the feathers out of the way while I painted.
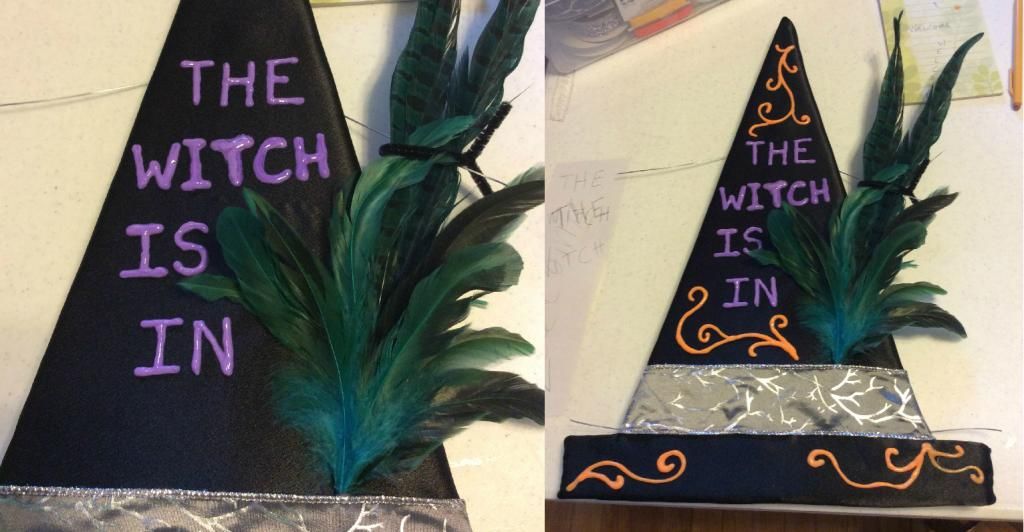
The puffy paint takes a while to dry so watch a spooky movie or do a load of scary laundry. When it's dry just attach the hat to your wreath using the wires on the back.
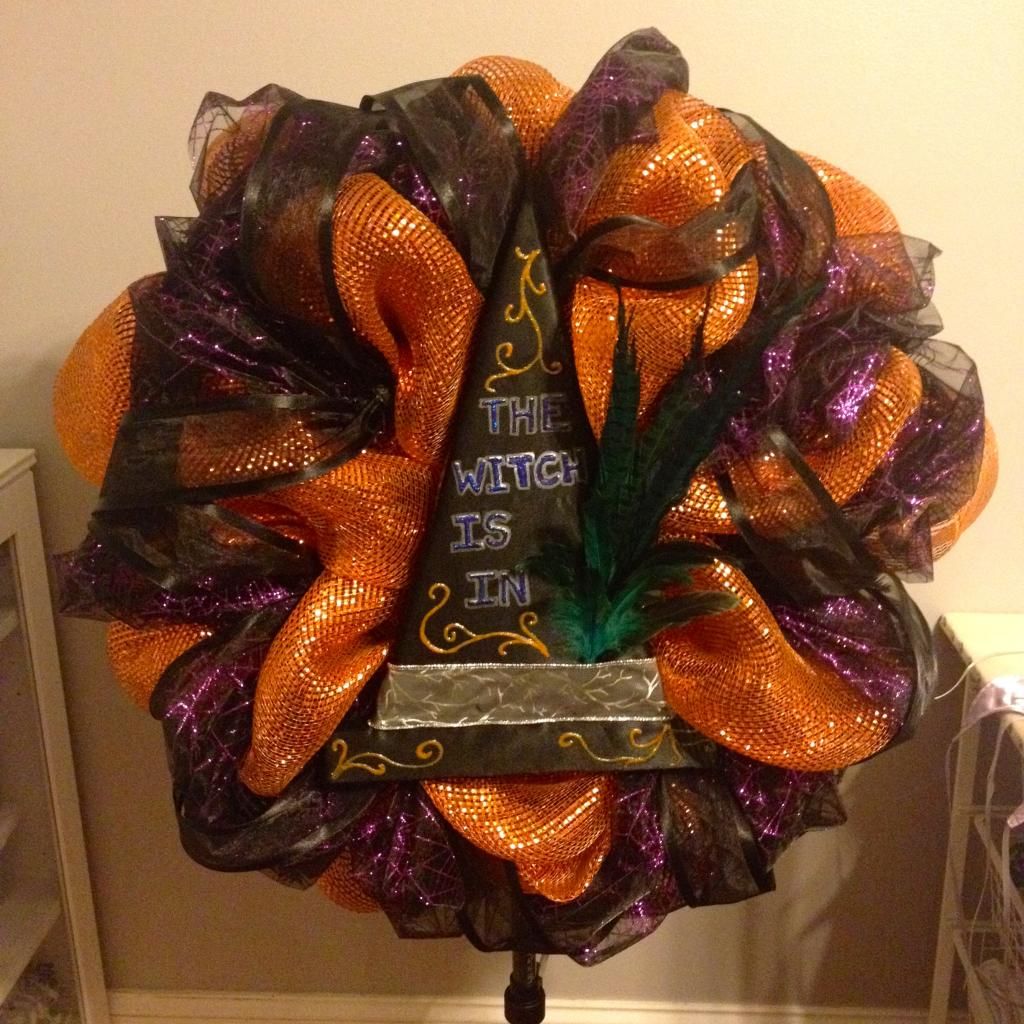
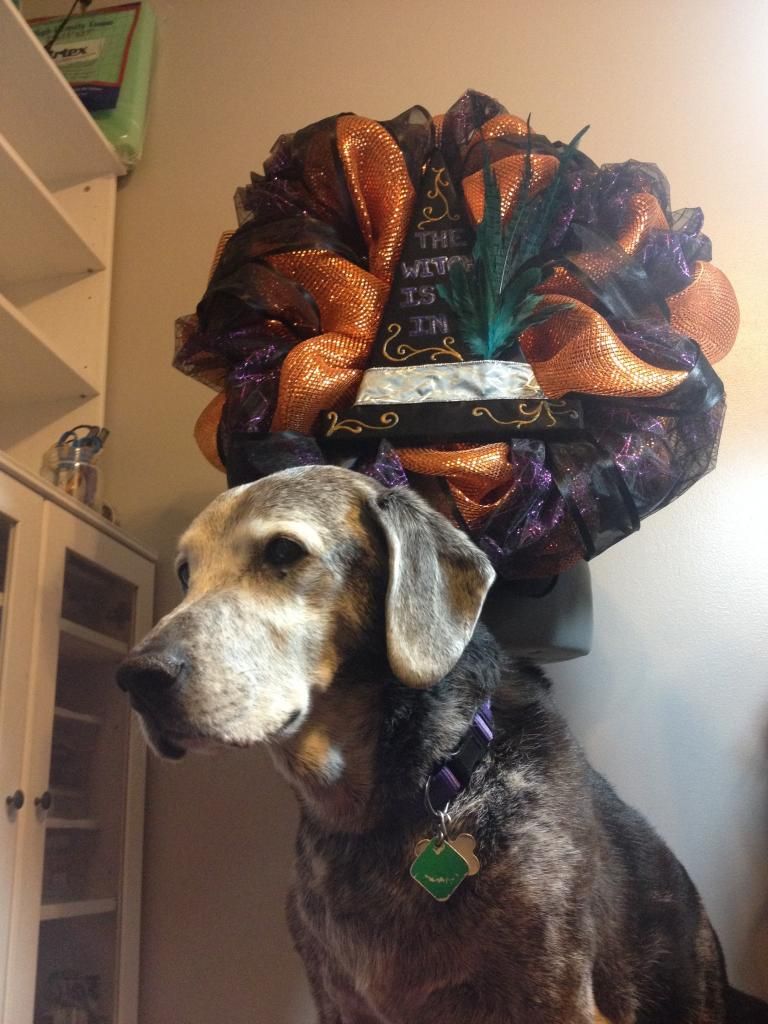
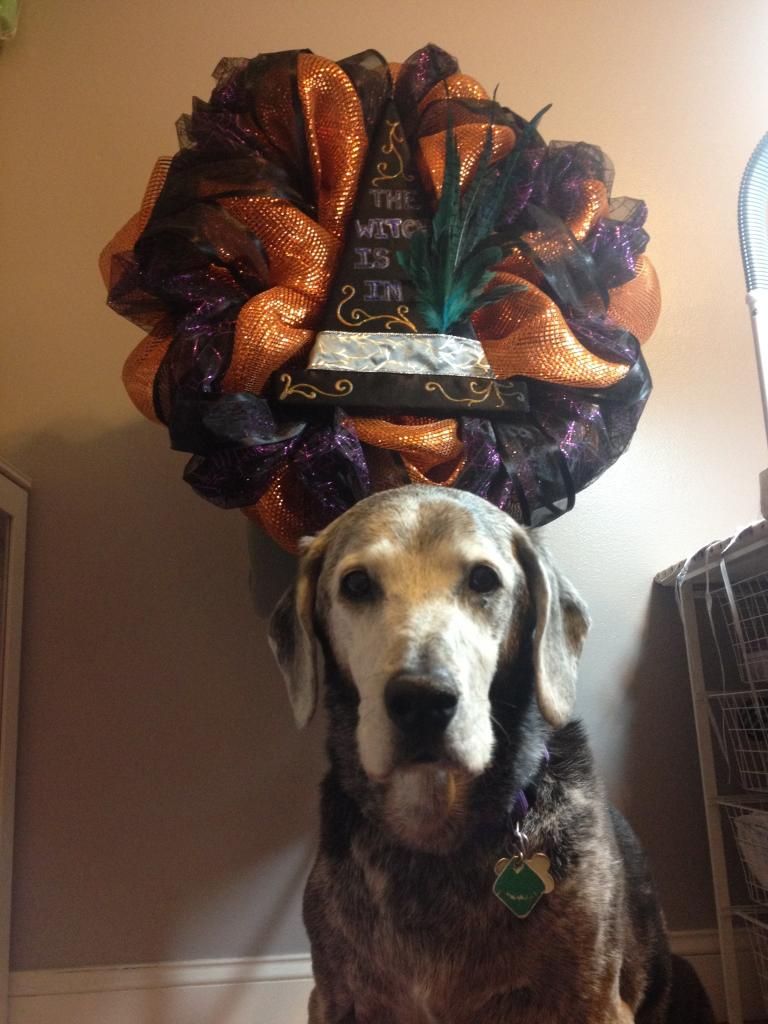
TADA! You're done. Now you can hang it up and just wait for the complements to roll in. Here's Sadie in a couple dramatic poses with the finished product.
Cast on!
Anita
0 comments:
Post a Comment