This a long tutorial but its easier than it looks. I made sure to be extra detailed with the instructions but its really just a two part process. Part 1 - Make Ghosts Part 2 - Make Garland Easy peasy!
Supplies
Ghosts -
Cheesecloth
Liquid starch
Small dixie cups (white or clear plastic)
Small balloons (don't use the red ones)
Black felt for faces
Garland -
Silver Deco mesh ribbon (1 roll), I got this at Hobby Lobby in their fake flowers section
Black Wired ribbon (1 roll)
Jewelry or floral wire, preferably same color as your mesh
Black pipe cleaners
Black ribbon (thin)
Tapestry or sharp yarn needle
Ghosts
1. Start by making your forms. Blow up a balloon just big enough so it covers the top of your cup. Poke a hole in the top of your cup and pull the end of the balloon through.
DONT USE RED BALLOONS.
I found out the hard way that the red coloring comes off on your cheesecloth when they dry.
You can also just make these from aluminum foil but I wanted the heads to be really round. Make sure to get your forms inspected by an available pooch for quality control.2. Cut 3 inch strips of cheesecloth and soak them in full strength liquid starch. Squeege off the excess and drape over your form.
Repeat until your form is covered. Make a couple extra just in case.
3. Let dry 24 hours and then remove forms. Be careful not to tear your ghosts in the process.
4. OPTIONAL - My ghosts had a little residual color that came off the cups I used so I took a regular ink pad and a scrap of fabric and rubbed some ink on the inside and lower edges to hid it. Plus this makes them extra dirty and scary looking. Wear gloves if you're going to do this step.
5. Now we need to make their faces. Cut out eyes and mouths for each of your ghosts and hot glue them on. Tada! Ghosts done.
Garland
1. First decide how long your garland needs to be. Then cut a pice of your jewelry/floral wire about a foot longer, don't worry we will trim it at the end. Starting at the center of your jewelry/floral wire take one of the pipe cleaners and wrap it with the heavier gauge wire to secure. Repeat about every 7 inches to either end until your wire looks like this. Make sure your pipe cleaners are secure and won't slide down the wire.
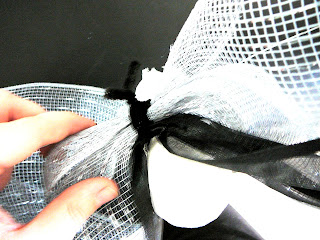
2. Starting at one end with the grey deco mesh bunch a piece and tie it with the pipe cleaner at the end. Make sure to leave a tail at the end for a nice finish. Now repeat bunching and tying at each pipe cleaner but bubble up the mesh to add volume.
3. Repeat step 2 with same deco mesh.
4. Take your wired black ribbon and repeat the tying and bunching two more times, making sure to leave a nice tail on each end.
5. We are going to add a little loop of the thin black ribbon onto the back of each of our ghosts so we can attach them to the garland. Take a piece of thin ribbon and run it through the back of your ghost with the yarn needle. Tie it in place leaving a loop. I used a pen to tie around.
6. Now take each of your ghosts and run one of the pipe cleaner ends through your loop to attach. Twist the pipe cleaner together to secure everything in place and trim the excess wire on either end.
 |
| sorry this pic is fuzzy. |
Haunt on!
Anita


That looks really effective. I'd like to try this sometime!!
ReplyDeleteThat is SO cute. What an aweosme idea. And, it should keep for years! I found you through the linky party over at Trendy Treehouse!
ReplyDeleteVery fun garland, thank you for sharing! Love your doggies :°)
ReplyDeleteHave a good day, Nancy
This looks amazing! Such a creative idea. Pinning :)
ReplyDeleteGreat job..it so cute. Looks like the dogs aren't afraid of the ghosts...thank goodness. :)
ReplyDeleteBabs
Very cute garland!
ReplyDeleteHow fun is that? Definitely a keeper for my kids! They would love this!
ReplyDeleteThat is incredibly adorable! I love that you even made the ghosts with cheese cloth. Great tutorial!
ReplyDelete