I made these guys in the front yard last year and they were a hit. I even had people pulling their cars over to look at them. They were the centerpiece for my graveyard as well. Here's how to make your own.
Supplies
Plastic dropcloth - This comes in a huge roll pretty cheap at your local big box store.
Newspaper
Rebar - I used 48" pieces that were precut from the store. You'll need one for each ghost.
Twist ties - big ones are great if you have them
Scissors
1. First thing first you'll need to pound your rebar into the ground. Space each rod symmetrically in a circle. (I'm trying a semi-circle this year instead. I like to mix it up.) Here's my spacing rule - Stakes are same distance apart as they are tall. Ex. My ghosts are about 36 inches tall from the ground so they are about 36 inches apart. Just use one of your stakes as a spacer as you go. This keeps your proportions normal looking. Also make sure the rods are deep enough in the ground so they won't move.
*CAUTION* Don't buy cheap garden stakes as a substitute. I made this mistake last year and they weren't strong enough to stand up to the wind. Spend the extra dollar and get rebar. Plus you can reuse them every year.
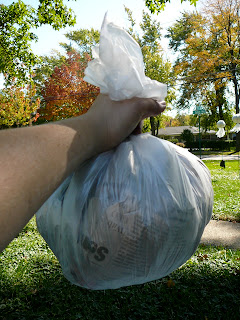
2. Now you need to make heads for each of your ghosts. Take a bundle of newspaper and wrap it like the head of a lollypop. Make a round ball with the newspaper wrapped in one layer of the plastic and shove it down on the stake. You may need to use your scissors to poke a hole.
3. Then take another piece of plastic and wrap it over the head and secure with one of your twist ties. Your stake will look like a giant lollypop. Repeat for all your stakes.
4. Now we are going to make the body of your ghosts. Take two large pieces of plastic and lay them over each other. Now lay them overtop of your lollypop ghost head.
5. Last but not least add the arms. Take a piece of plastic that's about a foot or so longer than the spacing between your stakes and tie it around the base of your ghost's head. Repeat with all your ghosts. Now tie one arm to the ghost's arm next to it until you have a complete circle. Don't leave too much slack in the arms either or they get whipped around by the wind pretty well.
6. That's it! You're done. I chose to put a cauldron with some fun lights in the center of my seance and tada. Instant atmosphere.
You can easily make these guys in an afternoon so why not break them out for your decorating this year. Since they are made with plastic instead of white sheets spooky lighting shines through them and they float eerily in the breeze. Happy Haunting!
Haunt on!
Anita


This is so adorable! I BET people stopped their cars to look at them....
ReplyDeleteKinda creepy too....
Very awesome.
Happy Halloween to you! Thanks for sharing this fab idea!
Crystelle
http://www.crystelleboutique.com/
I love your ghost! Great Halloween decorations!
ReplyDeletethat's awesome! i always want to do something like this, or make a spooky graveyard, but i'm afraid the wind would knock it all down.
ReplyDeleteOooh, spooky! My kids would have so much fun with this!
ReplyDeleteThey could be cute in a line across the front of the house! Love them!!! I am sure they look awesome as you drive by!
ReplyDeleteWhat a brilliant tutorial. Really Spooky. Well done.
ReplyDelete